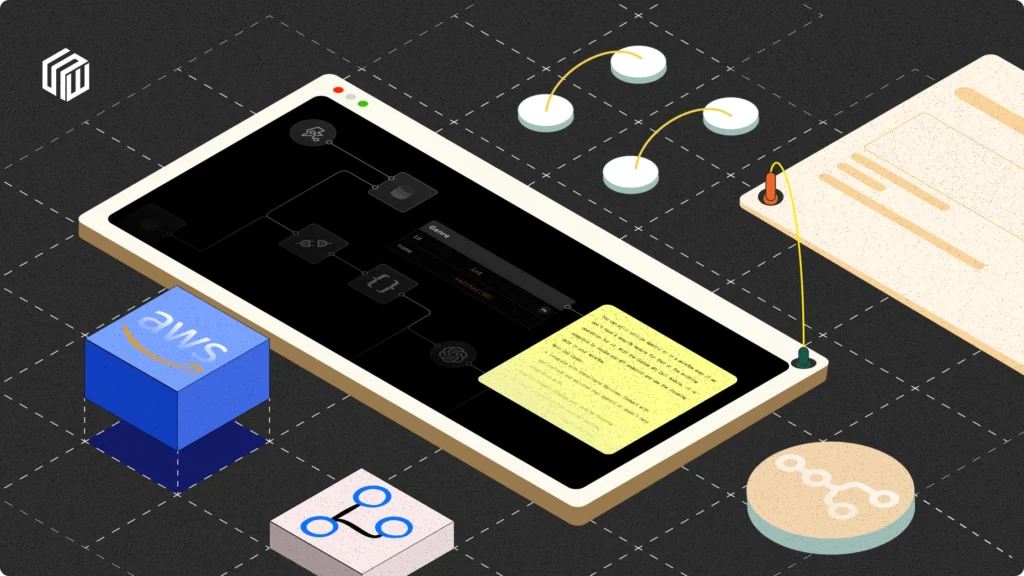
This guide runs n8n on a single Amazon EC2 server with Docker Compose, with Caddy in front of it to provide HTTPS automatically through Let’s Encrypt. It ends with an always-on automation server on your own domain, and it is honest about what that costs on AWS today.
Updated October 2026: I rewrote the setup because the 2025 version would not have worked as written. Its .env and Caddyfile were written with a quoted heredoc, so $(openssl rand ...) and ${SUBDOMAIN} were never expanded; Caddy doesn’t use the ${VAR} syntax anyway; it installed docker-compose-plugin together with Ubuntu’s docker.io, a combination that doesn’t exist in Ubuntu’s repositories; it turned on N8N_BASIC_AUTH_* settings that n8n removed in 1.0; it used N8N_COOKIE_SECURE (the setting is N8N_SECURE_COOKIE); and it called the t2.micro “free tier” and Elastic IPs a “nominal fee”, which no longer matches AWS. I validated the Caddyfile with Caddy and parsed the Compose file, but I did not launch an EC2 instance for this update, so test on a throwaway server first.
What This Costs on AWS Now
- The free tier changed. AWS’s Free Tier page now describes a free plan for new accounts: up to $200 in credits, with $100 on sign-up and up to $100 more for exploring services, and the account closes on its own 6 months after you open it or when credits run out, whichever comes first. AWS’s EC2 free-tier documentation lists the eligible instance types for accounts created on or after 15 July 2025 as t3.micro, t3.small, t4g.micro, t4g.small, c7i-flex.large and m7i-flex.large; older accounts have the previous 12-month t2.micro and t3.micro offer. So the old line “free tier qualifies for a t2.micro” holds only for accounts created before that date.
- Every public IPv4 address costs money. AWS’s VPC pricing page lists $0.005 per hour for an in-use public IPv4 address and the same for an idle one, and no longer mentions a free 750-hour allowance. That is about $3.65 per month for a server that runs all month. An Elastic IP is billed at the same rate, whether attached or not, so it isn’t the “nominal fee when unattached” this post used to say.
- Everything else (the instance after any credits or free plan end, the EBS volume, data transfer, snapshots) is billed at the rates on AWS’s pricing pages. Set a billing alarm or budget before you start, and know the date your free plan ends.
Choosing the Instance
n8n’s documentation doesn’t publish a minimum size for a basic install, but its guide for the fuller Docker Compose setup with the n8n Assistant asks for at least 4 GB of RAM and 2 vCPUs. A t3.micro has 1 GB of memory, which is workable for a few light workflows with swap but tight for anything heavier; a t3.small (2 GB) is a better floor if your account’s free plan covers it. If you are on the 6-month free plan, pick from the eligible list above. Choose x86 (t3) unless you are comfortable with ARM (t4g); n8n publishes images for both, but your other tools may not. For related guidance on sizing and alternatives, see choosing a host for n8n and the Google Cloud version of this guide.
Architecture
Two containers run in one Docker Compose project on the same host. Caddy is the only service published to the internet, on ports 80 and 443. It obtains and renews a Let’s Encrypt certificate for your domain automatically and proxies requests to n8n over Docker’s internal network. n8n has no published port at all, so nothing can reach it directly. This also matters because, as Docker’s documentation warns, ports you publish from containers bypass host firewall rules such as ufw, so not publishing the port is safer than relying on a firewall to block it. n8n’s data lives in a named Docker volume; Caddy’s certificates live in another.
Prerequisites
- An AWS account with billing alerts set.
- A domain where you can add an A record (for example
n8n.example.com). - Basic comfort with SSH and a Linux shell.
- Awareness of n8n’s licence: it is source-available under the Sustainable Use License, free for your own internal business or personal use, not an OSI open-source licence as the old version of this post claimed.
Step 1: Launch the EC2 Instance
In the AWS Console, go to EC2 > Instances > Launch instance and choose:
- Region: one close to you or your users. Keep all resources in this region.
- AMI: Ubuntu Server 24.04 LTS or 26.04 LTS. Docker’s install guide lists Ubuntu 22.04, 24.04 and 26.04 as supported. The default SSH user is
ubuntu. - Instance type: see above (t3.micro minimum, t3.small better).
- Key pair: create one and download the
.pemfile. AWS lets you download it only once; store it safely. - Network and security group: allow SSH (22) only from your own IP, plus HTTP (80) and HTTPS (443) from anywhere. If you want HTTP/3, also allow UDP 443. Port 80 must stay open, because Let’s Encrypt validates the domain over it.
- Storage: the default 8 GB fills quickly with Docker images and logs. Use 20 to 30 GB of general-purpose SSD (gp3).
Then give the server a stable public address. Without one, the public IP changes whenever you stop and start the instance and your DNS record breaks. Allocate an Elastic IP (EC2 > Elastic IPs) and associate it with the instance, accepting the $0.005 per hour cost described above. Whatever you do, release the Elastic IP if you delete the server; it keeps billing while idle.
Step 2: Point Your Domain at the Server
Create an A record for your subdomain pointing to the Elastic IP, then check it from your computer:
nslookup n8n.example.comWait until it returns your Elastic IP. Caddy requests the certificate as soon as it starts, and it can’t validate a domain that doesn’t resolve to the server yet. If this fails repeatedly, Let’s Encrypt enforces rate limits on failed validations, so fix DNS before retrying.
Step 3: Connect and Update the Server
chmod 400 ~/Downloads/ec2-n8n.pem
ssh -i ~/Downloads/ec2-n8n.pem ubuntu@YOUR_ELASTIC_IP
On the server, update packages, then add a swap file, which gives a small instance headroom when memory spikes (it is a safety net, not extra capacity):
sudo apt update && sudo apt upgrade -y

sudo fallocate -l 2G /swapfile
sudo chmod 600 /swapfile
sudo mkswap /swapfile
sudo swapon /swapfile
echo '/swapfile none swap sw 0 0' | sudo tee -a /etc/fstab
free -h
Step 4: Install Docker from Docker’s Repository
Don’t use Ubuntu’s docker.io package. Docker recommends its own apt repository, which provides Docker Engine and Compose v2 (used as docker compose, with a space). These are the commands from Docker’s Ubuntu instructions:
# Remove unofficial packages if present (fine if none are installed)
sudo apt remove $(dpkg --get-selections docker.io docker-compose docker-doc podman-docker containerd runc | cut -f1)

# Add Docker's official GPG key and repository
sudo apt update
sudo apt install -y ca-certificates curl
sudo install -m 0755 -d /etc/apt/keyrings
sudo curl -fsSL https://download.docker.com/linux/ubuntu/gpg -o /etc/apt/keyrings/docker.asc
sudo chmod a+r /etc/apt/keyrings/docker.asc

sudo tee /etc/apt/sources.list.d/docker.sources <<EOF
Types: deb
URIs: https://download.docker.com/linux/ubuntu
Suites: $(. /etc/os-release && echo "${UBUNTU_CODENAME:-$VERSION_CODENAME}")
Components: stable
Architectures: $(dpkg --print-architecture)
Signed-By: /etc/apt/keyrings/docker.asc
EOF

sudo apt update
sudo apt install -y docker-ce docker-ce-cli containerd.io docker-buildx-plugin docker-compose-plugin

sudo docker run hello-world
docker compose version
If you want to run Docker without sudo, add your user to the docker group (sudo usermod -aG docker $USER) and log in again. Note that members of that group have effectively root access on the machine.
Step 5: Create the Configuration Files
mkdir -p ~/n8n && cd ~/n8nCreate .env (use nano .env). The version number should be the current stable release from the n8n releases page (n8n’s docs listed 2.41.5 as stable when I wrote this); pinning it means updates happen when you choose:
N8N_VERSION=2.41.5
DOMAIN=n8n.example.com
[email protected]
GENERIC_TIMEZONE=Asia/Kolkata
Create compose.yaml. Docker Compose v2 ignores the old version: line, so it is gone:
services:
  n8n:
    image: n8nio/n8n:${N8N_VERSION}
    container_name: n8n
    restart: unless-stopped
    # No "ports:" here: n8n is reachable only through Caddy, over the internal Docker network
    environment:
      - N8N_HOST=${DOMAIN}
      - N8N_PORT=5678
      - N8N_PROTOCOL=https
      - N8N_WEBHOOK_URL=https://${DOMAIN}/
      - N8N_PROXY_HOPS=1
      - GENERIC_TIMEZONE=${GENERIC_TIMEZONE}
      - TZ=${GENERIC_TIMEZONE}
      - N8N_ENFORCE_SETTINGS_FILE_PERMISSIONS=true
    volumes:
      - n8n_data:/home/node/.n8n

  caddy:
    image: caddy:2-alpine
    container_name: caddy
    restart: unless-stopped
    depends_on:
      - n8n
    ports:
      - "80:80"
      - "443:443"
      - "443:443/udp"   # HTTP/3
    environment:
      - DOMAIN=${DOMAIN}
      - ACME_EMAIL=${ACME_EMAIL}
    volumes:
      - ./Caddyfile:/etc/caddy/Caddyfile:ro
      - caddy_data:/data      # certificates live here: keep this volume
      - caddy_config:/config

volumes:
  n8n_data:
    name: n8n_data
  caddy_data:
  caddy_config:
Create Caddyfile. Caddy’s syntax for environment variables is {$NAME}, expanded when the file is read; the ${NAME} style in the old post is Docker Compose syntax and wouldn’t work inside a Caddyfile. This is what Caddy’s documentation describes for environment variables and the global email option used for Let’s Encrypt:
{
	# Contact address for Let's Encrypt expiry notices
	email {$ACME_EMAIL}
}

{$DOMAIN} {
	encode gzip
	reverse_proxy n8n:5678

	header {
		Strict-Transport-Security "max-age=31536000"
		X-Content-Type-Options nosniff
		Referrer-Policy strict-origin-when-cross-origin
	}
}
I checked this file with caddy validate (valid configuration). Caddy turns on HTTPS automatically for a hostname site address, passes the usual X-Forwarded-* headers to the proxied service, and handles WebSocket upgrades, which n8n’s editor uses.
What the n8n settings do: N8N_HOST, N8N_PORT and N8N_PROTOCOL tell n8n how it is reached; N8N_WEBHOOK_URL is the public base URL for webhooks (it replaced WEBHOOK_URL in n8n 2.35.0, and the old name still works with a warning); N8N_PROXY_HOPS=1 says there is one reverse proxy in front. Those two are the ones n8n’s reverse-proxy guide says to set. The rest set the timezone and restrict the permissions on n8n’s settings file, which holds the credential encryption key.
There is no basic-auth setting. Current n8n uses built-in user accounts: you create the owner account the first time you open the site. The old advice to set N8N_ENCRYPTION_KEY to protect credentials is partly outdated too: n8n generates a key automatically on first start and stores it in its data volume; set your own only if you manage secrets elsewhere, and either way back it up.
Step 6: Start Everything
docker compose up -d
docker compose ps
docker compose logs -f caddy
Watch the Caddy log until you see the certificate being obtained (press Ctrl+C to stop following). Then open https://n8n.example.com and create the owner account immediately; until you do, anyone who reaches the URL could create it. Use a strong password and turn on two-factor authentication in your n8n settings.
Step 7: Secure and Maintain It
- Restrict SSH. Keep port 22 limited to your own IP, or avoid exposing it at all by using EC2 Instance Connect or AWS Systems Manager Session Manager. Rotate key pairs when people leave.
- Keep Ubuntu updated.
sudo apt update && sudo apt upgrade -yregularly, and reboot when kernel updates require it. The containers restart automatically thanks torestart: unless-stopped. - Update n8n deliberately. n8n’s update guidance is to update at least monthly after reading the release notes. Back up, edit
N8N_VERSIONin.env, then rundocker compose pull && docker compose down && docker compose up -d. - Back up the data. n8n’s backup documentation says to back up the
.n8nfolder (here, then8n_datavolume, which holds the SQLite database and the encryption key) and to stop n8n before copying it when using SQLite. Copy the archive off the server. - Billing hygiene. If you tear the server down, terminate the instance, delete its volume, and release the Elastic IP.
cd ~/n8n
mkdir -p ~/n8n-backups
docker compose stop n8n
docker run --rm -v n8n_data:/data -v ~/n8n-backups:/backup alpine \
  tar czf /backup/n8n-data-$(date +%F).tar.gz -C /data .
docker compose start n8n
EBS snapshots of the server’s disk are a useful second layer, but they cost money and shouldn’t be your only backup, because restoring one gives you the database as it was at a random moment unless n8n was stopped.
Troubleshooting
| Symptom | What to check |
|---|---|
| Certificate not issued | DNS doesn’t point at the Elastic IP yet; security group blocks 80 or 443; the Caddyfile is wrong. Run docker compose logs caddy. Caddy needs ports 80 and 443 free, so make sure no other web server is running on the host. |
| Browser can’t connect at all | Security group inbound rules; the instance has no public IP or Elastic IP; you used the IP instead of the domain. |
| 502 Bad Gateway | n8n container is down or still starting: docker compose ps and docker compose logs n8n. A 1 GB instance may have run out of memory; check free -h and dmesg | grep -i kill. |
| “Secure cookie” warning | You are visiting over plain HTTP or an IP address. n8n expects HTTPS by default; use the https:// domain. The correct environment variable for relaxing this is N8N_SECURE_COOKIE, but fix HTTPS rather than disabling it. |
| Webhook URLs show localhost or http | N8N_WEBHOOK_URL missing or wrong, or the container was not recreated after editing .env. Run docker compose up -d again. |
| Workflows disappear after a restart | The data volume isn’t mounted. This setup uses the n8n_data volume; check docker volume ls. |
| SSH “permission denied” | Wrong key pair or user (use ubuntu on Ubuntu AMIs, ec2-user on Amazon Linux), or the key file permissions aren’t chmod 400. |
Where to Go Next
A single small server is a good place to learn and to run light workflows. When you need more, move to a larger instance with PostgreSQL, then to queue mode with workers; n8n’s docs cover both, and our hosting comparison discusses the trade-offs, including when n8n Cloud is the simpler answer.
Is it free to run n8n on an AWS EC2 free-tier instance?
Not entirely, and not for long. New AWS accounts get a credits-based free plan that closes after 6 months or when the credits run out, and every public IPv4 address, including an Elastic IP, costs $0.005 per hour (about $3.65 a month). Older accounts have the previous 12-month free tier. Check AWS’s pages and set a billing alert.
Why does my browser say the site is not secure?
Because it is being served over plain HTTP. Point a domain at the server, open ports 80 and 443, and let Caddy obtain a Let’s Encrypt certificate. Then open the https:// address and set N8N_PROTOCOL=https and N8N_WEBHOOK_URL so n8n knows its public address.
Can I use an IP address instead of a domain?
Not with Let’s Encrypt in this setup, which needs a domain name to validate. Many webhook senders and OAuth providers also require a real HTTPS domain. Use a domain or subdomain.
Do I need to configure authentication for n8n?
Yes, in the sense that you must create the owner account as soon as you first open the site and use a strong password with two-factor authentication. Basic authentication via N8N_BASIC_AUTH variables was removed in n8n 1.0.
How do I update n8n without losing data?
Back up the n8n_data volume, change N8N_VERSION in .env, then run docker compose pull, docker compose down and docker compose up -d. Your workflows and credentials live in the named volume, so they survive container recreation. Read the release notes first.