
A 500 Internal Server Error can feel stressful. One moment your site works. The next, it stops loading entirely. You see a blank screen, an error message, and no access to your WordPress dashboard.
If this happened to you, I want you to know something upfront: you can fix this without any technical background. I fixed the same issue myself, and I’ll explain every step in a simple, practical way.
You’ll see two perspectives throughout this guide:
- Your view: what you may encounter and what steps you can follow.
- What happened in my case: the exact issue I found and how I resolved it.
This format helps you recognise your own situation and follow the right solution.
What Does a 500 Error Mean?
A 500 error means your server ran into a problem it couldn’t handle. WordPress tried to load your site, but something inside your site’s code stopped it.
In most cases, the cause is one of the following:
- A plugin that malfunctioned
- A theme file that broke
- Corrupted core WordPress files
- Server configuration errors
In my case, the problem turned out to be the first one: a malfunctioning plugin.
Your situation may be different. You might be facing a theme issue, a corrupted WordPress file, or a server-level configuration problem. That’s okay.
The important thing to understand is this: the first 3 steps to diagnose a 500 error are the same in every case. Before you fix anything, you need to identify which of these four causes applies to your site.
Here’s the approach I followed:
- Get access to the website files
- Enable error logging so WordPress tells you what’s wrong
- Read the error log to identify the real cause
Once you know the cause, the fix becomes much clearer.
The rest of this guide shows exactly how I fixed my case (a plugin issue).
If your error log points to something other than a plugin, don’t worry. The same diagnosis steps still apply.
At this stage, you only need to understand where the error is coming from. A detailed mapping of error types and what to do next is explained inside Step 3: Read the Error Log, where you’ll see exactly how to interpret different log messages and choose the right next action.
No matter which case applies to you, Steps 1–3 are mandatory. They help you identify which category your problem falls into before you attempt any fix.
First Step: Accessing Your Website Files
You need access to the internal files of your WordPress site because the dashboard won’t open. There are two ways to reach these files.
Option A: Using Your Hosting File Manager
Most hosting providers offer a file manager. If you log in to your hosting panel and see something like File Manager, cPanel, or hPanel, choose this method.
It allows you to:
- Open your files directly
- Edit your WordPress configuration file
- Download or rename plugin folders
If you see File Manager, use this option. It’s the simplest.
Option B: Using an SFTP Tool
An SFTP tool lets you securely connect to your website’s server and view its files, similar to how you browse folders on your own computer. It’s commonly used when your hosting panel doesn’t provide a file manager or when you prefer working with a dedicated tool.
In my case, I used FileZilla because it’s free, open source, and widely used. You’re free to use any other SFTP client you’re comfortable with—the steps remain the same.
To connect through SFTP, you’ll need:
- Host or IP address
- Username
- Password
- Port number
Your hosting provider supplies these details.
Once you enter them into your SFTP tool and connect, you’ll see your website’s files and can start inspecting the issue.
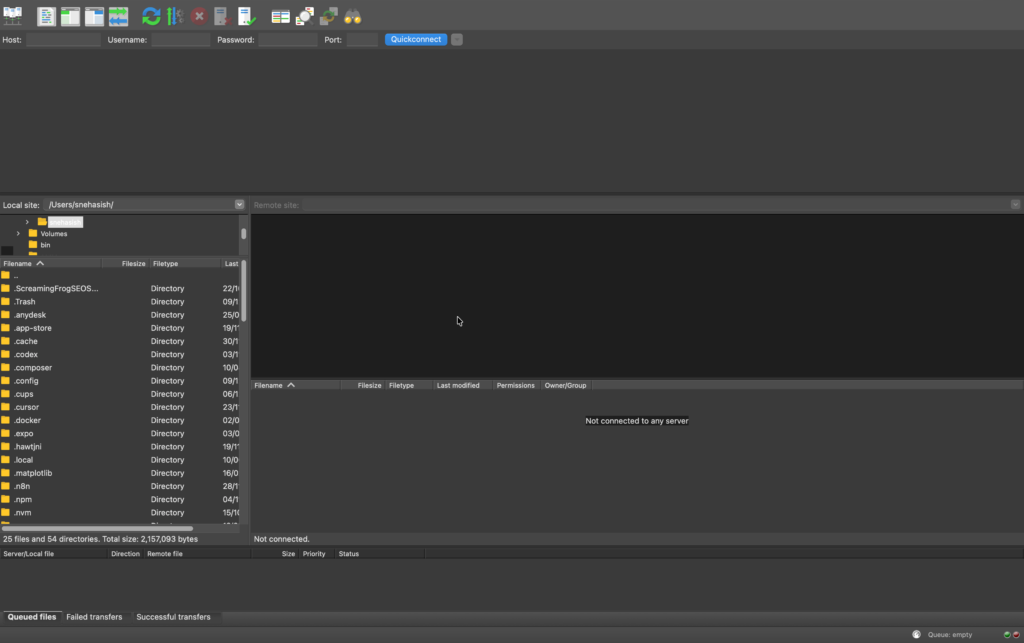
So, if you’re following my way, i.e., using FileZilla, then after installing the app and giving all the required permissions, you’ll see a screen like this:
Here, you just need to click on the top-left icon, and a pop-up like below will open:
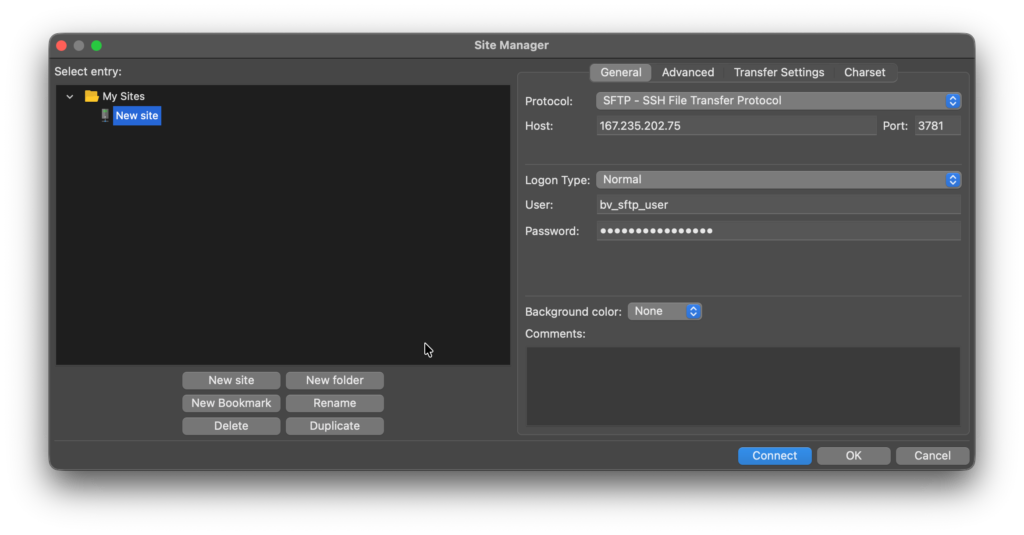
Here you need to
- Click on the New Site” button
- In the General, first choose the protocol (in my case it’s SFTP)
- Then, fill out all the details, and finally click on Connect.
Once you do that, your screen will change into this:
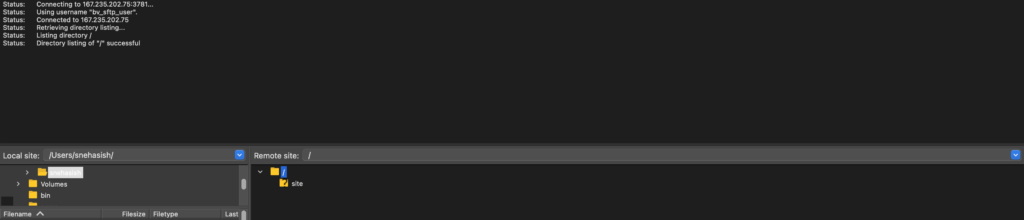
As you can see, we’ve now entered the Remote site’s server directory. Now, you’ll need to follow the steps below to fix the issue.
Step 2: Enable Debug Mode So WordPress Can Tell You What’s Wrong
Right now, the site is broken but silent. We need WordPress to log the actual error.
To do that, you’ll edit the wp-config.php file.
How to Find wp-config.php
Whether you’re in File Manager or SFTP:
- Open the folder named public_html, www, or htdocs.

- Inside it, locate the file wp-config.php.
- Open it using the editor provided (File Manager) or download it to edit (FileZilla).
What to Change
Inside that file, look for this line:
define('WP_DEBUG', false);

// In case you're not able to find it out, copy the text and search it inside the file using the shortcut **ctrl+F** or **cmd+F**
Replace it with these lines:
define('WP_DEBUG', true);
define('WP_DEBUG_LOG', true);
define('WP_DEBUG_DISPLAY', false);
This creates a private error log file inside wp-content/debug.log.
After saving the file, refresh your website in a browser. The error will still appear, but WordPress will now record the underlying issue.
Step 3: Read the Error Log
Now we need to read the error WordPress wrote down.
To do that, open your website URL and add this path at the end:
/wp-content/debug.log
For example, if your site is:
<https://yourwebsite.com>
open this in your browser:
<https://yourwebsite.com/wp-content/debug.log>
If the log doesn’t open in the browser, open it using File Manager or FileZilla by navigating to:
wp-content → debug.log
Once the file opens, scroll to the very bottom. The latest error is always at the end.
What You’re Looking For
You’re looking for a clear hint about what broke the site. It usually appears as a line starting with Fatal error.
Here’s how different problems typically look. Use this table to identify your case:
| What the error log mentions | What it usually means | What you should do next |
|---|---|---|
A path inside /wp-content/plugins/ | A plugin is breaking the site | Follow the steps in this guide to disable that plugin |
A path inside /wp-content/themes/ | The active theme has an issue | Temporarily switch to a default theme (like Twenty Twenty‑Five) |
A core WordPress file (e.g. wp-includes or wp-admin) | Core files are corrupted | Re-upload a fresh copy of WordPress core files |
| Server or PHP errors without plugin/theme paths | Server-level configuration issue | Contact your hosting provider with the error log |
What I Found in My Case
My log showed this:
PHP Fatal error: Call to undefined function mysql_connect() in /wp-content/plugins/mailchimp-for-wp/mailchimp-for-wp.php
This told me two things immediately:
- The error came from a plugin
- The plugin causing it was mailchimp-for-wp
Your log may point to a theme file, a core WordPress file, or a server-level problem instead. That’s normal. The goal of this step is to identify the category into which your error falls, so you know what to fix next.
Step 4: Fix the Website by Disabling the Problem Plugin
If your error log mentions anything inside the plugins folder, you can disable that plugin manually.
Quick Note: If your hosting provider offers a built-in plugin manager inside the control panel, you can disable the plugin directly from there. This is faster and doesn’t require renaming folders. Look for options like “Plugins”, “Disable Plugin”, or “Manage Plugins” in your hosting dashboard. If you see that option, use it.
Here’s how:
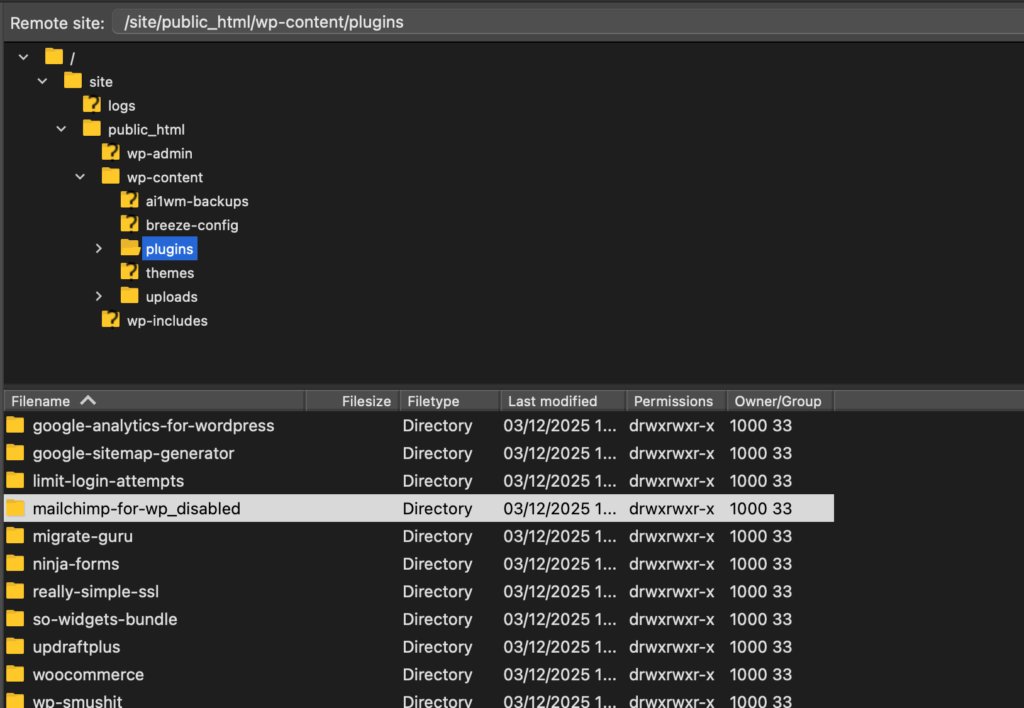
Go to the Plugins Directory
- Open wp-content → plugins
Inside, you’ll see folders for each installed plugin.
Find the Faulty Plugin
Match the folder name with what you saw in the debug log.
Example in my case:
mailchimp-for-wp
Rename the Folder
Right-click → Rename → add _disabled at the end.
Example:
mailchimp-for-wp_disabled
WordPress now ignores that plugin entirely.
Refresh Your Website
At this point, your site should start loading again.
This is exactly what happened for me. Renaming the plugin folder immediately restored my site.
Step 5: Log In and Clean Up
At this point, your website should load again in the browser. Now you’ll switch briefly between WordPress and your hosting/SFTP access.
First, log in to your WordPress admin by opening:
<https://yourwebsite.com/wp-admin>
You are logging into the WordPress dashboard, not the hosting panel.
Once inside WordPress:
- Go to Plugins
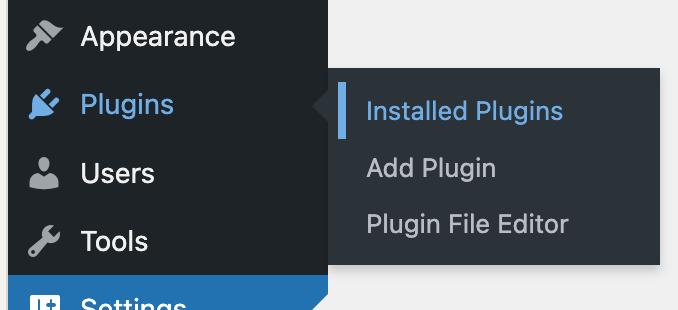
- You’ll see a message saying that a plugin was deactivated because its folder is missing
This confirms that the fix worked.
What You Should Do With That Plugin
Since the plugin folder was renamed, WordPress can no longer use it. Replacing it directly won’t work in this state.
You have two safe options:
- If you don’t need the plugin: delete it completely from the Plugins page
- If you do need it: install a fresh, updated version of the plugin from scratch
Avoid trying to reuse the renamed plugin folder.
Turn Off Debug Mode (Important)
Once everything looks stable, you must turn off debug mode.
To do this, go back to either:
- Your hosting File Manager, or
- Your SFTP tool (the same one you used earlier)
Open the wp-config.php file again and change it back to:
define('WP_DEBUG', false);
Remove the other debug lines you added earlier.
This step is done outside of WordPress, not inside the WordPress admin. It stops WordPress from continuing to write error logs in the background.
Why This Error Happened
A 500 error usually appears when something inside your WordPress setup changes and the site can no longer run as expected. This can happen for several reasons, and it’s often not caused by anything you did intentionally.
When these changes happen, older or incompatible code may fail, and WordPress responds by showing a 500 error instead of loading the site. The error log exists to help pinpoint where that failure is coming from, without needing to understand the technical details.
Preventing 500 Errors in the Future
You can’t prevent every 500 error, but you can reduce the chances of running into one.
A few simple habits make a big difference:
- Keep plugins and themes updated so they stay compatible with your server
- Remove plugins and themes you no longer use
- Install plugins only from trusted sources
- Avoid using extensions that haven’t been updated in a long time
These steps don’t require technical knowledge, but they help keep your site aligned with ongoing WordPress and hosting changes, which lowers the risk of sudden errors.
Conclusion
A 500 error feels intimidating, especially if you don’t handle technical work often. But with the right steps, you can diagnose and resolve it safely.
You now know how to:
- Access your files
- Capture the exact error
- Disable the source
- Restore your site
And the best part? You just solved a problem many users pay developers to fix.
If this happens again, return to this guide. If you get stuck, reach out to your hosting company—they handle these issues regularly.


