Follow Us:
A Complete Guide to make your OpenAI content generator
I have been working on a new project lately that involves creating a content generator using artificial intelligence (AI). I have been using different AI tools and techniques to create this content generator, and I thought I would share my process with you all!
So this article is going to be some kind of tutorial on web development where we’ll try to build our own AI content generator.
First, I gathered a large dataset of content that I wanted my AI to be able to generate. This dataset included a variety of different types of content, including articles, blog posts, and even some fiction.
Overall, I am very happy with how my AI content generator turned out. It created new, original content that sounded similar to the dataset I had provided. It was also able to generate content that was interesting and informative. I believe that this tool could be very useful for a variety of different applications.
After the neural network had learned the patterns of the content, I then began to add in some additional rules and constraints. This helped to ensure that the AI would generate content that made sense and was grammatically correct. I also added some keywords that I wanted the AI to focus on.
Finally, I let the AI loose to generate some content on its own. I was surprised at how well it did! The AI was able to generate new content that sounded very similar to the dataset that I had provided. It was also able to generate content that was interesting and informative.
First, let’s take a detailed look at what AI content generators are and how they can help you create better content.
What are AI content generators?
AI content generators are tools that use artificial intelligence to help you generate better content. These tools can help you come up with new ideas, improve your writing, and even help research new topics.
There are a number of different AI content generators available, and each one has its own strengths and weaknesses. However, all of these tools can help you improve your content in some way.
How can AI content generators help you?
AI content generators can help you in a number of ways. Firstly, they can help you come up with new ideas. If you are struggling to think of new topics to write about, or you want to come up with a new angle on a topic, then an AI content generator can help.
Secondly, AI content generators can help you improve your writing. If you are struggling to put your thoughts into words, or you are making too many grammar mistakes, then an AI content generator can help you improve your writing.
Finally, AI content generators can help you research new topics. If you are struggling to find information on a topic, or you want to make sure that you are getting all the facts right, then an AI content generator can help you research new topics.
How to choose the right AI content generator
There are a number of different AI content generators available, and not all of them will be right for you. When you are choosing an AI content generator, you need to consider your needs and requirements.
Think about what you want to use the AI content generator for. Do you want to use it to come up with new ideas? Do you want to use it to improve your writing? Do you want to use it to research new topics?
Once you know what you want to use the AI content generator for, you can start to narrow down your options. Look for AI content generators that are specifically designed for your needs.
I’ll suggest you read my previous blog on 6 Best AI Content Generators. If you want to explore the AI generator tools then you may visit that article.
Now, let’s jump up to our main topic, i.e. “How do I make my own AI content generator tool?”.
Required Technologies:
To make my own AI content generator, I first researched the technologies by which I can make this project. And I finally came up with this-
1. React.js:
To make the website, I chose React.js, cause it will give my website super speed from the beginning, no loading thing will be there, also it is easy to use and supported by each and every browser. For you here is a brief introduction to React.
React.js is a powerful JavaScript library that helps you create user interfaces. It is fast, reliable, and easy to use. In this blog, we will discuss some of the features of React.js that make it a great choice for creating user interfaces.
React.js is a declarative and component-based JavaScript library. This means that you can create reusable components that can be used in multiple places in your code. This makes your code more maintainable and easy to read.
React.js is a JavaScript library, so it works with all major browsers. This makes it easy to use React.js in your existing web projects.
React.js has a powerful set of tools that make it easy to create user interfaces. The React Developer Tools are a browser extension that allows you to inspect the React component hierarchy in the Developer Tools. The React DevTools are available for Chrome, Firefox, and Safari.
React.js is a great choice for creating user interfaces. It is declarative, easy to use, and has a powerful set of tools.
If you want to know more about different JavaScript frameworks, then I’ll suggest you read this blog-
2. GPT-3:
Designing and creating is one side of the project but now we’ve to know the actual technology by which we are going to make this project possible
Generative Pre-trained Transformer 3 (GPT-3) is a new language model that uses deep learning to generate human-like text. It is the successor to the widely-used GPT-2 model and was released on July 11, 2019. GPT-3 is a transformer-based language model that was trained on a large dataset of English text. It can generate coherent paragraphs of text on a given topic, and can also be used to answer questions about the text.
GPT-3 has a number of applications, including machine translation, text summarization, and question answering. It can also be used to generate realistic text, which can be used to train other machine-learning models.
GPT-3 is a significant improvement over previous language models and has the potential to revolutionize the field of natural language processing.
Process:
Now, let’s talk about the process. But first I need to clear this out here I’ll share only important code snippets that will give you directions. Rest of the things you’ve to do on your own.
And this project I’ve created using Open AI. So, this content generator is an “openAI content generator“.
Creating the website:
Using React.js first we need to create the website. In my case, I’ve used React.js as I already said, but you can do it in normal HTML, CSS, and javascript too, or may use some kind of javascript framework too.
In React.js, to create a website, you need to write these codes first-
//To create your react app

npx create-react-app content

//After your app is created, go to your app folder by writing this code-

cd content

//Now as I've done this with react-bootstrap so I did this. But if you don't want to do this project with react bootstrap then leave it.

npm install bootstrap react-bootstrap react-router-dom openai
Next, you’ve created your app, and also you’ve entered the target folder.
So, now you’ve to create elements/pages for your website as usual and make your website’s UI ready.
Now coming to our second and most important step, i.e. logging in to Open AI.
Open AI:
First, let’s get a brief intro about Open AI.
OpenAI is an artificial intelligence research laboratory consisting of the for-profit corporation OpenAI LP and its parent company, the non-profit OpenAI Inc. OpenAI was founded in December 2015, by SpaceX co-founder and Tesla CEO Elon Musk, Greg Brockman from notable data startup Cloudera, and entrepreneur Rebekah Mercer. Dimitry Ioffe, Pieter Abbeel, and Patrick Mynyk are also notable founding members of OpenAI. The company’s goal is to “advance digital intelligence in the way that is most likely to benefit humanity as a whole”, and Musk has said that AI poses existential risks for humanity.
In February 2016, OpenAI announced that it had been working with investment firm Fidelity Investments to open an investment fund, called the OpenAI LP, with the goal of raising $1 billion. The investment was to be used to finance long-term research in artificial intelligence. In June 2017, OpenAI laid off 9% of its staff, with the majority of the cuts coming from the organization’s business development and operations team. This was done in order to reduce costs and focus on the development of its technology.
In October 2017, OpenAI signed an exclusive partnership with Microsoft Azure, which includes an investment of $1 billion from Microsoft over the course of 10 years. The partnership will focus on developing artificial intelligence supercomputing technologies on Azure.
In December 2017, OpenAI released an early version of an artificial intelligence safety research paper, which proposed a number of safety concerns and possible mitigations for advanced artificial intelligence systems.
In February 2018, OpenAI announced that it had built a 3D simulator for training robots in virtual environments. The company also announced that it would be open-sourcing its virtual environment, called Universe.
In May 2018, OpenAI released a research paper that detailed their development of a robotic hand that can perform complex tasks, such as opening a door or using a tool. The hand was designed using a 3D printer and can be fitted with any standard prosthetic hand.
In September 2018, OpenAI announced the creation of the OpenAI Charter, which is “an attempt to pre-emptively coordinate on safety and best practices” in the development of artificial intelligence. The charter has been signed by a number of companies and individuals, including Jack Ma, Greg Brockman, Demis Hassabis, Alan Turing Institute, and Google DeepMind.
Log in to Open AI API:
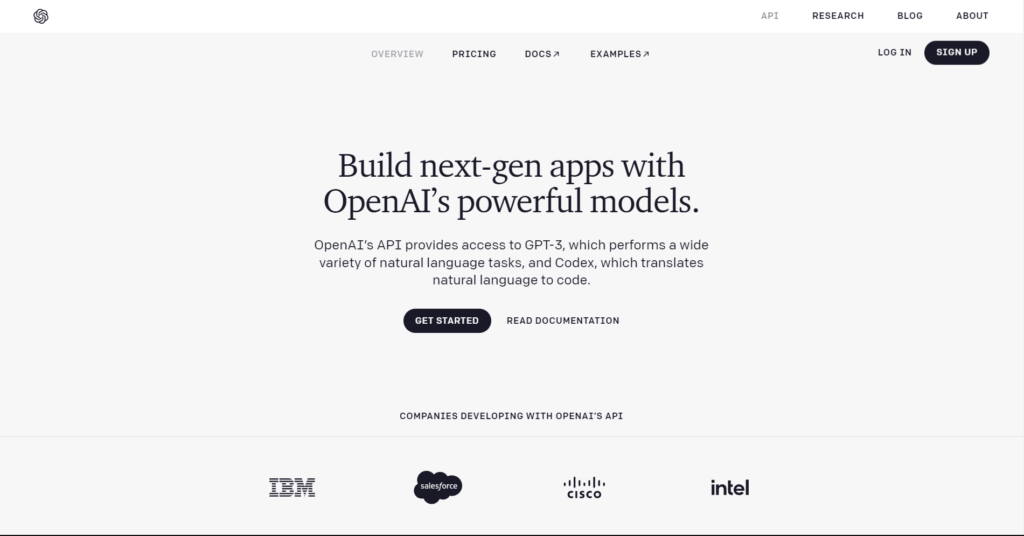
After logging in, it will take to its dashboard, i.e. Overview page. Now follow these steps.
- First, go to OPEN AI/API and then signup with your credentials.
- Then the dashboard will be open.
- Click on your profile and then go to “View API key” copy the secret key and paste it to the notepad for the time being. We’ll use this API key inside our JSX code.
Now, go to your code.
Open any page where you want to add this API. On this page, create a form, a simple form with an event handler called “onFormSubmit“. then paste this code under the main component, outside the return function.
The code is given here.
onFormSubmit = (e) => {
    e.preventDefault();
    const formData = new FormData(e.target),
      formDataObj = Object.fromEntries(formData.entries());
    console.log(formDataObj.blogName);


    ///////OPENAPI
    const configuration = new Configuration({
      apiKey: "paste your api key here",
    });
    const openai = new OpenAIApi(configuration);

    openai
      .createCompletion("text-davinci-002", {
        prompt: `Write a detailed blog for ${formDataObj.blogName}`,
        temperature: 0.8,
        max_tokens: 500,
        top_p: 1,
        frequency_penalty: 0,
        presence_penalty: 0,
      })
      .then((response) => {
        this.setState({
          heading: `AI Blog Suggestions for: ${formDataObj.blogName}`,
          response: `${response.data.choices[0].text}`,
        });
      });
  };
Now, your own AI content generator is ready. After completing everything, run your code by this code-
npm startCheck if your AI content generator app is working properly.
Till now whatever you was reading, the breif introductions, about GPT-3, Open AI and about AI content Generator, everything was written by my own AI content generator tool. Isn’t it amazing?
So, you can clearly see the result of my AI content generator. Now, if you’ve got any doubt, ask in the comment box below.
That’s it for this blog, hope you enjoyed it.

