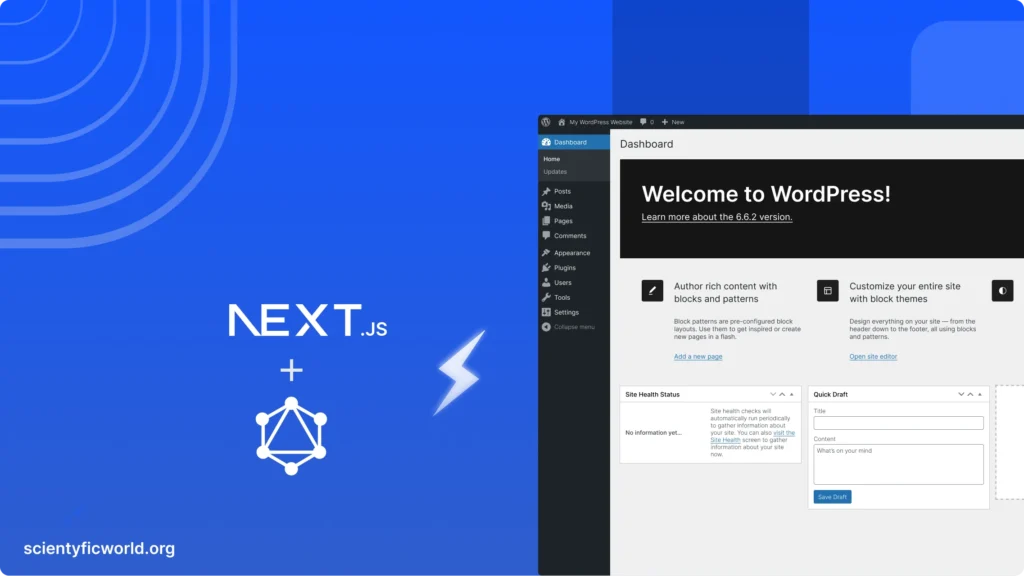
Let’s start with the big question: Why un-couple WordPress from its own frontend at all?
- Performance: Classic WordPress has known speed bottlenecks (PHP rendering, plugin bloat). Next.js delivers instant, globally cached pages via static generation (SSG/ISR) or blazing-fast SSR.
- Modern Dev UX: Balancing React’s flexible UI with WordPress’s editorial ease is a win for content and engineering teams alike. Teams can ship features without tripping over legacy PHP templates.
- Security Hardening: By removing WordPress’s public-facing PHP (and complex plugin surface), you dramatically shrink the attack surface. Your content team keeps their familiar tools, while never exposing PHP or /wp-admin to end users.
- Scalability: Decoupling allows you to scale reads (Next.js) and writes (WordPress) independently. Use serverless or edge deployments for the Next.js frontend and fully manage traffic spikes.
- Multi-channel Publishing: With WordPress as a headless CMS, you can power web, mobile, voice, digital signage, even e-commerce—all from one content source.
This isn’t theoretical—I’ve seen enterprise newsrooms, SaaS marketing sites, and high-traffic blogs slash TTFB and unlock lightning-fast user experience with this stack. It’s become a go-to for engineering teams who want to keep WordPress as a CMS but refuse to compromise on performance or frontend innovation.
So, what will you actually achieve by the end of this guide?
- Set up a robust, locked-down WordPress as a pure content API (GraphQL & REST, choose your poison).
- Boot a Next.js frontend that fetches content live from WordPress, with blazing-fast performance.
- Master the workflows for syncing content, handling previews, optimizing cache, and scaling for production.
- Get actionable answers on handling auth, error states, security, SEO (including AEO), and more.
Takeaway: A headless WordPress+Next.js architecture isn’t just “trendy”—it’s a practical playbook for modern teams who want full control over user experience, content workflow, and technical scalability.
Prerequisites: What Do You Need to Go Headless, Really?
1. Core Tools & Platforms
- WordPress (v6.0+):
- Can be any WP host—shared hosting, Docker, DigitalOcean, GCP, AWS, local dev. Must allow plugin installs and custom configuration.
- For GraphQL: WPGraphQL plugin (latest, v1.15+ recommended for bug fixes and schema improvements). REST is native, but for deep queries, you’ll need GraphQL.
- Next.js (v14+):
- Node.js v18+ (LTS recommended)
- Yarn or npm (pick your poison, both are fine in modern Next.js)
- Deployment target: Vercel (native, easiest), Netlify, AWS Amplify, custom Docker — all valid
- Domain & HTTPS: For production, you’ll need custom domains and SSL—WordPress and Next.js both must serve over HTTPS for secure API calls (token handling, previews, etc).
- API Authentication: (advanced) For authoring/preview features, you’ll need either Application Passwords (core WP), OAuth, or JWT. For public content, “read-only” is fine, but consider your editorial flows.
- WP Hosting Lockdown: Optional but strongly recommended—block all public /wp-admin and XML-RPC endpoints. Allow access only by IP or VPN for editors.
- Basic DevOps: Git (GitHub, GitLab, Bitbucket), CI/CD knowledge for pushing to prod.
2. Installation & Verification Steps
WordPress Setup, Plugins, and API Access
- WordPress Install:
- Spin up WP locally (e.g., using LocalWP), or on your preferred host. Version 6.x or newer recommended.
- Verify that
Permalinksare NOT set to “Plain” (Settings → Permalinks). Use “Post name” or custom—this affects REST/GraphQL endpoints.
- Install WPGraphQL:
- In WP Admin: Plugins → Add New → Search “WPGraphQL” → Install & Activate.
- Visit
/wp-admin/graphql/ide/: confirm GraphQL endpoint works, explore the schema.
- Optional (REST): If you want to use REST (not recommended for nested relationships), default WP is enough, but consider using WP REST API Controller for custom types.
- CORS: Update either plugin settings or WP config to allow your Next.js app domain to fetch data. Example in
functions.php:add_action( 'init', function() { header("Access-Control-Allow-Origin: https://your-nextjs-domain.com"); });
Next.js Setup
- Install Node.js (v18+): Download from official site or install via version manager (nvm recommended).
- Bootstrap Next.js app:
npx create-next-app@latest my-headless-wp cd my-headless-wp - Add GraphQL Client: For Apollo or urql:
npm install @apollo/client graphql # or npm install urql graphql - Verify dev server:
npm run dev- Visit
http://localhost:3000— confirm boilerplate renders.
API Connectivity Test
- Use Postman or curl to query
https://your-wp-site.com/graphql - Example minimal query:
{ posts(first: 1) { nodes { title slug } } } - Expect a result with at least one post. Fix CORS or permalinks if error.
Optional: Content, Design, and Permissions
- Have real content in WP for initial integration. Avoid “Hello world” only—it helps to use actual post/page data to surface real-world schema issues.
- Set up at least two user roles: Administrator (for setup), Editor (for content demo/test).
- Have a basic Figma/post design in mind—or start with the default Next.js template and migrate later.
3. Recommended: Locking Down WordPress for Headless Use
- Hide/rename
/wp-adminusing a plugin if public WP is exposed. - Disallow direct file browsing and directory listing.
- Enforce strong API authentication for all endpoints except public, read-only ones.
- Optional: put WP behind a VPN or IP allowlist, especially for admin/editor logins.
Verification: Both WPGraphQL (or REST) endpoints and the Next.js dev server
npm run devshould be running and talk to each other. Use browser dev tools or Postman to verify API responses without CORS errors.
Step-by-Step Implementation: Building a Headless WordPress Workflow with Next.js & GraphQL
Let’s get into the weeds. Below, you’ll find granular workflows, node decisions (metaphorically, since n8n isn’t in play here), actual code where it matters, and “why” rationale for each architectural call. Visual data flow is illustrated with Mermaid diagrams for clarity.
1. WordPress GraphQL API Design
Why GraphQL, not REST? If your content data is even remotely relational (posts + authors + categories + custom blocks), REST will drown you in n+1 API calls or incomplete data nesting. GraphQL lets you fetch exactly—and only—the data your Next.js frontend actually needs.
- Activate the WPGraphQL plugin.
- Verify
/graphqlendpoint via browser orcurl. - Schema: Review with GraphiQL in browser—note how posts, pages, categories, etc. map clearly.
- Customize exposed fields: Insecure or sensitive meta fields? Hide them via filter hooks in
functions.php. - For custom post types (CPTs), add via
register_post_typewithshow_in_graphqlset totrue.
  // Example: Custom post type setup for GraphQL
  add_action('init', function() {
    register_post_type('case_study', [
      'labels' => [ 'name' => 'Case Studies' ],
      'public' => true,
      'show_in_graphql' => true,
      'graphql_single_name' => 'caseStudy',
      'graphql_plural_name' => 'caseStudies',
    ]);
  });
2. Next.js-GraphQL Client Integration
- Install Apollo Client or urql. Here, I’ll use Apollo for its deep Next.js support.
- Create a
lib/apolloClient.jsto manage the client instance.
  // lib/apolloClient.js
  import { ApolloClient, InMemoryCache } from '@apollo/client';

  const client = new ApolloClient({
    uri: 'https://your-wp-site.com/graphql',
    cache: new InMemoryCache(),
  });

  export default client;
Wrap your _app.js or components in ApolloProvider:
  // pages/_app.js
  import { ApolloProvider } from '@apollo/client';
  import client from '../lib/apolloClient';

  function MyApp({ Component, pageProps }) {
    return (
      <ApolloProvider client={client}>
        <Component {...pageProps} />
      </ApolloProvider>
    );
  }

  export default MyApp;
Tip: Use getStaticProps for SSG (static generation) or getServerSideProps for real-time SSR, depending on how often your WP content changes.
3. Fetching Posts and Building Dynamic Pages
- List all posts (for blog homepage)—SSG preferred for speed/SEO. Example in
pages/index.js:
  // pages/index.js (Next.js)
  import client from '../lib/apolloClient';
  import { gql } from '@apollo/client';

  export async function getStaticProps() {
    const { data } = await client.query({
      query: gql`
        query AllPosts {
          posts(first: 10) {
            nodes {
              title
              slug
              excerpt
            }
          }
        }
      `,
    });
    return { props: { posts: data.posts.nodes } };
  }

  export default function Home({ posts }) {
    return (
      <main>
        <h1>Recent Posts</h1>
        <ul>
          {posts.map((post) => (
            <li key={post.slug}>
              <a href={`/posts/${post.slug}`}>{post.title}</a>
              <div dangerouslySetInnerHTML={{ __html: post.excerpt }} />
            </li>
          ))}
        </ul>
      </main>
    );
  }
- For each post, dynamically create pages using
getStaticPathsandgetStaticProps(Next.js’s “file-based routing” does the rest):
  // pages/posts/[slug].js
  export async function getStaticPaths() {
    const { data } = await client.query({ /* ... */ });
    return {
      paths: data.posts.nodes.map(post => ({ params: { slug: post.slug } })),
      fallback: 'blocking', // choose true/false/blocking as fits your update strategy
    };
  }

  export async function getStaticProps({ params }) {
    const { data } = await client.query({ /* ... */ });
    // ... fetch by slug ...
    return { props: { post: data.post } };
  }
Here’s the final Page Fetch/Render Flow:
/code
4. Handling Authoring, Real-time Previews, and Editorial Workflows
What about editors wanting “Preview” buttons for drafts? This is where most headless WP guides break down, but in the real world, it’s critical.
- Next.js supports Preview Mode via cookies and API routes—let’s connect WP’s “Preview” button to your Next.js frontend.
- On WP admin, add a custom field or filter to generate preview links that hit:
/api/preview?secret=...&slug=...in your Next.js app.- WP can auto-build these URLs with the
post_previewhook. - Next.js validates the secret, sets Preview Mode, fetches the draft page using REST or GraphQL (with auth).
- WP can auto-build these URLs with the
- Ensure the API route in Next.js checks the secret and slug, then sets the Next.js preview cookie, and redirects to the page.
Edge Case: Private or draft posts need authentication—consider using WP Application Passwords or JWT for API requests in preview mode.
5. Optimizing Data Fetching: SSG, SSR, ISR—Which for What?
- SSG (Static-site generation): Use
getStaticProps+getStaticPathsfor anything that can be mostly prebuilt (blog posts, landing pages). Blazing performance, works perfectly for marketing sites. - SSR (Server-side rendering): Use
getServerSidePropsfor personalized or rapidly-changing content (custom dashboards, membership features, frequently updated articles). Slight performance hit but always fresh. - ISR (Incremental Static Regeneration): Best of both worlds—set
revalidateingetStaticPropsto regenerate statically at intervals (e.g., every 60 seconds).
  export async function getStaticProps() {
    // ... GraphQL fetch ...
    return { props: { /* ... */ }, revalidate: 60 }
  }
Performance Tip: Use SSG/ISR where possible. For “breaking news” or rapidly changing content, switch to SSR.
6. Handling Media: Images, Responsive Assets & Optimization
- WP native images URLs are full-size; you’ll want to fetch all responsive image sizes (wpGraphQL exposes srcSet for this).
- In Next.js, use the built-in
<Image />component for auto-optimized image delivery, even from external domains. Add WP uploads domain tonext.config.js:
  // next.config.js
  module.exports = {
    images: { domains: ['your-wp-site.com'] }
  }
Security: Always sanitize and escape all WP-delivered HTML/content before rendering, to avoid XSS attacks.
7. Caching, API Rate Limiting, and Scaling Considerations
- Next.js frontend: Static assets and pages are edge-cached (Vercel, Netlify, CloudFront)—no real bottleneck here unless SSR is overused.
- WPGraphQL API: Heavy traffic or complex queries can tank shared WP hosting. Use GraphQL query caching (WPGraphQL SmartCache, external Redis, or reverse proxies like Varnish/Cloudflare).
- Throttle complex queries: Don’t over-expose nested content or custom queries to public endpoints.
- API Security: Rate-limit or firewall your WP APIs, especially if open to the world. Monitoring—yes, always.
8. Incremental Content Updates and Webhooks
For instant updates, use WP webhooks to notify Next.js (or invalidate static pages). Example: on content update, trigger a Vercel build hook or a custom API endpoint in your app to revalidate cache.
9. SEO & AEO: Making Headless Sites Discoverable
- Meta tags: Use
next/headto inject Open Graph, Twitter Card, and meta descriptions dynamically from WP fields. - Schema.org: Generate JSON-LD schemas in React for key pages (blog, author, product, FAQ, etc).
- Sitemap.xml, robots.txt: Automate generation during build. Fetch sources from WP, output via
next-sitemappackage. - 404 & fallback handling: Use Next.js error boundaries, both for real 404s and API/network errors. Set proper status codes for SEO (and AEO!).
AEO tip: Use FAQPage schema in Next.js to power answer engine snippets, and structure headings in Q&A format (as in this blog!).
Testing & Output: Ensuring Headless Integration Really Works
Test Scenario 1: Basic Data Fetch
- Visit
http://localhost:3000/: Confirm Next.js renders blog list using live GraphQL data. - Test content updates: Edit a post in WP, trigger a cache re-build—verify Next.js shows update after revalidation/no excessive delay.
Test Scenario 2: Preview Mode/Editorial Check
- Create a new draft in WP, open the “Preview” URL—ensure Next.js uses correct endpoint, authenticates, and renders the preview, not the latest published page.
- Edge case: What if preview token is expired/broken? System should fail gracefully (“Preview unavailable” message), never expose raw error logs or WP API secrets.
Test Scenario 3: Error Handling
- Simulate a failed WPGraphQL query (shut off WP or break the API). Next.js should render an error page or offline fallback, never crash server-side functions.
- Check logs for failed fetches. Use Sentry or similar for production alerting.
Test Scenario 4: Security Checks
- Attempt to fetch sensitive WP fields or draft posts with no auth—should NOT be visible or exposed in API response.
- Verify CORS headers are correctly configured—no open wildcards in production.
- Try XSS payload in WP content—ensure output is sanitized in Next.js.
Test Scenario 5: Performance & Scalability
- Run a Lighthouse audit on live site—expect sub-1s LCP and FCP for statically generated pages.
- Load test the API route using a tool like k6 or Artillery—monitor WP resource usage and tune rate limits/cache accordingly.
Expected Results & Output Validation
- All tests above pass with correct user-visible output, no error stacktraces leak to frontend.
- Error and preview flows are graceful and secure—no “white screen of death,” no raw WP errors exposed.
- Performance/logging dashboards report healthy API latency and uptime.
Takeaway: Your headless build isn’t “done” just because it renders. Test edit, error, preview, and scale scenarios aggressively—real sites break in edge flows, not sunny-day content pulls!
Advanced Configuration: Getting Battle-Tested & Enterprise Ready
GraphQL Schemas, Permissions, and Securing Endpoints
- Hide sensitive fields from GraphQL schema (
register_graphql_fieldfilters)—don’t rely on frontend to do this. - For anything requiring auth (previews, editing, internal APIs): Use Application Passwords, OAuth, or JWT (with short TTL and rotate secrets!).
- Protect endpoints with firewall rules/WAF; block obvious scans and unauthenticated POSTs on production APIs.
- For multi-site or dev/test/prod parity, version lock all WP plugins—schema drift is a silent killer at scale.
Webhooks and Real-time Sync
- Use WP Webhooks plugin or custom hooks to notify Next.js/Vercel/N8n on content updates.
- Example: On post publish/update/delete, POST a webhook to your Next.js API to revalidate affected routes (use revalidate API route).
- If using N8n for workflow orchestration, see deployment steps here: n8n on Google Cloud & n8n on Kubernetes (for advanced automation and monitoring).
Enterprise-grade Caching, Search, and Monitoring
- Cache GraphQL results at the CDN (Cloudflare, Fastly) or at WP API layer to avoid flooding the DB on traffic spikes.
- Use Algolia (or Elastic) for site search—WP native search doesn’t scale well; expose data via GraphQL to custom search indices.
- Set up proactive monitoring: logs, alerts for API failures, and metrics for “cold cache” page loads.
Custom Blocks and Dynamic Content
- Use WPGraphQL for Advanced Custom Fields plugin if using ACF blocks; deeply nest complex data in a way GraphQL can expose for Next.js consumption.
- For Gutenberg blocks, fetch
post.blocksor parse rendered HTML as needed on the frontend.
Security, Compliance, and Data Privacy
- Regularly audit exposed API fields and access logs for abuse.
- Comply with GDPR/US privacy laws: expose only the data you must, and provide clear privacy policy links in both CMS and frontend.
- For high compliance: restrict user API access by role, and log all changes to key data (editorial workflow).
Workflow: Content Edit to Global Update (with Webhooks and Revalidation)
Tradeoff: Too-frequent webhook triggers can “stampede” rebuilds in Vercel/Netlify. Use debounce logic or batch updates in high-volume publishing environments.
Conclusion: What Should You Actually Do Now?
If you’ve followed every step above, you now have a battle-tested headless WordPress+Next.js stack—one that delivers instant loads, robust editorial workflows, bulletproof error handling, and strong SEO/AEO discoverability.
- Don’t treat this as a “one-size-fits-all” solution—adapt the workflow for your actual editorial and product needs.
- Invest up front in security, API monitoring, and role-based permissions. 99% of headless WP breaches happen due to weak API lockdowns or under-tested error flows.
- If scaling up, revisit your build/preview pipeline—what works for 50 posts can break down at 50,000, unless you wire up robust caching and real-time revalidation.
- Keep your Next.js edge deploys and WordPress APIs independently upgradable—avoid coupled plugin logistics or shared environments.
- Above all: test aggressively. Most integration bugs lurk in edit/preview/error corners, not happy-path content fetches.
Actionable Takeaway:
Headless is not a trend—it’s the practical path to resilient, modern web content. Test interconnected workflows, invest in monitoring, and empower both content teams and engineers without compromise.
FAQs:
What’s the biggest “gotcha” when moving from classic WordPress themes to a headless setup?
Honestly: handling dynamic features and editorial previews. Classic themes “just work” for previews and plugins. In headless, you have to cover preview routing, syncing auth/cookies, and handle features like shortcodes, dynamic Gutenberg blocks, and custom fields manually on the frontend. Budget extra time for mapping all WYSIWYG/editorial features to your React code and test every editorial workflow, not just published posts.
Should I use GraphQL or REST for my headless WordPress API?
My battle-tested advice: go GraphQL unless your content model is ultra flat (i.e., never fetch relational data). REST will tangle you up in n+1 fetches and brittle endpoints, especially as WP content grows more complex. WPGraphQL exposes richer nested data, reduces queries, and is easier to evolve as your schema changes.
How do I prevent publishing delays (cache “stale” news) in high-traffic newsrooms?
Build a webhook-based system: trigger Next.js cache revalidation or on-demand static regeneration every time content changes in WordPress. Use Vercel, Netlify, or a custom API route in your infrastructure. Monitor for build errors and fallback to SSR if regeneration fails. For enterprise volume, batch update notifications to prevent “build stampedes” (hundreds of publish webhooks per minute).
What’s the best way to handle WordPress plugin features (e.g., Yoast SEO, ACF fields, custom blocks) in a headless world?
Headless means “do it in code, not in template.” Use WPGraphQL for Yoast SEO to export meta fields. For ACF, use WPGraphQL for ACF and serialize all field data in GraphQL. For classic shortcodes/dynamic blocks, render HTML output in WP and parse it as trusted markup (with sanitization!) in the React side. Always validate output and don’t assume plugins “just work”—test each integration end-to-end.
How do I secure the API endpoints from abuse, especially if I open up GraphQL?
Multiple layers: 1) Restrict public API to read-only access; never allow mutation endpoints to unauthenticated users. 2) Rate-limit by IP, with CAPTCHAs if necessary. 3) Log access patterns — look for abuse or scraping. 4) Audit plugin updates frequently, especially any GraphQL or REST extension. If GDPR/privacy is a concern, limit what’s exposed in the schema and log data export requests. In production, block admin routes and rate-limit all open APIs.
What are the main scaling/maintenance strategies when my content or traffic grows dramatically?
It’s all about caching, decoupling, and telemetry. Use CDN caching at the edge for all static assets. Move search to Algolia/Elastic, not native WP search. Version lock plugins and regularly snapshot schema. Actively monitor API performance and error logs. Automate purging/revalidation with webhook pipelines (via N8n or WP Webhooks). And always—test scale/performance before launch, not after.
Can I use the same stack for multisite, multilingual, or e-commerce projects?
Mostly yes—but add layers. For multisite, ensure your API surface (schemas, CORS, endpoints) are distinct per site. For multilingual, leverage plugins like WPGraphQL Polylang (or REST for translation endpoints) and synchronize locales in both WP and Next.js. For e-commerce, use WooCommerce’s GraphQL (or REST) endpoints—test Cart and Checkout flows end-to-end, as they have the most moving parts and edge cases.
Note: If you have advanced workflow automation needs (webhooks, third-party integrations, custom event triggers), combine this stack with n8n on Google Cloud.