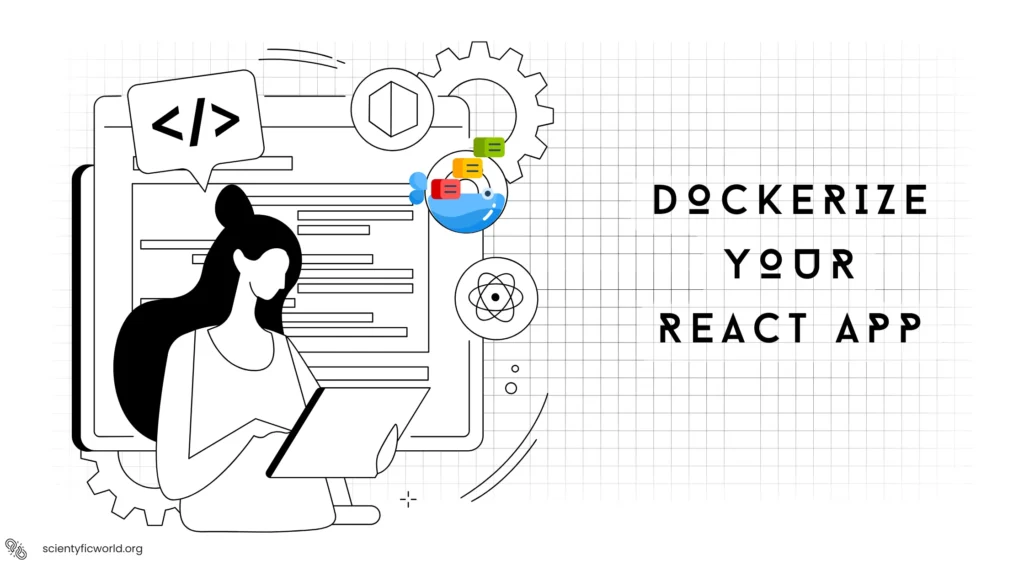
Dockerize a React application offers a powerful solution for achieving consistent and isolated environments across different stages of development. Containerizing your applications with Docker ensures they run seamlessly on any system with Docker installed, solving the “it works on my machine” problem.
For React applications, Docker offers significant benefits. It encapsulates all dependencies and configurations, making deployment more reliable and reproducible. Additionally, Docker containers provide a lightweight and efficient way to manage and scale your applications.
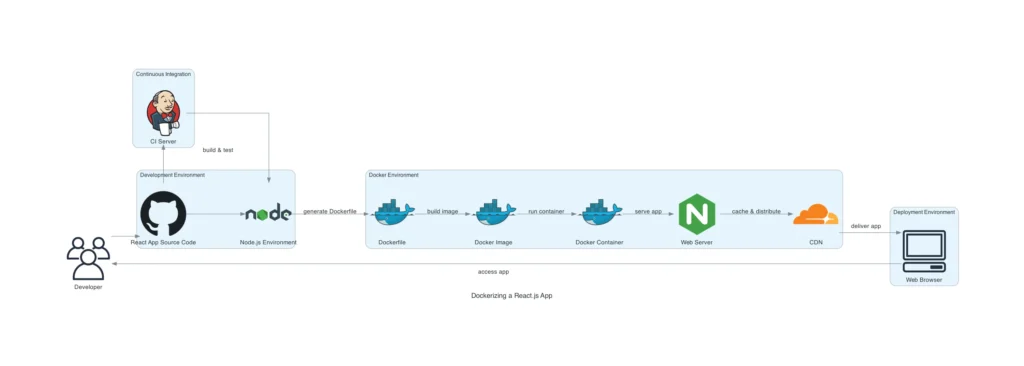
This blog will guide you through Dockerizing a React application. Whether you’re streamlining your development workflow, simplifying deployment, or ensuring consistency across environments, Dockerizing your React app is a powerful solution. We’ll cover the entire process, from preparing your React app to creating a Dockerfile, building the Docker image, and running the Docker container. By the end of this guide, you’ll have a fully Dockerized React app ready to deploy anywhere.
Prerequisites to Dockerize a React app:
Before we begin the process of Dockerizing your React app, ensure you have the following prerequisites in place:
- Docker Installed: Docker must be installed and running on your machine. You can download Docker from the official Docker website and follow the installation instructions for your operating system.
- React Application: You should have a complete and functional React application ready for deployment. This guide assumes you have already developed your React app and it is production-ready.
- Basic Understanding of Docker: Familiarity with basic Docker concepts and commands is helpful. You should know how to run Docker commands in your terminal. If you’re new to Docker, consider reviewing the Docker documentation to get up to speed.
- Node.js and npm: Ensure you have Node.js and npm installed. These are required for building your React app. You can download Node.js and npm from the official Node.js website.
With these prerequisites met you are ready to start Dockerizing your React app. In the next section, we’ll ensure your React app is properly prepared for the Docker environment.
Preparing Your React App for Docker
Before Dockerizing your React app, you need to ensure it is production-ready. This involves creating a production build and verifying that it works as expected. Here are the steps to prepare your React app for Docker:
- Build the Production Version of Your React App:
- Open your terminal and navigate to the root directory of your React project.
- Run the following command to create a production build of your app:
npm run build
This command will generate abuildfolder containing the optimized production version of your app. Ensure the build process completes without errors.
- Verify the Production Build:
- It’s important to test the production build to ensure everything works correctly before containerizing the app. You can use a simple HTTP server to serve the production build locally.
- Install
serveglobally if you haven’t already:npm install -g serve - Serve the production build:
serve -s build - Open your browser and navigate to
http://localhost:5000(or the port specified byserve). Verify that your app functions as expected.
- Organize Your Project Directory:
- Ensure your project directory is well-organized and includes only necessary files. Remove any development dependencies and unnecessary files to keep the Docker image lightweight.
With your React app production-ready, you are now prepared to create the Dockerfile. This file will define the environment for your app within the Docker container. In the next section, we will guide you through writing an effective Dockerfile for your React app.
Creating the Dockerfile
A Dockerfile is a script that contains a series of instructions on how to build a Docker image for your application. For a React app, the Dockerfile will specify the base image, copy the app files, install dependencies, build the app, and define how the app should run within the container. Follow these steps to create an effective Dockerfile for your React app:
- Create a Dockerfile in the Root Directory: In the root directory of your React project, create a new file named
Dockerfile(without any file extension). - Specify the Base Image: Begin by specifying the base image. For a React app, we typically use the official Node.js image, as it includes Node.js and npm, which are required to build and run the app.
FROM node:14-alpine - Set the Working Directory: Set the working directory inside the container where the app’s code will reside. This helps keep the filesystem organized.
WORKDIR /app - Copy the Package Files and Install Dependencies: Copy the
package.jsonandpackage-lock.jsonfiles to the working directory. Then, install the dependencies using npm.COPY package*.json ./ RUN npm install - Copy the Application Code: Copy the rest of the application code to the working directory.
COPY . . - Build the React Application: Run the build command to create a production build of the React app.
RUN npm run build - Serve the Application:
- Use a lightweight web server like
serveto serve the static files. First, installserve:RUN npm install -g serve - Specify the command to run the server when the container starts.
CMD ["serve", "-s", "build"]
- Use a lightweight web server like
- Expose the Necessary Port: Expose the port that the application will run on. By default,
serveuses port 5000.EXPOSE 5000
Here is the complete Dockerfile:
# Use the official Node.js image as the base image
FROM node:14-alpine

# Set the working directory inside the container
WORKDIR /app

# Copy the package files and install dependencies
COPY package*.json ./
RUN npm install

# Copy the rest of the application code
COPY . .

# Build the React application
RUN npm run build

# Install the 'serve' package to serve the static files
RUN npm install -g serve

# Expose the port the app will run on
EXPOSE 5000

# Command to run the application
CMD ["serve", "-s", "build"]With the Dockerfile created, you are now ready to build the Docker image for your React app. In the next section, we will guide you through the process of building the Docker image.
Building the Docker Image
Once you have created the Dockerfile, the next step is to build the Docker image. This image will contain everything needed to run your React application, encapsulated in a consistent environment. Follow these detailed steps to build your Docker image:
- Open Your Terminal: Navigate to the root directory of your React project where your Dockerfile is located.
- Build the Docker Image: Use the
docker buildcommand to create the Docker image. The-tflag allows you to tag your image with a name for easier reference.docker build -t react-app-image . - Explanation of the command:
docker build: The command to build a Docker image.-t react-app-image: Tags the image with the namereact-app-image. You can choose any name for your image..: Specifies the current directory as the build context, meaning Docker will use the Dockerfile and other necessary files from this directory.
- Monitor the Build Process:
- As the image builds, Docker will execute each instruction in the Dockerfile. You will see output logs indicating the progress of each step.
- Common steps include downloading the Node.js image, copying files, installing dependencies, building the React app, and setting up the server.
- Ensure that there are no errors during the build process. If any errors occur, review the Dockerfile and the output logs to identify and fix the issues.
- Verify the Docker Image:
- After the build process completes successfully, you can verify the created image by listing all Docker images on your system:
docker images - This command will display a list of images, including the one you just built. You should see
react-app-imagein the list along with its image ID, creation time, and size.
- After the build process completes successfully, you can verify the created image by listing all Docker images on your system:
- Optimizing the Docker Image (Optional):
- To keep your Docker image lightweight, consider multi-stage builds. This approach allows you to separate the build environment from the runtime environment, ensuring that only the necessary files are included in the final image.
With the Docker image built, you are now ready to run the Docker container and see your React app in action. In the next section, we will guide you through running the Docker container.
Running the Docker Container
After building the Docker image, the next step is to run the Docker container. The container will use the image you created to instantiate an isolated environment where your React app can run. Follow these detailed steps to run your Docker container:
- Run the Docker Container:
- Use the
docker runcommand to start a new container from your Docker image. You will need to map a port from your host machine to the container to access the React app in your browser.docker run -d -p 3000:5000 --name react-app-container react-app-image - Explanation of the command:
docker run: The command to run a new Docker container.-d: Runs the container in detached mode, meaning it runs in the background.-p 3000:5000: Maps port 3000 on your host machine to port 5000 in the container. This allows you to access the app viahttp://localhost:3000.--name react-app-container: Assigns a name to the running container for easier management.react-app-image: The name of the Docker image you built in the previous section.
- Use the
- Verify the Container is Running:
- List all running Docker containers to verify that your container is up and running:
docker ps - This command will display a list of running containers. Look for
react-app-containerin the list along with its status and port mappings.
- List all running Docker containers to verify that your container is up and running:
- Access the React App:
- Open your web browser and navigate to
http://localhost:3000. You should see your React application running. - Verify that the app functions as expected. Since the app is running in a Docker container, it should be isolated from any variations in the host environment.
- Open your web browser and navigate to
- Managing the Docker Container:
- Stop the Container: If you need to stop the container, use the
docker stopcommand followed by the container name.docker stop react-app-container - Restart the Container: To restart a stopped container, use the
docker startcommand.docker start react-app-container - Remove the Container: To remove a container when you no longer need it, use the
docker rmcommand. Make sure to stop the container first if it is running.docker stop react-app-container docker rm react-app-container
- Stop the Container: If you need to stop the container, use the
- Viewing Container Logs:
- To view the logs of your running container, use the
docker logscommand. This is useful for debugging and monitoring your application.docker logs react-app-container
- To view the logs of your running container, use the
- Accessing the Container Shell:
- If you need to access the shell of the running container for troubleshooting or manual inspection, use the
docker execcommand.docker exec -it react-app-container sh - This command opens an interactive shell session within the container.
- If you need to access the shell of the running container for troubleshooting or manual inspection, use the
By following these steps, you can successfully run your Docker container and manage it effectively. In the next section, we will explore using Docker Compose for more complex setups involving multiple containers.
Using Docker Compose (Optional)
Docker Compose is a powerful tool for defining and running multi-container Docker applications. It allows you to use a docker-compose.yml file to configure your application’s services, networks, and volumes. This section will guide you through setting up Docker Compose for your React app, making it easier to manage complex setups.
- Install Docker Compose: Docker Compose is typically included with Docker Desktop, but if you need to install it separately, follow the instructions on the Docker Compose installation page.
- Create a
docker-compose.ymlFile:- In the root directory of your React project, create a new file named
docker-compose.yml. - This file will define the services required for your application. For a simple React app, you will typically need just one service.
- In the root directory of your React project, create a new file named
- Define the React App Service:
- Add the following configuration to the
docker-compose.ymlfile to define the React app service:
- Add the following configuration to the
version: '3'
services:
  react-app:
    image: react-app-image
    build:
      context: .
      dockerfile: Dockerfile
    ports:
      - "3000:5000"
command: ["serve", "-s", "build"]- Explanation of the configuration:
version: Specifies the version of the Docker Compose file format.services: Defines the services that make up your application.react-app: The name of the service.image: Specifies the image name. Docker Compose will build the image from the Dockerfile if it doesn’t already exist.build: Defines the build context and Dockerfile for the service.ports: Maps port 3000 on the host to port 5000 in the container.command: Specifies the command to run the application.
- Build and Run the Containers:
- Use the
docker-compose upcommand to build and start the services defined in thedocker-compose.ymlfile.docker-compose up - This command builds the Docker image if it doesn’t already exist and starts the container.
- Use the
-dflag to run the services in detached mode (background).docker-compose up -d
- Use the
- Verify the Containers are Running:
- List all running services with the
docker-compose pscommand.docker-compose ps - This command shows the status of the services defined in your
docker-compose.ymlfile.
- List all running services with the
- Access the React App:
- Open your web browser and navigate to
http://localhost:3000to access your React application running in a Docker container managed by Docker Compose.
- Open your web browser and navigate to
- Managing the Services:
- Stop the Services: Use the
docker-compose downcommand to stop and remove the containers, networks, and volumes defined in thedocker-compose.ymlfile.docker-compose down - Restart the Services: Use the
docker-compose restartcommand to restart the services.docker-compose restart - View Logs: Use the
docker-compose logscommand to view the logs of all services.docker-compose logs - Scale Services: Use the
docker-compose up --scaleoption to run multiple instances of a service.docker-compose up --scale react-app=3
- Stop the Services: Use the
Using Docker Compose simplifies the management of your React application’s Docker containers, especially when dealing with more complex setups or multiple services. In the next section, we will cover how to test and debug your Dockerized React app.
Testing and Debugging
After Dockerizing your React app, it’s essential to test and debug it to ensure everything works as expected in the containerized environment. This section provides detailed steps and tips for effectively testing and debugging your Dockerized React app.
- Test the Running Application:
- Access your React app in the browser using the mapped port (e.g.,
http://localhost:3000) to verify that the application loads correctly and functions as expected. - Perform thorough testing by navigating through the app, interacting with different features, and ensuring there are no issues or unexpected behaviours.
- Access your React app in the browser using the mapped port (e.g.,
- Check Container Logs:
- Use the
docker logscommand to view the logs of your running container. Logs can provide valuable insights into what might be going wrong if the app isn’t working as expected.docker logs react-app-container - For Docker Compose setups, use the
docker-compose logscommand to view logs for all services.docker-compose logs
- Use the
- Debugging with Interactive Shell:
Access the shell of the running container using thedocker execcommand to inspect the container’s environment and troubleshoot issues.docker exec -it react-app-container sh
This command opens an interactive shell session within the container, allowing you to run commands, check configurations, and view files. - Common Issues and Solutions:
- Port Conflicts: Ensure no other services on your host machine are using the same port as your Docker container. Adjust the port mapping in the Docker run or Docker Compose file if necessary.
- Environment Variables: Verify that all required environment variables are correctly set and accessible within the container. Use the
docker execcommand to check environment variables inside the container.docker exec -it react-app-container printenv - Dependency Issues: Ensure all necessary dependencies are installed and correctly specified in the Dockerfile. If there are missing dependencies, update the Dockerfile and rebuild the image.
- Rebuilding the Docker Image:
- If you make changes to your code or Dockerfile, rebuild the Docker image to include the updates.
docker build -t react-app-image . - For Docker Compose setups, use the
docker-compose up --buildcommand to rebuild the image and restart the services.docker-compose up --build
- If you make changes to your code or Dockerfile, rebuild the Docker image to include the updates.
- Automated Testing:
- Integrate automated tests into your Docker setup to ensure the app’s functionality remains intact. You can add a step in the Dockerfile to run tests during the build process.
# Add this before the final CMD instruction in your Dockerfile RUN npm test - Alternatively, create a separate test service in your
docker-compose.ymlfile to run tests independently of the main application service.
- Integrate automated tests into your Docker setup to ensure the app’s functionality remains intact. You can add a step in the Dockerfile to run tests during the build process.
- Monitoring and Performance Tuning:
- Monitor the performance and resource usage of your Docker container using Docker commands like
docker stats.docker stats react-app-container - Optimize your Dockerfile to reduce image size and improve container performance. Techniques include using multi-stage builds, minimizing the number of layers, and removing unnecessary files and dependencies.
- Monitor the performance and resource usage of your Docker container using Docker commands like
By following these steps, you can effectively test and debug your Dockerized React app, ensuring it runs smoothly in the containerized environment. In the next section, we will conclude the guide by summarizing the benefits and encouraging further exploration of Docker and containerization.
Conclusion
Dockerizing a React application offers numerous benefits, including consistent development environments, simplified deployment processes, and enhanced scalability. By encapsulating all dependencies and configurations within a Docker container, you ensure your application runs reliably across different environments, eliminating the common “it works on my machine” problem.
In this guide, we covered the entire process of Dockerizing a React app. We began by preparing the React application for production, creating a Dockerfile, and building the Docker image. We then ran the Docker container and explored the optional use of Docker Compose for managing complex setups. Finally, we discussed testing and debugging techniques to ensure your Dockerized app runs smoothly.
By following these steps, you can streamline your development workflow, improve deployment reliability, and scale your React applications more efficiently. Docker not only enhances your current projects but also prepares you for future endeavors by providing a robust and consistent environment for application development and deployment.
We encourage you to apply these techniques to other projects and explore the vast possibilities Docker offers. For further learning, refer to the official Docker and React documentation, and consider integrating more advanced Docker features into your workflow.
FAQs:
How can I ensure the security of my Dockerized React app?
Securing a Dockerized React app involves several practices:
1. Image Security: Use official and trusted Docker images to minimize the risk of vulnerabilities. Regularly update your images to include the latest security patches.
2. Least Privilege: Run containers with the least privilege required. Avoid running your containers as the root user.
3. Network Security: Isolate your Docker networks to control communication between containers. Use Docker’s built-in network security features to restrict access.
4. Secrets Management: Use Docker secrets to manage sensitive information such as API keys and passwords. For standalone Docker setups, use environment variables with caution and ensure they are not hardcoded.
What are the common challenges when Dockerizing a React app, and how can I overcome them?
Common challenges include:
Build Performance: Docker builds can be slow, especially for large React applications. Optimize the Dockerfile using multi-stage builds and leveraging caching.
File Permissions: File permission issues can arise when copying files into the Docker container. Ensure correct ownership and permissions are set within the Dockerfile.
Environment Parity: Ensuring the development, staging, and production environments are identical can be difficult. Docker helps by providing consistent environments, but it’s crucial to test thoroughly in each environment.
How does Docker improve the deployment process of a React app?
Docker simplifies the deployment process by:
Consistency: Docker ensures that your application runs the same way in every environment, reducing the “it works on my machine” problem.
Isolation: Each Docker container is isolated, which prevents conflicts between applications and their dependencies.
Scalability: Docker makes it easier to scale applications horizontally by running multiple containers across different hosts.
Portability: Docker images can be easily moved across different environments, such as from a developer’s laptop to a production server.
What are the benefits of using Docker Compose for a React app in a microservices architecture?
Docker Compose is beneficial in a microservices architecture for several reasons:
Simplified Configuration: Define all your services, networks, and volumes in a single docker-compose.yml file, making the setup easier to manage.
Service Dependencies: Docker Compose allows you to specify dependencies between services, ensuring that they start in the correct order.
Consistent Environment: Docker Compose creates a consistent environment for all your services, reducing the likelihood of environment-specific bugs.
Multi-Container Applications: Easily manage and run multi-container applications, which is common in microservices architectures where each service runs in its container.
How can I monitor the performance of my Dockerized React app?
Monitoring the performance of a Dockerized React app involves several tools and practices:
Docker Stats: Use the docker stats command to monitor real-time CPU, memory, and network usage of your Docker containers.
Logging: Implement centralized logging to collect logs from your Docker containers. Tools like ELK Stack (Elasticsearch, Logstash, Kibana) or Fluentd can help aggregate and analyze logs.
Monitoring Tools: Use monitoring tools such as Prometheus and Grafana to collect and visualize metrics from your Docker containers.
Health Checks: Define health checks in your Dockerfile or Docker Compose file to ensure your containers are running correctly and restart them if they fail.
Thank you for following along with this guide. We hope it has been informative and helpful in your journey to Dockerize your React applications. Happy coding!