As a developer, you may have encountered the problem of managing state across different components in your React application. Passing props down through multiple levels of components can quickly become tedious and error-prone. This is where global state management comes in. It allows you to manage state at a higher level of your application and share it across different components. One of the popular solutions for global state management in React is the Context API.
The React Context API is a feature that allows you to share data across the component tree without having to pass props down manually at every level. It provides a way to manage global state in a more efficient and centralized manner. In this article, we will dive into the React Context API and learn how to use it for global state management in your React application.
We will start by understanding what React Context API is and why it is important. Then, we will create a context and see how we can use it to manage global state in our application. Finally, we will cover some best practices for using the React Context API.
Let’s get started!
Understanding React Context API
React Context API is a feature in React that allows you to share data between components without having to pass props manually at every level. It is a way to manage global state in a more centralized and efficient manner. With the Context API, you can create a context object and share it with any component that needs it.
What is global context in React?
In React, global context refers to a mechanism for passing data down the component tree without relying on props. It allows you to share data between components that are not directly connected in the component hierarchy.
Global context in React is created using the createContext() function, which returns an object with two components: the Provider and the Consumer. The Provider component is used to define the data that needs to be shared and make it available to all child components that use the Consumer.
The Provider component accepts a value prop, which contains the data to be shared. The Consumer component is used to access the shared data from any child component that uses it.
Advantages of using React Context API
There are several advantages to using React Context API for global state management.
- Reducing the complexity of passing props:
Passing props down through multiple levels of components can become complex and error-prone. As the number of components grows, it becomes harder to keep track of which props are being passed where. With the Context API, you can avoid passing props down the component tree, which can simplify your code and reduce the risk of errors. - Easier sharing of data between components:
In React, data is typically passed down the component tree from parent to child via props. However, sometimes you need to share data between components that are not directly related, such as siblings or cousins. With the Context API, you can share data between any components that have access to the same context object. - Centralized management of global state:
When you have state that needs to be accessed by multiple components in your application, it can be challenging to manage it in a centralized way. With the Context API, you can create a single context object that manages the state for the entire application. This can improve the maintainability of your code and make it easier to reason about. - Improved performance in certain cases:
Passing props down the component tree can sometimes cause unnecessary re-renders, especially when dealing with deeply nested components. With the Context API, you can avoid passing props down the tree, which can improve performance in certain cases.

When to use React Context API?
React Context API is most useful when you have data that needs to be accessed by multiple components in your application. It can be used to manage state that is not related to a specific component or to manage global configuration data that needs to be shared across the application.
Here are some examples when you should use Context API:
- Managing state that is not related to a specific component:
Sometimes, you may have state in your application that is not directly related to a specific component, but needs to be shared across multiple components. For example, you may have a theme that needs to be applied to all components in your application. In this case, you can use the Context API to create a context that manages the theme state and share it across all components. - Managing global configuration data:
In some cases, you may have configuration data that needs to be accessed by multiple components in your application. For example, you may have an API endpoint that is used by several components. In this case, you can use the Context API to create a context that manages the configuration data and share it across all components. - Reducing prop drilling:
As mentioned earlier, passing props down through multiple levels of components can become complex and error-prone. If you find yourself passing the same props down multiple levels of your component tree, you may want to consider using the Context API to avoid prop drilling. - Simplifying state management:
If you have a large application with many components and complex state management, the Context API can simplify the process by centralizing the state management in a single context object. This can make it easier to maintain and reason about the state of your application.
The Context API can simplify your code, reduce prop drilling, and improve the maintainability of your application.
Creating Context
To use the React Context API for global state management, the first step is to create a context that will hold the global state. In this section, we’ll walk through the process of creating a context and providing the initial global state values to it. We’ll also cover how to consume the context in our components using the useContext hook.
A. Creating a Context object
To create a context in React, you first need to create a context object using the createContext() method provided by the React library. Here’s an example:
import { createContext } from 'react';

const MyContext = createContext();
This creates a new context object called MyContext.
B. Providing a value to the Context
Once you have created a context object, you need to provide a value to it. This can be done by wrapping your component tree with a <MyContext.Provider> component and passing in a value prop. Here’s an example:
<MyContext.Provider value={myValue}>
  <App />
</MyContext.Provider>
In this example, myValue is the value that you want to share across your application.
C. Consuming the Context
To access the value of the context in your components, you need to use the useContext hook provided by the React library. Here’s an example:
import { useContext } from 'react';
import MyContext from './MyContext';

function MyComponent() {
  const myValue = useContext(MyContext);
  // ...
}
In this example, MyComponent is using the useContext hook to access the value of MyContext.
D. Default values
When you create a context using createContext(), you can optionally pass in a default value as a parameter. This default value is used when there is no matching <MyContext.Provider> component higher up in the component tree. Here’s an example:
const MyContext = createContext('default value');In this example, the default value of MyContext is 'default value'.
E. Nested contexts
You can also create nested contexts in React by wrapping a <MyContext.Provider> component inside another <MyContext.Provider> component. In this case, the nested provider will override the value provided by the parent provider. Here’s an example:
<MyContext.Provider value={parentValue}>
  <MyContext.Provider value={childValue}>
    <App />
  </MyContext.Provider>
</MyContext.Provider>
In this example, childValue will be the value that is used in any components that access the nested context.
In the next section, we will explore how to use the Context API for global state management in your React application.
Building the global state management
Now that we understand how the React Context API works and when it should be used, let’s dive into building a global state management solution using this powerful tool. In this section, we’ll walk through the process of setting up the global state context, using the global state in our components, updating the global state, and accessing the global state from nested components. By the end of this section, you’ll have a solid understanding of how to use the React Context API for global state management in your own React projects.
Setting up the Global State Context
The first step in building our global state management is to create a context that will hold the global state. We can do this by creating a new file called GlobalStateContext.js and importing the createContext function from the React library.
import { createContext } from 'react';

const GlobalStateContext = createContext();
Next, we need to provide an initial value to the context that will act as the global state. We can do this by creating a new file called GlobalStateProvider.js and importing the useState hook from the React library.
import { useState } from 'react';
import GlobalStateContext from './GlobalStateContext';

const GlobalStateProvider = ({ children }) => {
  const [globalState, setGlobalState] = useState({
    // initial values here
  });

  return (
    <GlobalStateContext.Provider value={{ globalState, setGlobalState }}>
      {children}
    </GlobalStateContext.Provider>
  );
};

export default GlobalStateProvider;
Here, we are creating a new component called GlobalStateProvider that wraps our entire application and provides the globalState object and the setGlobalState function to all of our components. The useState hook is used to set the initial values of our globalState object. Note that we are passing the children prop into the provider so that all of our child components have access to the global state.
Using the Global State in Components
Now that we have our global state context set up, we can use it in our components by importing the useContext hook from the React library and referencing the GlobalStateContext we created earlier.
import { useContext } from 'react';
import GlobalStateContext from './GlobalStateContext';

const MyComponent = () => {
  const { globalState } = useContext(GlobalStateContext);

  return (
    <div>
      <h1>{globalState.title}</h1>
      <p>{globalState.description}</p>
    </div>
  );
};
Here, we are using the useContext hook to access the globalState object from the context. We can then use the properties of the globalState object in our component just like any other object.
Updating the Global State
To update the global state, we simply need to call the setGlobalState function that we provided earlier in our GlobalStateProvider component.
import { useContext } from 'react';
import GlobalStateContext from './GlobalStateContext';

const MyComponent = () => {
  const { globalState, setGlobalState } = useContext(GlobalStateContext);

  const handleButtonClick = () => {
    setGlobalState({
      ...globalState,
      title: 'New Title',
    });
  };

  return (
    <div>
      <h1>{globalState.title}</h1>
      <p>{globalState.description}</p>
      <button onClick={handleButtonClick}>Update Title</button>
    </div>
  );
};
Here, we are using the setGlobalState function to update the globalState object with a new title. Note that we are using the spread operator (...) to copy over all of the existing properties of the globalState object and only update the title property.
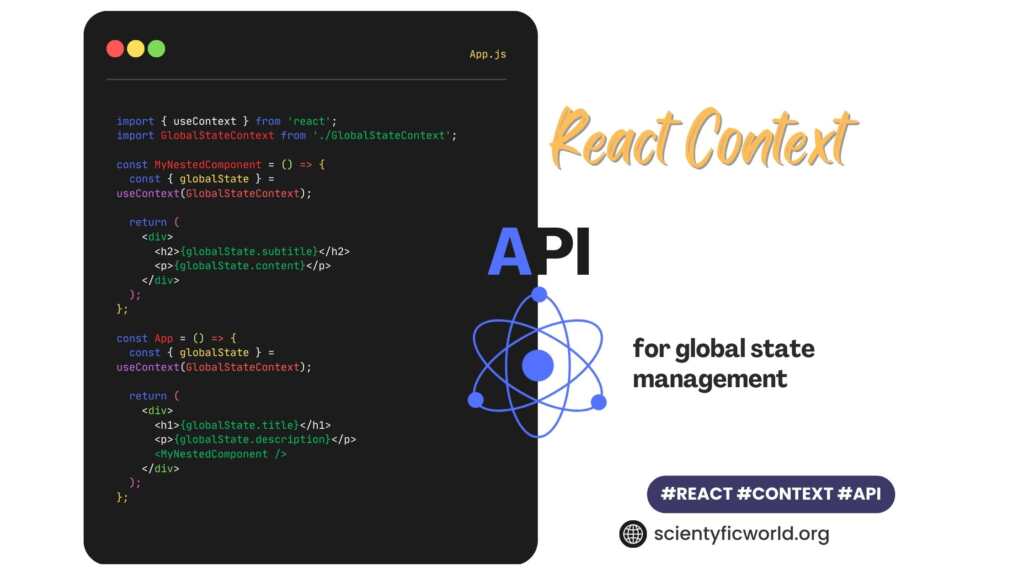
Accessing the Global State from Nested Components
One of the benefits of using the React Context API for global state management is that we can easily access the global state from any level of our component tree, even if the component is nested several layers deep. Here’s an example:
import { useContext } from 'react';
import GlobalStateContext from './GlobalStateContext';

const MyNestedComponent = () => {
  const { globalState } = useContext(GlobalStateContext);

  return (
    <div>
      <h2>{globalState.subtitle}</h2>
      <p>{globalState.content}</p>
    </div>
  );
};

const MyComponent = () => {
  const { globalState } = useContext(GlobalStateContext);

  return (
    <div>
      <h1>{globalState.title}</h1>
      <p>{globalState.description}</p>
      <MyNestedComponent />
    </div>
  );
};
In this example, we have a nested component called MyNestedComponent that needs to access some properties of the global state. We can simply use the useContext hook again to access the global state from within the nested component, just like we did in the parent component.
Best practices for using React Context API
While using React Context API for global state management, there are some best practices to keep in mind that can help make your code more efficient, maintainable, and scalable.
- Avoid nesting too many providers:
While it’s possible to nest multipleProvidercomponents to create a hierarchical structure of contexts, it’s important to avoid nesting too many providers as it can make the code harder to understand and maintain. Instead, consider using a singleProvidercomponent to manage all the data you need in your application. - Use multiple contexts when needed:
If your application has multiple types of data that need to be managed separately, consider using multiple contexts rather than a single, monolithic context. This can help make your code more modular and easier to maintain. - Use memoization for performance optimization:
React’suseMemo()hook can be used to memoize values that are computationally expensive to calculate, such as derived state values or complex data structures. By memoizing these values, you can avoid unnecessary re-renders and improve the performance of your application. - Keep the global state immutable:
It’s important to keep the global state immutable to avoid unexpected side effects and ensure that the data flows in a unidirectional manner. When updating the global state, always create a new object rather than modifying the existing one. This can be achieved using thespreadoperator or other methods such asObject.assign(). - Use descriptive naming conventions:
When naming your context and provider components, use descriptive and meaningful names that reflect their purpose and functionality. This can make your code easier to understand and navigate, especially for other developers who may be working on the same project. - Use TypeScript or PropTypes for type checking:
TypeScript or PropTypes can be used for type checking in your React application, including your context and provider components. This can help catch errors early on and make your code more robust and maintainable.
Conclusion
In conclusion, React Context API is a powerful tool that can greatly simplify global state management in your React applications. With the ability to pass data down the component tree without having to rely on props, you can build complex applications more easily and efficiently. Depending on the complexity of your application, you may also need to consider other options such as Redux or MobX.
Understanding the advantages of using React Context API, knowing when to use it, creating contexts, and building a global state management system are key steps to effectively use this feature in your application. By implementing these best practices, you can make your code more modular, maintainable, and scalable.
Another important takeaway is that while React Context API can simplify your code, it’s important to use it thoughtfully and keep performance and maintainability in mind. It’s also a good idea to review the API documentation periodically, as new features and updates may be added.
Overall, React Context API is a valuable addition to your React toolkit, and it’s worth taking the time to learn how to use it effectively.
Happy Coding!!


