Follow Us:
How to Build a Chatbot with PaLM and React Native?
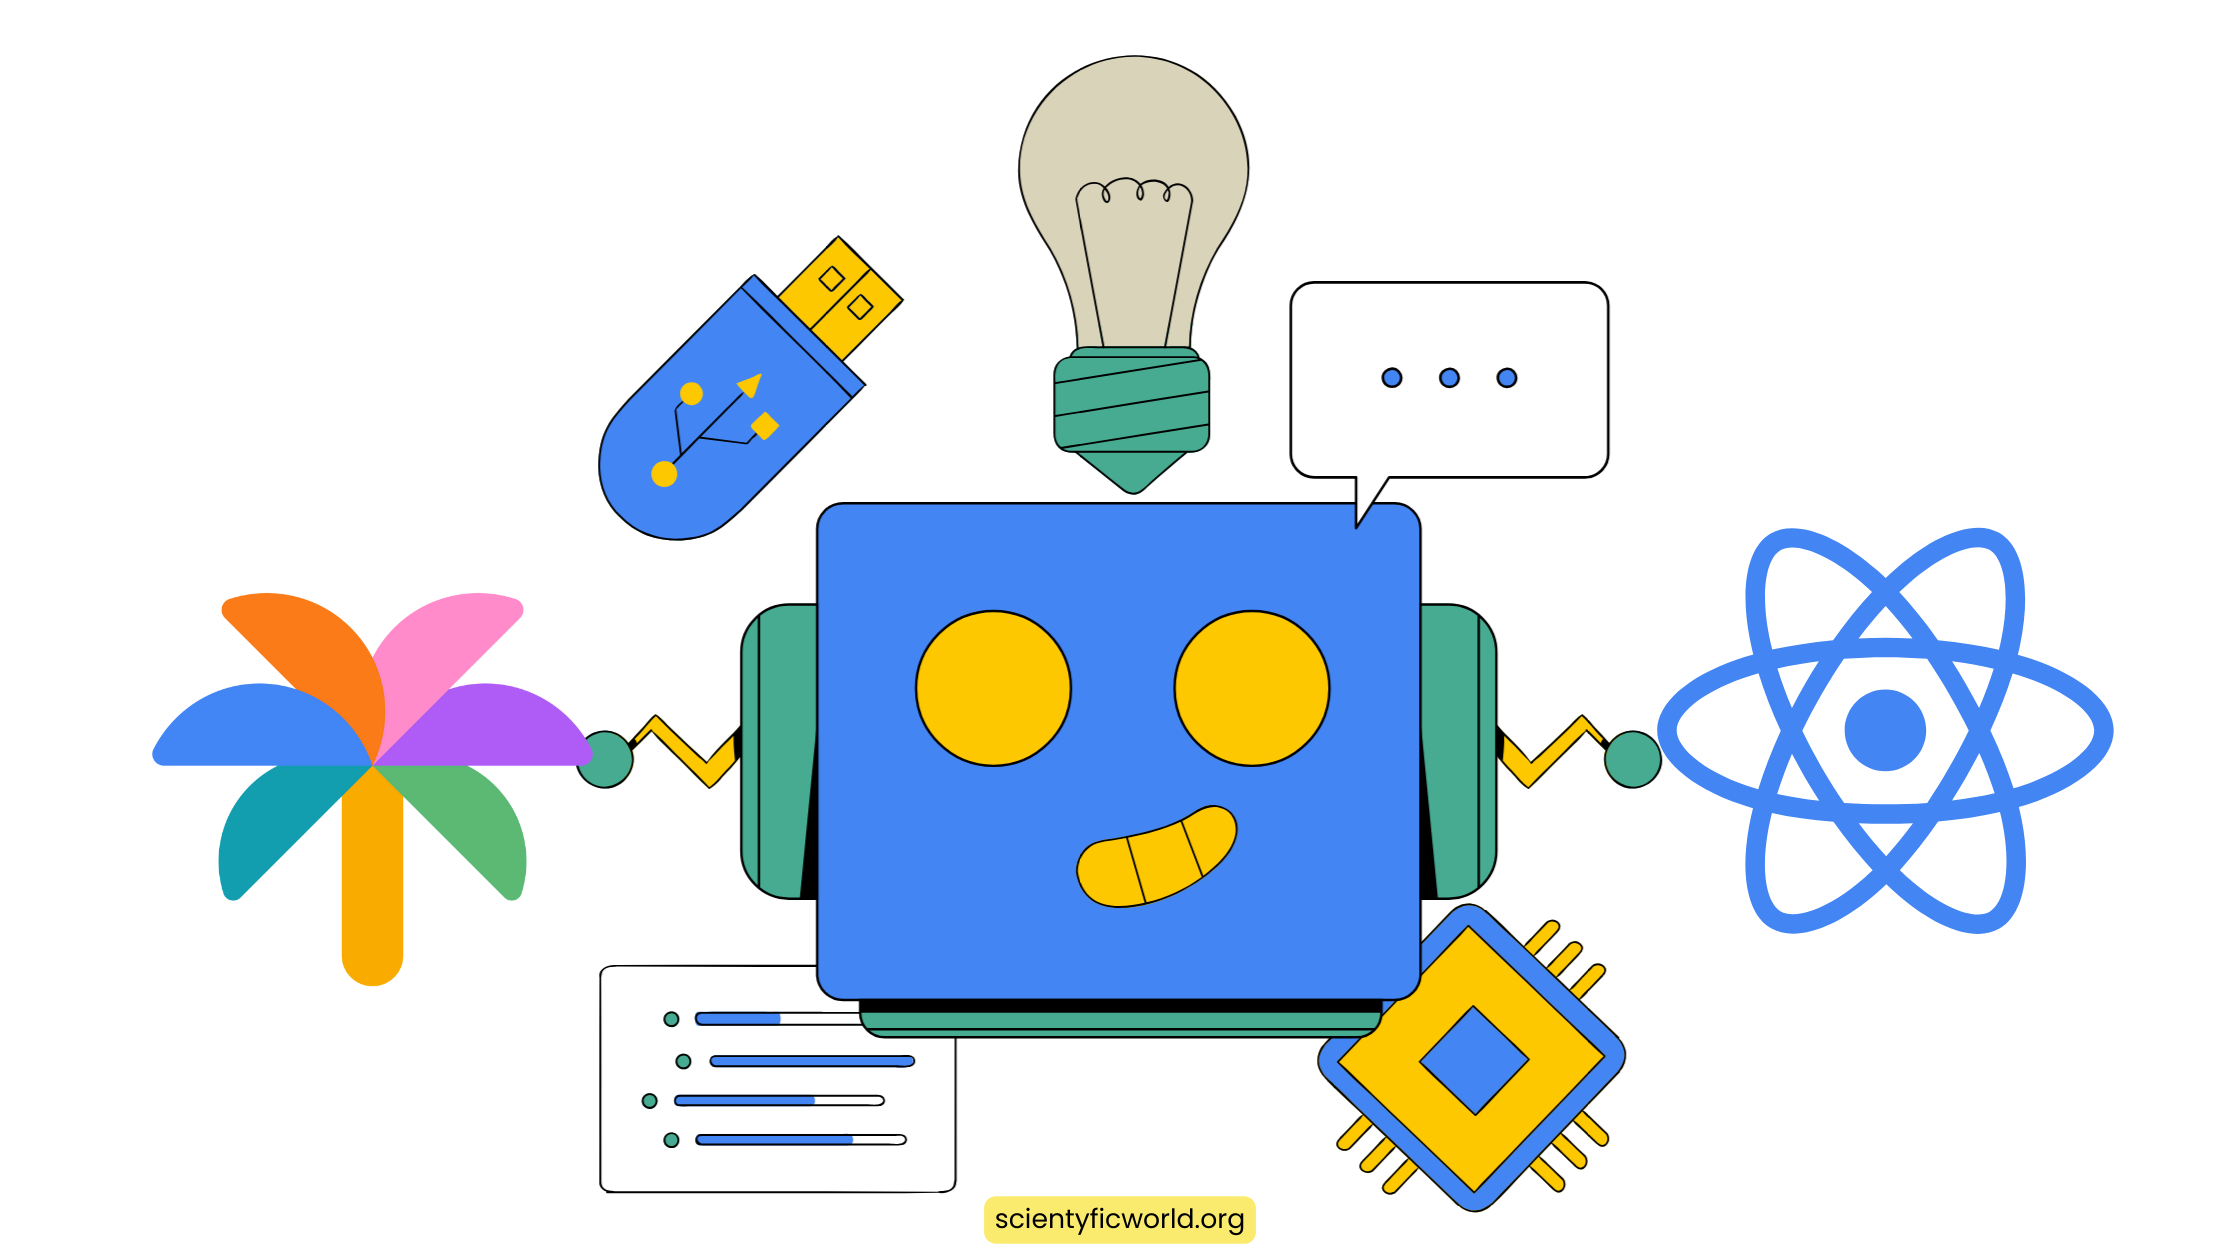
Welcome to this in-depth technical guide on building an AI chatbot with PaLM and React Native. In this step-by-step tutorial, we will take you through the process of creating a chatbot application from the ground up. Our target audience for this guide comprises professional developers and students already well-versed in React Native and have a strong foundation in API integration.
Chatbots have become an integral part of modern applications, enabling businesses to offer efficient and personalized customer support, automate repetitive tasks, and enhance user engagement. With the power of AI and Natural Language Processing (NLP), chatbots can understand and respond to user queries in a human-like manner, making them an invaluable addition to various industries.
I’m assuming that you are familiar with React Native and the fundamentals of API integration. I will not go into the details on introductory explanations or what React Native or the PaLM API are, as our focus is on technical implementation. We’ll dive straight into the technical aspects, including setting up the project, integrating the PaLM API, designing the chatbot’s user interface, handling user input, generating responses, and managing chat history.
Let’s get started on this exciting journey of building a chatbot that’s not only technically impressive but also holds the potential to revolutionize the way your applications interact with users.
Prerequisites:
Before we dive into the intricacies of building an AI chatbot with PaLM API and React Native, it’s essential to ensure that you meet the following prerequisites. This guide assumes that you are already well-acquainted with the foundations of React Native development and API integration. Here’s what you’ll need:
- Familiarity with React Native: You should have a strong grasp of React Native, a popular framework for building mobile applications. This includes knowledge of component-based development, state management, and navigation within React Native apps.
- Development Environment: Ensure you have a working development environment set up for React Native. This includes Node.js, npm (Node Package Manager), and an integrated development environment (IDE) like Visual Studio Code.
- Access to PaLM API: To integrate the PaLM (Pathways Language Model) API into your application, you will need access to the API key and endpoint from Google Makersuit. You should have this information ready before proceeding. If you don’t already have access, you can acquire it from the respective provider.
- Basic Understanding of APIs: A fundamental understanding of how APIs work and how to make HTTP requests using libraries like Axios is crucial. You should be familiar with making GET and POST requests to external services.
With these prerequisites in place, you’ll be well-prepared to follow along with the steps outlined in this guide. We won’t spend time on introductory explanations or definitions, as our focus here is on the technical aspects of building an AI chatbot using React Native and the PaLM API.
Now, let’s move on to setting up the project and creating the Chatbot component.
Setting Up the Project:
In this section, we’ll walk you through the process of setting up a new React Native project or using an existing one for building our AI chatbot. Ensure you have React Native and its dependencies installed on your system.
Creating a New React Native Project (Optional):
If you’re starting from scratch or prefer to create a new project for the chatbot, follow these steps:
- Open your terminal and navigate to the directory where you want to create the project.
- Run the following command to create a new React Native project:
npx react-native init ChatbotApp
Replace “ChatbotApp” with your preferred project name. - Change into the project directory:
cd ChatbotApp
- Now, you have a basic React Native project set up. You can proceed to integrate the chatbot into this project.
Installing Dependencies:
Regardless of whether you’re creating a new project or using an existing one, you’ll need to install some dependencies. These dependencies include Axios for making API requests, image picker utilities, and responsive screen dimensions.
To install these dependencies, run the following commands in your project directory:
npm install axios
npm install react-native-image-picker
npm install react-native-responsive-screenLinking Native Modules (for react-native-image-picker):
If you’re using the react-native-image-picker library, you’ll need to link the native modules to your project. Run the following command: npx react-native link react-native-image-picker
Here’s an example of how you might structure your project for better organization:
ChatbotApp/
├── android/
├── ios/
├── node_modules/
├── src/
│   ├── components/
│   │   ├── Chatbot.js
│   ├── constants/
│   │   ├── ... (other constants)
│   ├── utils/
│   │   ├── imgpick.js
│   ├── App.js
├── ...You can adapt this structure according to your preferences.
With your project set-up and dependencies installed, you’re ready to proceed to create the core of our chatbot: the Chatbot.js component. In the next section, we’ll delve into the details of creating this component.
Creating the Chatbot.js Component:
In this section, we’ll walk you through the process of creating the core component of our chatbot, Chatbot.js. This component will handle user interactions, display chat history, and interact with the PaLM API to generate responses.
1. Import Dependencies:
Start by importing the necessary dependencies at the top of your Chatbot.js file:
import React, { useState, useRef, useEffect } from "react";
import {
  View,
  Text,
  TextInput,
  Image,
  ScrollView,
  Pressable,
  ActivityIndicator,
  ToastAndroid,
  TouchableOpacity,
  KeyboardAvoidingView,
} from "react-native";
import axios from "axios";
import { icons, images, COLORS, SIZES, FONTS } from "../constants"; // Adjust import paths as needed
import {
  widthPercentageToDP as wp,
  heightPercentageToDP as hp,
} from "react-native-responsive-screen";
import {
  PaperAirplaneIcon,
  TrashIcon,
  CameraIcon,
} from "react-native-heroicons/outline";
import { pickImageFromGallery } from "../utils/imgpick";
import { MaterialIcons } from "@expo/vector-icons";
import Constants from "expo-constants";2. Define PaLM API Key:
Retrieve your PaLM API key from your project configuration or environment variables. Ensure it’s available as a constant:
const PALM_API_KEY = Constants.expoConfig.extra.palmKey; // Replace with your PaLM API key3. Create the Chatbot Component:
Define the Chatbot component function:
const Chatbot = ({ navigation }) => {
  // State variables for chat messages, user input, loading indicator, and image input
  const [messages, setMessages] = useState([]);
  const [inputText, setInputText] = useState("");
  const [inputImage, setInputImage] = useState("");
  const [isLoading, setLoading] = useState(false);

  // Ref for scrolling to the latest message
  const scrollViewRef = useRef();

  // Code for handling image selection from the device's gallery (You can include your image picker code here)
  const handleImage = async () => {
    // Use your image picker utility here
    let result = await pickImageFromGallery();
    if (!result.canceled) {
      setInputImage(result.assets[0].uri);
    }
  };

  // Function for generating text-based responses from the PaLM API
  const generateText = async () => {
    // Check if either text input or image input is provided
    if (!inputText.trim() && !inputImage) {
      return;
    }

    // Set loading indicator
    setLoading(true);

    // Define the PaLM API endpoint URL from your project configuration
    const apiUrl = Constants.expoConfig.extra.palmURL;

    // Create the request data based on input (text, image, or both)
    let requestData;

    // Code for constructing the API request based on input (text, image, or both)

    // ...

    // Add your request data construction code here

    // ...

    // Make the API request using Axios
    try {
      const response = await axios.post(
        `${apiUrl}?key=${PALM_API_KEY}`,
        requestData,
        {
          headers: {
            "Content-Type": "application/json",
          },
        }
      );

      // Handle API response and update chat messages
      if (response.status === 200) {
        // Extract bot's response and update chat messages
        // Add your response handling code here

        // ...

        // Clear input fields and loading indicator
        setInputText("");
        setInputImage(null);
        setLoading(false);
      } else {
        // Handle API request failure
        // Add your error handling code here

        // ...

        setLoading(false);
      }
    } catch (error) {
      // Handle API request error
      // Add your error handling code here

      // ...

      setLoading(false);
    }
  };

  // Add code for rendering chat history, user input, and handling user interactions

  // ...

  return (
    // JSX code for rendering the chatbot interface

    // ...
  );
};

export default Chatbot;4. Complete the Component:
Continue to add code for rendering the chat history, user input, and handling user interactions within the Chatbot component. Ensure you include the appropriate UI components and styling for a user-friendly chatbot interface.
In the upcoming sections of this guide, we’ll delve into the details of integrating the PaLM API, designing the user interface, handling user input, and generating responses.
Integration PaLM and React Native:
In this section, we’ll delve into the crucial step of integrating the PaLM API into our chatbot. This integration will empower our chatbot with natural language processing capabilities, allowing it to understand user queries and provide meaningful responses.
1. Configure API Endpoint:
We’ve already defined our PaLM API key in the previous section. Now, let’s configure the API endpoint URL. You can usually find this information in your project configuration or PaLM API documentation.
const apiUrl = Constants.expoConfig.extra.palmURL; // Define the PaLM API endpoint URL2. Construct API Request Data:
The structure of the API request data depends on whether the user provides text input, image input, or both. Let’s construct the requested data accordingly.
Case 1: Both Text and Image Input:
if (inputText.trim() && inputImage) {
  requestData = {
    prompt: {
      context:
         "You are a seasoned software engineer with expertise in building cutting-edge AI chatbots. Your knowledge spans various programming languages, natural language processing libraries, and neural networks. Your chatbot is designed to accept text and image inputs for advanced interactions.",
      examples: [],
      messages: [
        {
          content: `Text: ${inputText}`,
        },
        {
          content: `Image: ${inputImage}`,
        },
      ],
    },
    temperature: 0.25,
    top_k: 40,
    top_p: 0.95,
    candidate_count: 1,
  };
}Case 2: Text Input Only:
else if (inputText.trim()) {
  requestData = {
    prompt: {
      context:
         "You are a seasoned software engineer with expertise in building cutting-edge AI chatbots. Your knowledge spans various programming languages, natural language processing libraries, and neural networks. Your chatbot is designed to accept text and image inputs for advanced interactions.",
      examples: [],
      messages: [{ content: inputText }],
    },
    temperature: 0.25,
    top_k: 40,
    top_p: 0.95,
    candidate_count: 1,
  };
}Case 3: Image Input Only:
else if (inputImage) {
  requestData = {
    prompt: {
      context:
         "You are a seasoned software engineer with expertise in building cutting-edge AI chatbots. Your knowledge spans various programming languages, natural language processing libraries, and neural networks. Your chatbot is designed to accept text and image inputs for advanced interactions.",
      examples: [],
      messages: [
        {
          content: `Image: ${inputImage}`,
        },
      ],
    },
    temperature: 0.25,
    top_k: 40,
    top_p: 0.95,
    candidate_count: 1,
  };
}These API request structures are designed to provide context to the PaLM model and retrieve meaningful responses based on user inputs.
3. Make the API Request: Now, let’s use Axios to make the API request to the PaLM API with the constructed request data:
try {
  const response = await axios.post(
    `${apiUrl}?key=${PALM_API_KEY}`,
    requestData,
    {
      headers: {
        "Content-Type": "application/json",
      },
    }
  );

  // Handle API response and update chat messages
  if (response.status === 200) {
    if (
      response.data &&
      response.data.candidates &&
      response.data.candidates.length > 0
    ) {
      const botResponse = response.data.candidates[0].content;

      // Add the user's input to the messages array
      const newUserMessage = {
        id: messages.length + 1,
        text: inputText,
        sender: "user", // Set the sender as 'user'
        timestamp: new Date().getTime(),
      };

      // Add the bot's response to the messages array
      const newBotMessage = {
        id: messages.length + 2,
        content: botResponse,
        sender: "bot", // Set the sender as 'bot'
        timestamp: new Date().getTime(),
      };

      setMessages([...messages, newUserMessage, newBotMessage]);
      setInputText("");
      setInputImage(null);
      setLoading(false);
    } else {
      ToastAndroid.show("Response structure is not as expected.");
      setLoading(false);
    }
  } else {
    ToastAndroid.show(
      "Google Cloud API request failed with status:",
      response.status
    );
    setLoading(false);
  }
} catch (error) {
  ToastAndroid.show(
    "An error occurred while making the Google Cloud API request:",
    error
  );
  setLoading(false);
}In the code above:
- We check if the API response status is 200, indicating a successful response.
- If the response structure matches our expectations, we extract the bot’s response and format it for display.
- We add the user’s input and the bot’s response to the
messagesarray, which holds our chat history. - We clear the input fields, reset the loading state, and trigger a re-render to display the updated chat.
4. Displaying Updated Chat Messages:
We’ve updated our chat messages, but how do we display them to the user? We’ll use a ScrollView to render the chat history and ensure that the most recent messages are visible.
<ScrollView
  style={{ height: hp(100), width: wp(100) }}
  ref={scrollViewRef}
  onContentSizeChange={() =>
    scrollViewRef.current.scrollToEnd({ animated: true })
  }
  className="space-y-4 m-6 flex-row overflow-y-scroll"
  bounces={false}
  showsVerticalScrollIndicator={false}
>
  {messages.map((message, index) => {
    if (message.sender === "bot") {
      // Code for rendering bot's responses
    } else {
      // Code for rendering user's messages
    }
  })}
</ScrollView>In this code:
- We use a
ScrollViewto create a scrollable chat interface. - The
onContentSizeChangeprop ensures that the chat view automatically scrolls to the latest message. - We map through the
messagesarray and conditionally render messages based on the sender.
In the next sections, we’ll focus on other aspects of our chatbot application, such as designing the user interface and handling user input effectively.
User Interface Design:
In this section, we’ll explore the design aspects of our chatbot’s user interface. Crafting an intuitive and visually appealing interface is essential for a seamless and engaging user experience.
1. Design Principles:
When designing the user interface for your chatbot, keep the following design principles in mind:
- Simplicity: Keep the interface clean and uncluttered. Users should easily understand how to interact with the chatbot.
- Consistency: Maintain a consistent design throughout the application. Use a cohesive colour scheme, typography, and layout.
- User-Friendly: Prioritize user-friendliness. Ensure that users can send messages, view responses, and clear the chat history effortlessly.
2. UI Components:
Let’s take a closer look at some of the essential UI components used in our chatbot:
- Message Bubbles: Use message bubbles to display both user and chatbot messages. You can style them differently to distinguish between user and chatbot responses.
- Image Display: If your chatbot supports image responses, use an image component to display images sent by the chatbot.
- Input Field: Provide a text input field where users can type their queries or messages to the chatbot.
- Buttons/Icons: You may include buttons or icons for actions like sending messages, uploading images, or clearing chat history.
3. Styling Considerations:
Here are some styling considerations for your chatbot’s user interface:
- Colour Scheme: Choose a colour scheme that aligns with your application’s branding. Ensure good contrast for text readability.
- Typography: Select readable fonts and font sizes for both messages and user input.
- Message Layout: Consider aligning chatbot messages to the left and user messages to the right for clarity.
- Image Handling: If your chatbot supports image responses, ensure images are appropriately sized and displayed within message bubbles.
4. Responsive Design: Make sure your chatbot’s user interface is responsive to different screen sizes and orientations. You can use libraries like react-native-responsive-screen to ensure your UI components adapt to various device dimensions.
5. Testing and Iteration: After implementing your initial design, thoroughly test the chatbot’s user interface on different devices and screen sizes. Gather feedback from users or colleagues and be open to making iterative improvements based on their input.
6. Implementation Example:
Below is an example of how you can structure the UI components in your Chatbot.js file. Remember to adapt this code to your specific design preferences and requirements:
// Render chat history
<ScrollView
  style={{ height: hp(100), width: wp(100) }}
  ref={scrollViewRef}
  onContentSizeChange={() =>
    scrollViewRef.current.scrollToEnd({ animated: true })
  }
  className="space-y-4 m-6 flex-row overflow-y-scroll"
  bounces={false}
  showsVerticalScrollIndicator={false}
>
  {messages.map((message, index) => {
    if (message.sender === "bot") {
      if (message.content.includes("https")) {
        // AI image response
        return (
          // Render image response
        );
      } else {
        // PaLM text response
        return (
          // Render text response
        );
      }
    } else {
      // User input text
      return (
        // Render user input
      );
    }
  })}
</ScrollView>

// Render input field and send button
<View className="absolute bottom-12 w-full">
  <View className="flex-row items-center justify-center m-4 bg-white rounded-full align-middle">
    {/* Upload Image */}
    <Pressable
      title="Upload"
      onPress={() => {
        handleImage();
      }}
      className="m-4"
    >
      {/* Render image upload icon */}
    </Pressable>

    {/* Display selected image (if any) */}

    {/* Input Text */}
    <TextInput
      style={{
        ...FONTS.body3,
      }}
      className="bg-white rounded-full py-2.5 px-6 mr-2 ml-2 flex-1 text-gray-700 "
      placeholder="Ask to the AI Doctor..."
      value={inputText}
      onChangeText={(text) => setInputText(text)}
    />

    {/* Send Button */}
    <Pressable title="Ask" onPress={generateText} className="m-4">
      {isLoading ? (
        <ActivityIndicator size="small" color="black" />
      ) : (
        <PaperAirplaneIcon size="25" color="black" />
      )}
    </Pressable>
  </View>
</View>This code demonstrates how to structure your chatbot’s user interface, including displaying chat history, user input, and image responses. Adjust the styling and layout to match your design preferences.
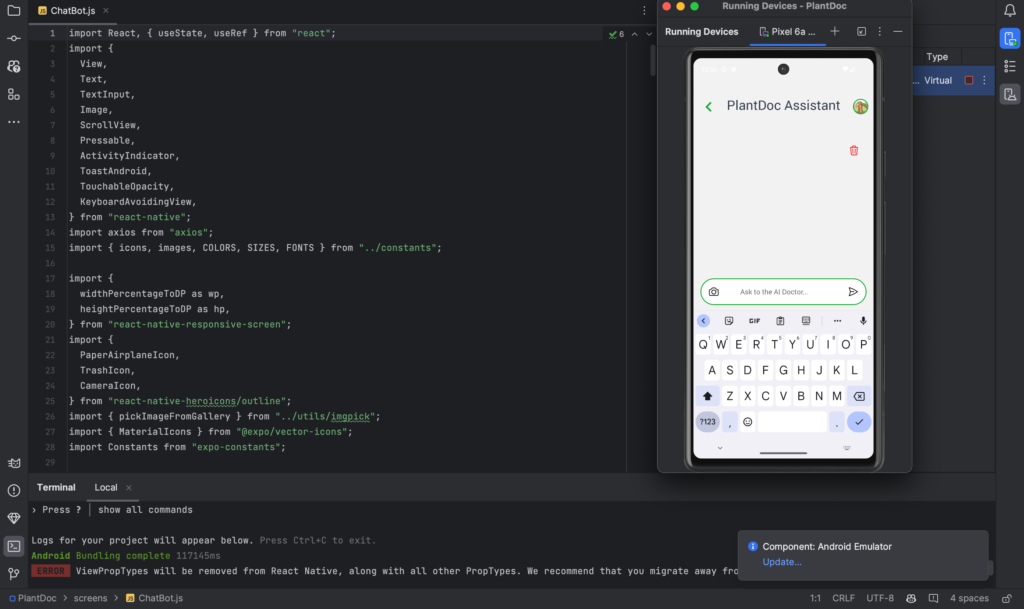
With careful attention to user interface design, your chatbot will not only be functional but also visually appealing and user-friendly.
Managing Chat History and Displaying Responses:
In this section, we’ll focus on managing the chat history effectively and displaying bot responses to users. This is a crucial aspect of creating a chatbot that provides a seamless conversational experience.
1. Updating Chat History: To create a natural conversation flow, it’s essential to update the chat history with both user inputs and bot responses. We’ve set up a messages state to manage the chat history:
const [messages, setMessages] = useState([]);We add these messages to the state whenever a user sends a message or the bot generates a response. Here’s how we update the chat history:
// Inside generateText function, after receiving the bot's response
const newUserMessage = {
  id: messages.length + 1,
  text: inputText,
  sender: "user",
  timestamp: new Date().getTime(),
};

const newBotMessage = {
  id: messages.length + 2,
  content: botResponse,
  sender: "bot",
  timestamp: new Date().getTime(),
};

setMessages([...messages, newUserMessage, newBotMessage]);This code snippet adds the user’s message and the bot’s response to the chat history.
2. Displaying Messages: To display messages, we use a ScrollView component. It ensures that as new messages are added, the chat interface scrolls to the latest message, providing a natural chat experience. We’ve already implemented this in the UI design section.
<ScrollView
  style={{ height: hp(100), width: wp(100) }}
  ref={scrollViewRef}
  onContentSizeChange={() =>
    scrollViewRef.current.scrollToEnd({ animated: true })
  }
  // Rest of the ScrollView configuration
>
  {/* Mapping through messages to display them */}
</ScrollView>3. Conditional Rendering: Messages can be of two types: user messages and bot messages. We conditionally render them differently for clarity. Here’s how we handle this:
{messages.map((message, index) => {
  if (message.sender === "bot") {
    if (message.content.includes("https")) {
      // Render image response
    } else {
      // Render text response
    }
  } else {
    // Render user input
  }
})}We check the sender property of each message to determine whether it’s from the user or the bot. Then, we render it accordingly, including support for displaying images if the bot response contains an image URL.
4. Timestamps: Adding timestamps to messages can enhance the chat experience. You can include timestamps to show when each message was sent. This adds context to the conversation and helps users track the conversation flow.
5. Clearing Chat History: As mentioned earlier, you can provide a “Clear” button for users to clear their chat history if needed. This ensures that the chat interface remains tidy.
By effectively managing chat history and displaying responses, you create a chatbot that users can engage with seamlessly. The conversation flow becomes intuitive, and users can easily follow the interaction.
Conclusion:
In this comprehensive guide, we’ve explored the process of building an AI chatbot using the PaLM API and React Native. From setting up the project and designing the user interface to handling user input, image uploads, and managing chat history, we’ve covered essential aspects of creating a functional chatbot.
By integrating the PaLM API, you’ve equipped your chatbot with the power of natural language processing, making it capable of understanding and responding to user queries related to plants and their care.
As a developer or student in the field of technology, you now have the knowledge and tools to create your own AI chatbot. This project not only enhances your technical skills but also opens up possibilities for various applications, from plant-related assistance to broader conversational AI projects.
Remember that the key to building a successful chatbot lies in continuous testing, iteration, and user feedback. As technology evolves, so do the capabilities of chatbots. Stay curious, explore new possibilities, and keep improving your chatbot to provide valuable interactions for users.
Thank you for embarking on this journey to create an AI chatbot with PaLM and React Native. The world of conversational AI holds endless opportunities, and you’re now equipped to explore them.
Happy Coding 👨🏻💻

