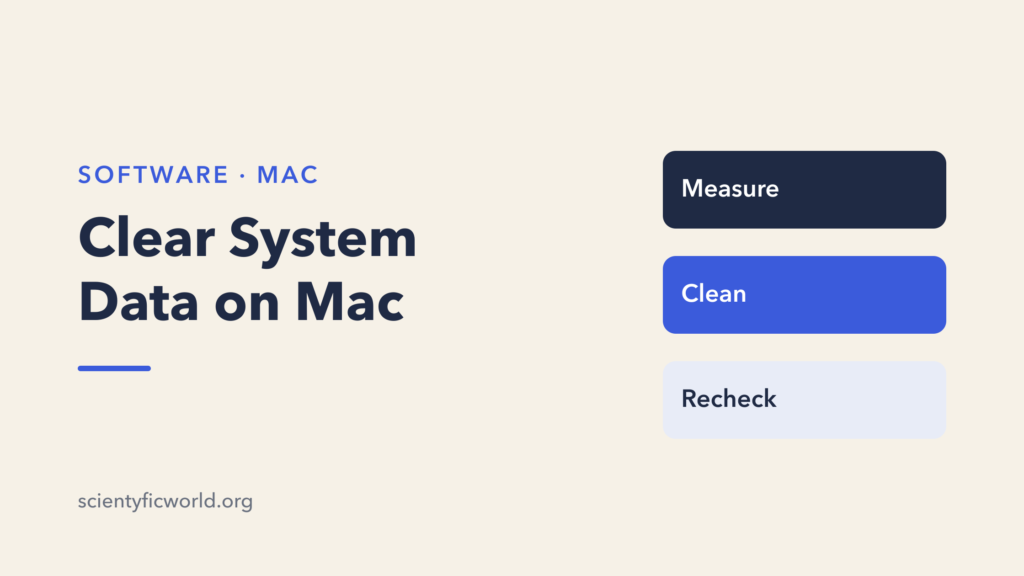
System Data is the grey bar in your Mac’s storage chart that keeps growing and that Finder will not let you open. This guide shows how to clear System Data on Mac in two ways: the quick way, with a free app that finds and groups the files for you, and the manual way, with Terminal and the tools built into macOS. Both start by measuring, so you delete based on numbers, not guesses.
Disclosure: OneClean is a free Mac cleaner built by the founder of Scientyfic World. We recommend it here because it does the tedious part of this job, but it is optional: Method 2 uses only tools that ship with macOS, and we state the app’s limits below.
TL;DR
The quick way (OneClean):
- Install OneClean (free, macOS 14 or later) and approve it once in System Settings > Privacy & Security.
- Check the Internal Disk view to see what is using space.
- Run a Surface Clean (caches, logs, temporary files) or a Deep Clean (also large files, duplicates and system caches).
- Review each group, untick anything you want to keep, then click Clean. Items go to the Bin, so you can put them back.
- Empty the Bin when you are sure, and handle device backups and Time Machine snapshots with the manual steps.
The manual way: check Storage settings, measure folders with du, restart, delete old device backups and identified app caches, clear developer files, then empty the Trash. Full steps are in Method 2.
What is System Data on Mac?
Apple describes System Data (called Other in older macOS versions) as a general category for Apple and third-party files that do not fit any more specific category, such as Apps, Documents or Photos. See Apple’s Free up storage space on Mac page. In practice that means:
- App and browser caches
- Log files
- Swap and sleep image files used by virtual memory
- Time Machine local snapshots
- iPhone and iPad backups made by Finder
- Developer files: Xcode build data, simulators, Docker or Android emulator disk images
- Files in system and app support folders that macOS cannot classify
Some of these are safe to delete, some are rebuilt automatically, and some are essential to macOS. That is why both methods below start by measuring what is actually there.
Method 1: Clear System Data with OneClean (the quick way)
Clearing System Data by hand means finding the right folders, measuring them, working out what each one belongs to and deleting carefully. OneClean does that legwork for you: it scans the usual System Data locations, groups what it finds by category with sizes, and lets you decide what goes. It never removes anything without asking.
Step 1: Install OneClean and approve it once
- Download OneClean from oneclean.scientyficworld.org, open
OneClean.dmgand drag the app into Applications. - Open it. Because OneClean is not yet notarized by Apple, macOS says it cannot check the app. Click Done, not Move to Bin.
- Go to System Settings > Privacy & Security, scroll down and click Open Anyway next to the OneClean message, then confirm with your password.
- Open OneClean again. You will not be asked again.
The full walkthrough with screenshots of the alert is on the OneClean install guide.
Step 2: See what is using space
The Dashboard shows how much can be cleaned, plus storage for your Mac and any connected external disks. Open the Internal Disk view to see which folders and files take up the most space. This replaces the Terminal measuring in Method 2 and makes it obvious whether your System Data is mostly caches, large forgotten files or something else.
Step 3: Run a Surface Clean or a Deep Clean
- Surface Clean looks for app caches, logs and temporary files: the parts of System Data that are safe to remove and get rebuilt when needed. Start here.
- Deep Clean also looks for large files, duplicate files and system caches. Use it when a Surface Clean did not free enough space, and review its results more carefully, since large files and duplicates can be things you want to keep.
You start every scan yourself; nothing runs or deletes in the background.
Step 4: Review, then clean
Results are grouped by category with their size. Open a group to see exactly which files are in it and untick anything you want to keep. Then click Clean and confirm. By default removed items go to the Bin, so if an app misbehaves afterwards you can open the Bin, select the files and choose Put Back. Space is only freed for good when you empty the Bin, which OneClean’s Tools view can also do.
Step 5: Finish the parts a cleaner should not touch
Some System Data needs a decision only you can make. Delete old iPhone and iPad backups from Finder (Method 2, Step 4), let macOS manage Time Machine local snapshots (Step 5), and remove developer data such as unused simulators or Docker images with their own tools (Step 7). Then restart your Mac to clear swap files.
OneClean’s limits
OneClean is a young app, and you should know what it is not: it is a 1.0 release, it needs macOS 14 Sonoma or later, it is not yet notarized by Apple (hence the one-time approval), and it does not scan for malware. It is free with every feature included, needs no account and, according to its website, sends no files or usage data off your Mac. As with any cleaner, read the scan results before you confirm.
We wrote this section from OneClean’s published documentation. The Terminal output in Method 2 is from our own test Mac; we did not run a OneClean scan for this article, so we do not quote before-and-after numbers for it.
Method 2: Clear System Data on Mac manually
If you prefer to see every file yourself, or you only need to clear one specific thing, these steps use only what ships with macOS. Every Terminal command is read-only unless we say otherwise.
Step 1: Check how big System Data is
On macOS Ventura 13 or later, choose Apple menu > System Settings, click General in the sidebar, then click Storage. Wait for the bar to finish calculating before you read the numbers. On older macOS versions the same chart is under About This Mac > Storage.
You can click the info button next to other categories to review and delete files, but System Data itself cannot be opened from there. That is what the next step is for.
Step 2: Measure what is inside System Data with Terminal
Open Terminal (Applications > Utilities) and paste this loop. It only reads folder sizes with du; it does not change anything:
for d in ~/Library/Caches ~/Library/Logs /Library/Caches /Library/Logs \
  ~/Library/Application\ Support/MobileSync/Backup \
  ~/Library/Developer/Xcode/DerivedData ~/Library/Developer/CoreSimulator \
  /private/var/vm ~/.Trash; do
  printf "%s: " "$d"
  if [ -e "$d" ]; then du -sh "$d" 2>/dev/null | cut -f1; else echo "not present"; fi
done
Here is the output from the Mac we tested on (macOS 27.2.1, run in zsh on 16 November 2026, home folder renamed to you):
/Users/you/Library/Caches: 1.5G
/Users/you/Library/Logs: 324K
/Library/Caches:  11M
/Library/Logs:  82M
/Users/you/Library/Application Support/MobileSync/Backup: not present
/Users/you/Library/Developer/Xcode/DerivedData:  12K
/Users/you/Library/Developer/CoreSimulator:  20K
/private/var/vm: 2.0G
/Users/you/.Trash:   0B
On this Mac the biggest items were user caches (1.5 GB) and swap files in /private/var/vm (2.0 GB). There were no device backups and almost no Xcode data. Your numbers will be different, which is the point: spend your time on the folders that are actually large.
To see which apps own the largest caches, run:
du -sh ~/Library/Caches/* 2>/dev/null | sort -h | tail -5On our test Mac the top five were an app updater cache (626 MB), a browser cache (326 MB), two developer tool caches and Apple’s GeoServices location cache (50 MB). Each folder name usually tells you which app it belongs to.
Step 3: Restart your Mac
/private/var/vm holds swap files that macOS uses when RAM is full. They are recreated after a restart, and some temporary files under /private/var/folders are cleaned up at the same time. Restarting is the safest way to reclaim this space: never delete files in either folder by hand.
Apple also notes that starting up in safe mode clears some system caches, which can help if you need temporary space for a macOS update. We did not restart or boot into safe mode for this article, so we cannot give you before-and-after numbers for these two steps.
Step 4: Delete old iPhone and iPad backups
Device backups can each be tens of gigabytes and are counted under System Data. Following Apple’s backup management guide:
- Connect the device, or open Finder (or the Apple Devices app) if the device has been backed up before.
- Select the device in the Finder sidebar and open the General tab.
- Click Manage Backups.
- Right-click a backup you no longer need and choose Delete, then click OK.
Apple warns that a deleted backup cannot be recovered, so keep at least one recent backup of every device you still use. Backups live in ~/Library/Application Support/MobileSync/Backup/; the du loop above shows whether that folder exists. It did not exist on our test Mac, so we could not run this deletion ourselves.
Step 5: Check Time Machine local snapshots
If Time Machine is on, macOS keeps local snapshots on your internal disk. List them with:
tmutil listlocalsnapshots /On our Mac it printed only the header, meaning there were no snapshots:
Snapshots for disk /:According to Apple’s Time Machine local snapshots page, macOS deletes snapshots automatically as they age or when space is needed, and counts their space as available storage. In most cases you can leave them alone. If you need the space right now, Apple’s suggested route is to set Time Machine’s backup frequency to Manually, wait a few minutes, then switch automatic backups back on.
The Terminal alternative deletes the snapshot for one date, using the timestamp shown by the list command (the date below is an example):
sudo tmutil deletelocalsnapshots 2026-11-16-093000We confirmed this subcommand in man tmutil but did not run it, because there were no snapshots to delete.
Step 6: Clear app caches you can identify
Caches in ~/Library/Caches are rebuilt when needed, so deleting a specific app’s cache is usually safe. Do it carefully:
- Quit the app whose cache you want to clear.
- In Finder, press Shift-Command-G and go to
~/Library/Caches. - Open the folder for that app and move its contents to the Trash. Leave the folder itself in place.
- Reopen the app and check it works before emptying the Trash.
Skip /Library/Caches and anything under /System; on our Mac the system-wide cache folder was only 11 MB anyway. Browser caches are best cleared from the browser’s own settings, which also avoids signing you out by accident. Log folders are rarely worth the effort: ours were 324 KB (user logs) and 82 MB (system logs).
We did not delete any cache files on our test Mac; we only measured them.
Step 7: Developer files (Xcode, simulators, Docker, Android)
On a developer’s Mac these are often the largest part of System Data:
- Xcode DerivedData (
~/Library/Developer/Xcode/DerivedData): build products and indexes. Xcode rebuilds them on the next build, so the folder’s contents are safe to delete while Xcode is closed. - Simulators (
~/Library/Developer/CoreSimulator): remove simulators that no longer match an installed SDK with the command below. - Docker Desktop: images and volumes live in one large disk image. Remove unused images and volumes from Docker Desktop or with Docker’s prune commands rather than deleting the file. If you run local containers, our note on avoiding port conflicts in Docker covers the setup this applies to.
- Android emulators: each virtual device in
~/.android/avdcan take several gigabytes. Delete devices you no longer use from Android Studio’s Device Manager. See our guide to the Android emulator on macOS.
xcrun simctl delete unavailablexcrun simctl help delete on our Mac confirms that unavailable removes devices not supported by the current Xcode SDK. We did not run the delete, and our Mac had no Docker or Android emulator data, so those two items are based on the tools’ documented behavior, not on our test.
Step 8: Empty the Trash and recheck
Files you move to the Trash still use disk space until you empty it. Empty it from the Finder menu (Finder > Empty Trash), then return to System Settings > General > Storage and give the chart a minute to recalculate.
What not to delete when you clear System Data on Mac
| Location | Why to leave it alone |
|---|---|
/System | macOS itself. It is protected, and changing it can stop the Mac from starting. |
/private/var/vm | Swap and sleep image files. Restart instead. |
/private/var/folders | Live temporary files for running apps. macOS cleans it up. |
Whole ~/Library subfolders | Many hold settings and app data, not caches. Delete contents of known cache folders only. |
| Your last device backup | Deleted backups cannot be recovered. |
Other cleaner apps
OneClean is not the only option. For a wider comparison, including notarized and open-source apps, see our lists of the best Mac cleaner software and free CleanMyMac alternatives. Whatever app you use, review what it plans to delete before you confirm.
Conclusion
You cannot open System Data directly, but you can see what is inside it. The quickest route is to let OneClean scan, group and size the files, review the results and clean what you do not need, with everything going to the Bin first. If you prefer the manual route, check Storage settings, run the read-only du loop and target the folders that are actually big. Either way, delete old device backups yourself, restart to clear swap, let macOS handle snapshots and leave system folders alone.
FAQ
Why is System Data so large on my Mac?
It collects files that fit no other category: caches, logs, swap files, Time Machine local snapshots, iPhone and iPad backups and developer data such as Xcode builds or container disk images. Large backups and developer files are the usual reasons it reaches tens of gigabytes.
What is the easiest way to clear System Data on Mac?
Use a cleaner that shows you what it found before removing anything. OneClean, a free app built by the founder of this site, scans caches, logs and temporary files (Surface Clean) or also large files, duplicates and system caches (Deep Clean), groups them by size and moves removed items to the Bin so you can restore them.
Is it safe to delete System Data on Mac?
Only parts of it. Old device backups, identified app caches, Xcode DerivedData and unused simulators are safe to remove. Never delete files in /System, /private/var/vm or /private/var/folders by hand.
Does restarting a Mac reduce System Data?
It can. Swap files in /private/var/vm and some temporary files are recreated after a restart, so the System Data figure often drops. How much depends on how long the Mac has been running.
Why does macOS warn me when I open OneClean?
OneClean is not yet notarized by Apple, so macOS cannot check it automatically. Click Done, then approve it once with Open Anyway in System Settings > Privacy & Security. The app still asks before removing anything.
Do I need a cleaner app to clear System Data?
No. Every manual step in this guide uses tools built into macOS. A cleaner app saves time by finding and grouping the files, and you should still review what it will delete.