In the rapidly evolving world of web development, staying updated with the latest architectures and technologies is crucial for developers. One such powerful architecture that has gained significant popularity is MERN stack. By seamlessly integrating MongoDB, Express.js, React, and Node.js, MERN stack empowers developers to build robust and scalable web applications.
In this comprehensive guide, we will delve into the depths of MERN stack architecture and explore its various components. But before we dive in, let’s take a moment to recall our previous exploration of JAM stack architecture. If you haven’t read about JAM stack yet, you can check out our detailed guide here. Now, let’s embark on our journey of unraveling the potentials of MERN stack and learn how it revolutionizes the web development landscape.
What is MERN stack?
MERN stack is a full-stack JavaScript framework that combines four powerful technologies to facilitate the development of modern web applications. Let’s take a closer look at each component of the MERN stack:
- MongoDB: MongoDB is a popular NoSQL database that stores data in a flexible, document-based format known as JSON-like BSON. Its scalability, high performance, and ease of use make it an ideal choice for handling large volumes of data. MongoDB allows developers to store, retrieve, and manipulate data using a flexible schema, enabling seamless integration with the rest of the MERN stack.
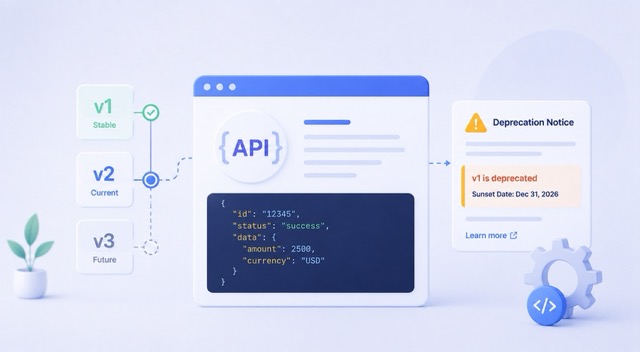
- Express.js: Express.js is a minimalistic and flexible web application framework for Node.js. It simplifies the process of building web servers and APIs by providing a range of features and middleware. Express.js allows developers to handle HTTP requests, define routes, and manage middleware functions for authentication, data validation, and more. Its simplicity and extensive ecosystem make it a preferred choice for creating server-side components in MERN stack applications.
- React: React, developed by Facebook, is a popular JavaScript library for building user interfaces. It follows a component-based architecture, allowing developers to create reusable UI components that efficiently update and render as the application state changes. React’s virtual DOM (Document Object Model) enables efficient rendering, resulting in faster and more responsive user interfaces. Its declarative syntax and rich ecosystem of libraries and tools make React a powerful choice for front-end development in the MERN stack.
- Node.js: Node.js is a JavaScript runtime built on Chrome’s V8 engine that allows developers to execute JavaScript code outside the browser. It provides a scalable and event-driven architecture that enables building high-performance, server-side applications. Node.js facilitates seamless communication between the front-end and back-end components of a MERN stack application. It offers a wide range of libraries and packages from its robust npm (Node Package Manager) ecosystem, making it a versatile and efficient choice for server-side development.
By combining these four technologies, MERN stack enables end-to-end JavaScript development, from the front-end to the back-end. The flexibility, scalability, and efficiency of MERN stack make it a popular choice for building modern web applications that require real-time updates, interactive user interfaces, and seamless data management. In the next section, we will explore the advantages of using MERN stack in more detail.
Architectural Structure:
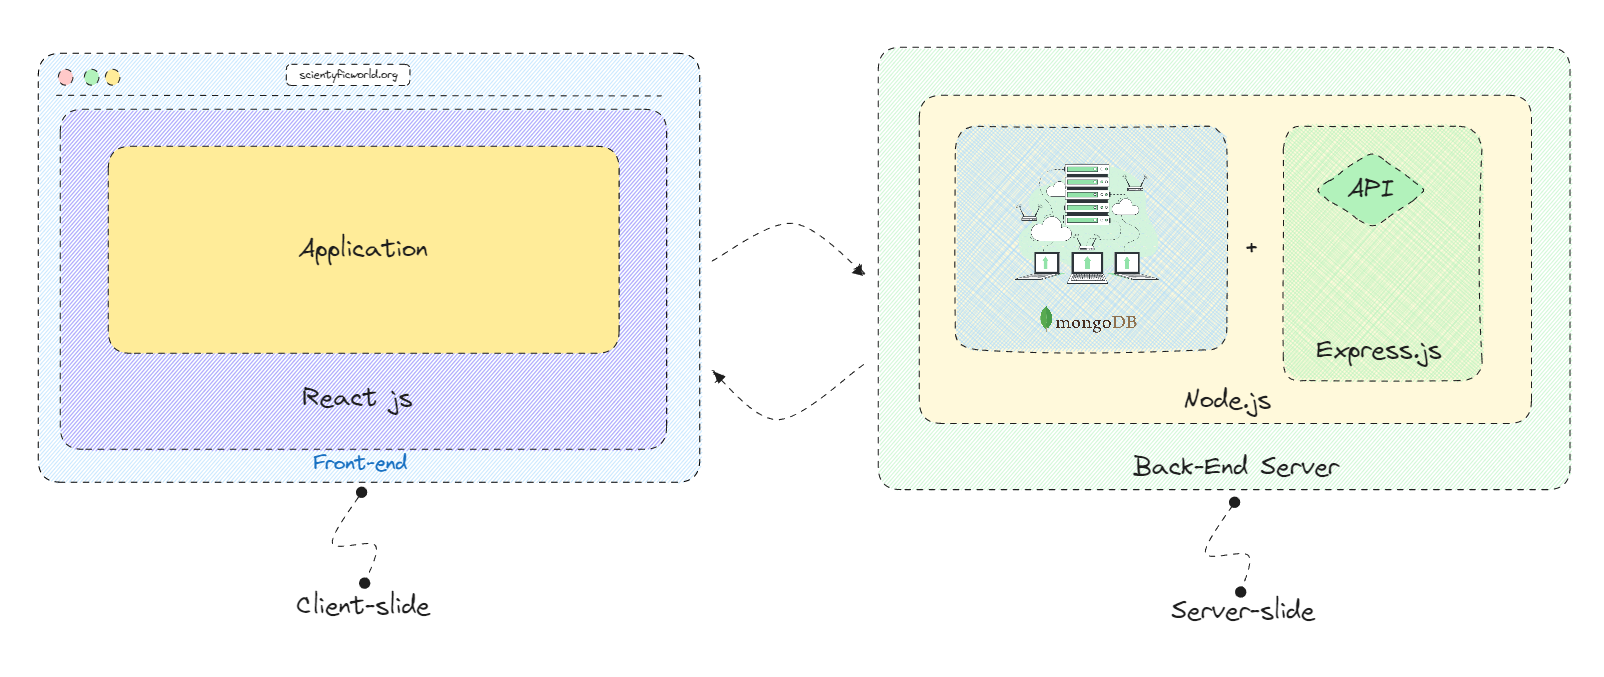
The MERN stack architecture follows a structured and modular approach to web application development. Let’s dive into the architectural components and their roles within the MERN stack:
- Front-end Components:
The front-end of a MERN stack application is built using React, the JavaScript library for user interface development. React follows a component-based architecture, where each UI element is encapsulated within a reusable component. These components, composed together, form the user interface of the application. React utilizes a virtual DOM, which efficiently updates and renders components as the application state changes. This approach results in fast and responsive user interfaces. - Back-end Components:
The back-end of a MERN stack application consists of two main components: Node.js and Express.js. Node.js provides the runtime environment for executing JavaScript code on the server-side. It enables handling of HTTP requests, file operations, and database interactions. Express.js, built on top of Node.js, is a web application framework that simplifies the process of building server-side components. It handles routing, middleware management, and request/response handling, making it easier to develop APIs and handle server-side logic. - Data Storage and Management:
MongoDB, a NoSQL database, serves as the data storage component in the MERN stack architecture. It provides a flexible and scalable solution for storing and retrieving data. MongoDB’s document-based structure allows for easy manipulation of data using JSON-like BSON. It integrates seamlessly with the Node.js server, enabling efficient data retrieval and storage operations. Developers can use MongoDB’s powerful querying capabilities to perform complex searches and aggregations on the data. - Communication and API Integration:
The MERN stack architecture employs RESTful APIs for communication between the front-end and back-end components. Express.js simplifies the process of building APIs by providing routing mechanisms and middleware functions. APIs define the endpoints that the front-end can interact with, allowing data retrieval, manipulation, and other operations. The front-end components, built with React, can make HTTP requests to these APIs to fetch data, submit forms, or perform other actions.
Overall, the MERN stack architecture ensures a smooth flow of data and actions between the front-end and back-end components. React provides an interactive user interface, while Express.js and Node.js handle server-side logic and API development. MongoDB serves as the data storage and retrieval solution, seamlessly integrating with the server. This modular and interconnected structure makes MERN stack a powerful choice for developing scalable and efficient web applications.
In the next section, we will explore the advantages of utilizing the MERN stack in web development projects.
Advantages of using MERN Stack:
MERN stack offers several advantages that make it a popular choice among developers for web application development. Let’s explore some of the key benefits of using MERN stack:
- Speed of Development: MERN stack allows developers to leverage the power of JavaScript across the entire application stack. With a unified language and consistent syntax, developers can seamlessly transition between front-end and back-end development. This reduces the learning curve and accelerates development speed, enabling faster time-to-market for web applications.
- Reusability of Code: MERN stack promotes code reusability through the use of components in React. Developers can create modular UI components that can be reused across multiple pages or even in different projects. This saves time and effort by eliminating the need to write repetitive code and ensures consistency throughout the application.
- Flexibility of Development Process: MERN stack offers flexibility in choosing the tools and libraries for each component. Developers have the freedom to select from a wide range of libraries, frameworks, and packages available in the JavaScript ecosystem. This flexibility allows for customizing the development process based on project requirements and developer preferences.
- Scalability: MERN stack provides scalability both in terms of handling growing user demands and managing data. MongoDB, the NoSQL database in the stack, offers horizontal scalability by allowing distribution of data across multiple servers. Additionally, the modular and component-based structure of the stack makes it easier to scale individual components as needed, ensuring efficient performance as the application grows.
- Rich JavaScript Ecosystem: MERN stack leverages the extensive JavaScript ecosystem. There are numerous libraries, frameworks, and tools available for each component of the stack. This vast ecosystem provides developers with a wide range of resources to enhance productivity, solve complex problems, and streamline the development process.
By harnessing the power of MongoDB, Express.js, React, and Node.js, the MERN stack empowers developers to build robust, scalable, and efficient web applications. The speed of development, code reusability, flexibility, scalability, and the vast JavaScript ecosystem are significant advantages that make MERN stack a preferred choice for developers.
In the next section, we will dive into the implementation of MERN stack and provide a step-by-step guide to creating a MERN stack application.
Implementation of MERN Stack:
Building a web application using the MERN stack involves integrating MongoDB, Express.js, React, and Node.js in a seamless manner. Let’s explore a step-by-step guide on implementing a MERN stack application:
Set up the Development Environment
To begin working with the MERN stack, you need to set up your development environment. Follow these steps to ensure a smooth setup process:
- Install Node.js and npm:
- Visit the official Node.js website (https://nodejs.org) and download the appropriate installer for your operating system.
- Run the installer and follow the on-screen instructions to complete the installation of Node.js.
- npm (Node Package Manager) comes bundled with Node.js, so you don’t need to install it separately.
- Initialize a new project directory:
- Open your preferred command-line interface and navigate to the directory where you want to create your MERN stack project.
- Use the following command to initialize a new Node.js project:
npm init - Follow the prompts to set up your project. You can press enter to accept the default values or provide your own.
- Install the necessary dependencies:
- In your project directory, install the required dependencies: Express.js, React, and MongoDB driver for Node.js.
- Use the following command to install Express.js:
npm install express - To install React, navigate to your project’s client directory (created in Step 3 of the implementation section) and run the following command:
npx create-react-app - This command initializes a new React application within the client directory, using the current directory as the project root.
- Finally, install the MongoDB driver for Node.js by running the following command:
npm install mongodb
Once you have completed these steps, your development environment is ready to start building your MERN stack application. You can proceed with creating the back-end and front-end components as outlined in the subsequent steps.
Note: Ensure that you have a MongoDB server set up and running locally or have access to a remote MongoDB database. Adjust the MongoDB connection settings in your code to match your database configuration.
Create the Back-end
In this step, we will create the back-end components using Express.js and set up the server to handle HTTP requests. Follow these steps to create the back-end of your MERN stack application:
- Create a new file for your Express.js server:
- In your project directory, create a new file called
server.js(or any other desired name) to house your Express.js server code.
- In your project directory, create a new file called
- Import the necessary dependencies:
- In
server.js, import the required dependencies by adding the following lines of code at the top of the file:
- In
const express = require('express');
const app = express();- Configure the server to listen on a specific port:
- Add the following code to specify the port on which the server will listen:
const PORT = process.env.PORT || 5000;
app.listen(PORT, () => {
  console.log(`Server is running on port ${PORT}`);
});
This code sets the port to either the environment variable PORT or 5000 as the default. The server will then start listening on this port.
- Set up the routes and API endpoints:
- Define the routes and API endpoints that your server will handle. This can be done by adding appropriate route handlers using Express.js.
- For example, you can set up a basic route handler for a GET request by adding the following code:
app.get('/api/data', (req, res) => {
  // Handle the request and send a response
  res.json({ message: 'Data endpoint reached successfully' });
});
This code sets up a route handler for the /api/data URL path, which responds with a JSON object containing a simple message.
- Connect to the MongoDB database:
- Install the MongoDB driver for Node.js by running the following command if you haven’t already done so:
npm install mongodb - In
server.js, add the code to connect to your MongoDB database. This typically involves providing the connection URL and handling any necessary connection options. Here’s an example:
- Install the MongoDB driver for Node.js by running the following command if you haven’t already done so:
const { MongoClient } = require('mongodb');
const mongoURL = 'mongodb://localhost:27017/mydatabase'; // Replace with your MongoDB connection URL

MongoClient.connect(mongoURL, { useNewUrlParser: true, useUnifiedTopology: true })
  .then((client) => {
    // Use the MongoDB client and perform database operations
    const db = client.db();
    // Define routes that interact with the database
  })
  .catch((error) => {
    console.error('Failed to connect to the database:', error);
  });
In this example, we use the MongoClient class from the MongoDB driver to establish a connection with the specified MongoDB database.
- Implement CRUD operations:
- Within the database connection code block, you can implement various CRUD (Create, Read, Update, Delete) operations to interact with the database.
- This involves defining additional routes and route handlers for handling different API endpoints, such as fetching data, creating new entries, updating existing data, and deleting records.
With these steps completed, you have successfully created the back-end of your MERN stack application using Express.js. The server is set up to handle HTTP requests and interact with the MongoDB database.
Create the Front-end
In this step, we will create the front-end components using React. Follow these steps to create the front-end of your MERN stack application:
- Set up the React application:
- Open your command-line interface and navigate to your project’s root directory.
- Run the following command to create a new React application:
npx create-react-app client - This command initializes a new React application within the
clientdirectory of your project. Thecreate-react-apptool sets up the necessary project structure and dependencies for a React application.
- Remove default files and set up the folder structure:
- Navigate to the
clientdirectory:cd client - Delete the
srcdirectory contents within theclientdirectory, excluding thepublicdirectory. - Create a new
srcdirectory and set up the desired folder structure for your React components. For example:
- Navigate to the
src/
├── components/
│   ├── App.js
│   └── ...
├── services/
│   ├── api.js
│   └── ...
├── styles/
│   ├── App.css
│   └── ...
└── index.js
You can organize your components, services, and styles within the src directory based on your application’s needs.
- Design the UI components:
- Open
App.js(or the corresponding file you created) in thecomponentsdirectory. - Design your UI components using JSX syntax, which allows you to write HTML-like code within your JavaScript files.
- You can import other custom components, add styles, and define the necessary logic within each component.
- Open
- Implement client-side routing:
- Install React Router, a popular library for handling client-side routing in React applications:
npm install react-router-dom - Create a
routes.jsfile within thesrcdirectory to define your application’s routes and associated components. - Set up the desired routes using the
<Switch>and<Route>components from React Router. For example:
- Install React Router, a popular library for handling client-side routing in React applications:
import React from 'react';
import { Switch, Route } from 'react-router-dom';
import Home from './components/Home';
import About from './components/About';

function Routes() {
  return (
    <Switch>
      <Route exact path="/" component={Home} />
      <Route path="/about" component={About} />
    </Switch>
  );
}

export default Routes;
In App.js, import the Routes component and include it within your main component’s JSX structure. This will render the appropriate component based on the current route.
- Run the React development server:
- Ensure that you are in the
clientdirectory within your project’s root directory. - Run the following command to start the React development server:
npm start - This command will launch the development server and open your application in a web browser. Any changes made to your React components will automatically trigger a hot reload.
- Ensure that you are in the
With these steps completed, you have successfully created the front-end of your MERN stack application using React. You can now design your UI components, define the necessary routes, and add the required logic within each component. In the next step, we will discuss how to connect the front-end and back-end components of your MERN stack application.
Connect the Front-end and Back-end
In this step, we will connect the front-end components built with React to the back-end components created using Express.js. Follow these steps to establish communication between the front-end and back-end of your MERN stack application:
- Make API calls from the React components:
- Open the React component file where you want to make API calls, for example,
MyComponent.js. - Import the necessary dependencies, such as
axiosor the built-infetchAPI, to perform HTTP requests. - Implement the logic to make API calls to the back-end endpoints. For example, to fetch data from the
/api/dataendpoint, you can use the following code:
- Open the React component file where you want to make API calls, for example,
   import React, { useEffect, useState } from 'react';
   import axios from 'axios';

   function MyComponent() {
     const [data, setData] = useState([]);

     useEffect(() => {
       axios.get('/api/data')
         .then((response) => {
           setData(response.data);
         })
         .catch((error) => {
           console.error(error);
         });
     }, []);

     return (
       <div>
         {/* Display the fetched data */}
       </div>
     );
   }

   export default MyComponent;
In this example, we use the axios library to make a GET request to the /api/data endpoint. The retrieved data is then stored in the component’s state using the useState hook.
- Handle the server responses:
- Within the API call’s promise chain, handle the server responses accordingly. You can update the component’s state, trigger UI changes, or handle any errors that occur during the API call.
- Configure CORS (Cross-Origin Resource Sharing):
- To allow cross-origin requests from your React front-end to the Express.js back-end, you need to configure CORS settings on the server.
- In your Express.js
server.jsfile, add the following code before defining your routes to enable CORS:
const cors = require('cors');
 app.use(cors());
This enables the server to respond to requests from different origins, allowing your React application to make requests to the server.
With these steps completed, your front-end React components can now communicate with the back-end Express.js server through API calls. You can fetch data from the server, submit form data, or perform other actions by making appropriate HTTP requests.
In the next step, we will discuss the process of running and testing your MERN stack application.
Run and Test the MERN Stack Application
In this step, we will cover the process of running and testing your MERN stack application. Follow these steps to launch your application and ensure everything is working correctly:
- Start the Express.js server:
- Open your command-line interface.
- Navigate to the root directory of your MERN stack application.
- Run the following command to start the Express.js server:
node server.js - The server will start listening on the specified port (as defined in the
server.jsfile) and be ready to handle incoming requests.
- Start the React development server:
- Open another command-line interface.
- Navigate to the
clientdirectory within your MERN stack application. - Run the following command to start the React development server:
npm start - This command will launch the development server and open your application in a web browser.
- Interact with your MERN stack application:
- Once the development server is running, you can interact with your MERN stack application in the web browser.
- Test the functionality of your application by navigating through different pages, submitting forms, and interacting with the UI components.
- Ensure that the API calls from the front-end to the back-end are successful and that the expected data is retrieved or modified as intended.
- Monitor the server and console logs:
- Keep an eye on the command-line interfaces running the Express.js server and React development server.
- Check for any error messages or warnings that might indicate issues with your application.
- Debug any errors that arise by inspecting the server logs and the browser’s developer console.
- Perform comprehensive testing:
- Conduct thorough testing of your MERN stack application to ensure its functionality, performance, and usability.
- Test different scenarios, such as edge cases and user interactions, to uncover and address potential bugs or issues.
- Validate the data flow between the front-end and back-end components, ensuring that the application behaves as expected.
By following these steps, you can run and test your MERN stack application. It’s essential to perform thorough testing to ensure the stability and reliability of your application before deployment.
Common Challenges of MERN Stack:
While MERN stack offers numerous benefits and facilitates efficient web development, it is not without its challenges. Here’s a table summarizing the parameters, challenges, and solutions when working with the MERN stack:
| Parameters | Challenges | Solutions |
|---|---|---|
| Debugging | Identifying and fixing bugs due to the distributed nature of the stack | Utilize debugging tools, logging, and error tracking for each component |
| Security | Protecting against common web vulnerabilities | Implement secure coding practices, authentication, and authorization |
| Performance | Optimizing performance of the application | Employ bundling, compression, database optimization, and caching |
| Deployment | Issues related to deployment configuration and consistency | Follow proper deployment practices, utilize containerization, testing |
| Scalability | Scaling the application to handle increased traffic and data | Implement sharding, load balancing, and efficient resource management |
This comparison table provides a concise overview of the parameters, the challenges associated with each parameter, and the corresponding solutions for working effectively with the MERN stack.
Let’s explore the challenges in more detail and discuss their corresponding solutions:
- Debugging:
- Challenge: Debugging a MERN stack application can be challenging due to the distributed nature of the stack and the interaction between multiple components. Identifying and fixing bugs require careful inspection and understanding of the flow of data and control between the front-end and back-end components.
- Solution: To overcome debugging challenges, developers can utilize specific tools and techniques tailored to each component. React Developer Tools and Redux DevTools aid in debugging React components, while Node.js offers a built-in debugger for server-side debugging. Properly logging errors and utilizing error tracking tools, such as Sentry or Bugsnag, can help in identifying and resolving issues more efficiently. Additionally, employing comprehensive testing strategies and adhering to best practices can assist in minimizing the occurrence of bugs.
- Security:
- Challenge: Implementing proper security measures is crucial to protect a MERN stack application from common web vulnerabilities, such as cross-site scripting (XSS), cross-site request forgery (CSRF), and SQL injection. Inadequate security practices can lead to unauthorized access, data breaches, and compromised user accounts.
- Solution: Developers should follow secure coding practices to mitigate security risks. This includes performing input validation and output encoding to prevent XSS attacks, implementing parameterized queries or object document mapping (ODM) libraries like Mongoose to avoid SQL injection, and employing HTTPS encryption for secure data transmission. Implementing authentication mechanisms, such as JSON Web Tokens (JWT), session management, and robust password hashing, enhances application security. Regular security audits, penetration testing, and staying updated with security best practices are vital for maintaining a secure MERN stack application.
- Performance Optimization:
- Challenge: Ensuring optimal performance of a MERN stack application can be challenging due to the complexity of the stack, inefficient code, and database queries. Slow load times, high server response times, and inefficient data retrieval can impact user experience and application scalability.
- Solution: Employing performance optimization techniques can help address these challenges. Code bundling, minification, and compression reduce the application’s size and improve load times. Employing client-side caching and server-side caching mechanisms, such as Redis, can enhance performance by reducing database hits. Optimizing database queries, indexing frequently accessed fields, and avoiding unnecessary data retrieval can significantly improve overall application performance. Additionally, monitoring and optimizing server resources, utilizing efficient data structures, and employing techniques like lazy loading and code splitting can further enhance performance.
- Deployment Issues:
- Challenge: Deploying a MERN stack application to a production environment can pose challenges related to configuration, scaling, and maintaining consistent behavior across different environments. Inconsistent deployment processes can lead to deployment failures, compatibility issues, and inconsistent application behavior.
- Solution: Following proper deployment practices is crucial to address these challenges. Setting up environment-specific configurations ensures consistent behavior across development, staging, and production environments. Utilizing containerization tools like Docker enables packaging the application with its dependencies for easier deployment. Employing continuous integration/continuous deployment (CI/CD) pipelines automates the deployment process, reduces human errors, and ensures consistency. Conducting thorough testing in staging environments, including load testing, can help identify and address deployment-related issues before going live.
- Scalability:
- Challenge: As user traffic and data grow, scaling a MERN stack application to handle increased load can present challenges. Managing database performance, load balancing, and optimizing server resources to maintain application responsiveness and reliability can be complex.
- Solution: Employing appropriate scalability strategies helps address these challenges. Utilizing horizontal scaling techniques, such as sharding and replication in MongoDB, allows for distributing data across multiple servers. Implementing load balancing mechanisms, such as reverse proxies or container orchestration tools like Kubernetes, helps distribute traffic efficiently among application instances. Monitoring and optimizing server resources, employing caching mechanisms, and utilizing cloud-based hosting providers with auto-scaling capabilities enable efficient resource management and scalability.
Conclusion:
The MERN stack architecture, consisting of MongoDB, Express.js, React, and Node.js, provides developers with a powerful and efficient solution for building modern web applications. By leveraging these technologies, developers can create scalable, robust, and dynamic applications.
Throughout this blog, we explored the key aspects of the MERN stack. We discussed the individual components of the stack and how they work together to enable seamless communication between the front-end and back-end. We also highlighted the advantages of using the MERN stack, such as faster development speed, code reusability, flexibility, scalability, and the extensive JavaScript ecosystem.
Additionally, we examined common challenges that developers may encounter when working with the MERN stack. These challenges include debugging, security, performance optimization, deployment issues, and scalability. However, we provided solutions to address these challenges, such as utilizing debugging tools, implementing secure coding practices, optimizing code and database queries, following deployment best practices, and employing scalability techniques.
In conclusion, the MERN stack architecture empowers developers to build efficient and feature-rich web applications. By understanding the components, architectural structure, and best practices of the MERN stack, developers can create impactful applications that meet the demands of modern web development.