Serverless computing has revolutionized the way developers deploy and manage applications. By abstracting the underlying infrastructure, it allows developers to focus solely on writing code. ApyHub emerges as a powerful platform for deploying serverless functions, offering scalability, ease of use, and seamless integration with various services.
This article guides you through creating, deploying, and testing a serverless function using ApyHub. Whether you aim to process data, handle API requests, or automate tasks, this step-by-step guide ensures you can efficiently achieve your objectives with ApyHub. Let’s embark on this journey to harness the full potential of serverless computing with ApyHub.
Prerequisites:
Before building a serverless function with ApyHub for your web development or app development project using Node.js, ensure you have the following prerequisites:
- Node.js v16+: To check your current Node.js version or install Node.js, visit the official Node.js website. Follow the installation instructions for your operating system to get the required version.
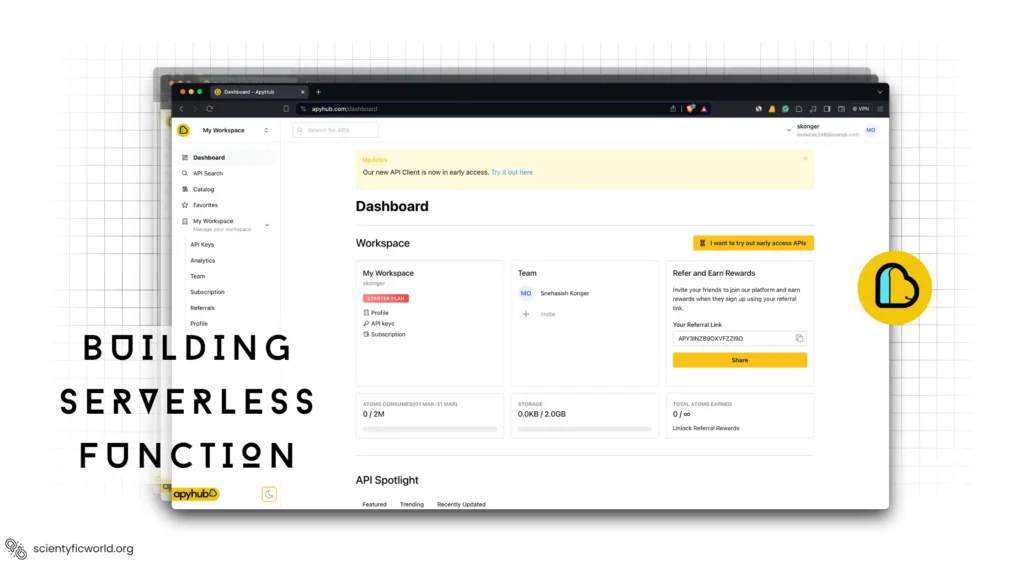
- ApyHub Account: Sign up for an ApyHub account. Once registered, you will receive an API key that you can use to authenticate your requests to ApyHub APIs.
- Basic Knowledge of Node.js: If you need to brush up on your Node.js skills or learn more about it, consider referring to online resources like the official Node.js documentation.
- Familiarity with Serverless Computing: If you are new to serverless computing, you can explore introductory guides and tutorials on serverless architecture and its benefits. Websites like AWS (Amazon Web Services) provide resources on serverless computing concepts.
- Understanding of ApyHub APIs: Familiarize yourself with the available ApyHub APIs and their documentation. Visit the ApyHub API documentation page to explore the APIs and their functionalities.
By ensuring you have these prerequisites in place, you will be well-equipped to proceed with building a serverless function using ApyHub in your Node.js projects for web or app development.
Setting up ApyHub:
To set up ApyHub for your project, follow these steps:
- Create a new project: Initiate a new Node.js project and install the necessary dependencies. You can use the
create-next-appCLI tool or any other preferred method. - Install ApyHub: Install the
apyhub.jslibrary in your project using NPM. Run the following command in your terminal:
npm install apyhub- Initialize ApyHub: Create a new file called
apyhub.tsin a new folder calledlib. Inside this file, initialize the Apyhub client using the environment variable token created previously:
   import { initApyhub } from "apyhub";
   const apy = initApyhub(process.env.APY_TOKEN as string);
export { apy };- Configure ApyHub: Set up your ApyHub account and create an API token. You can use the token to authenticate your serverless function calls.
- Fetch data from ApyHub: Use the
getServerSidePropsfunction in your Next.js project to fetch data from ApyHub. For example, to fetch timezones, you can use the following code:
   import { data } from "../lib/apyhub";
   export const getServerSideProps = async () => {
     const { data: timezones } = await data.timezones();
     return { props: { timezones } };
};By following these steps, you will be able to set up ApyHub and integrate it with your serverless function in Node.js or Next.js projects.
💡 ApyHub SDK does not include all the latest APIs published on their platform, but they aim to publish a new version of the SDK quite in the coming months. Follow their Twitter feed to stay up to date.
Creating a Serverless Function:
After setting up your ApyHub environment, the next step involves developing your serverless function. This section walks you through writing a serverless function using JavaScript (Node.js) that interacts with ApyHub. We will create a simple function to demonstrate fetching and processing data.
1. Create the Function Handler
First, you need to establish a handler for your serverless function. This handler is the entry point of your function, which ApyHub invokes when the function is executed. Create a new file named getTimezoneFunction.js in your project directory. This file will contain the code for fetching time zones.
exports.handler = async (event, context) => {
  // Function logic will go here
};2. Fetch Data Using ApyHub
Within the handler function, use the ApyHub client you initialized earlier to fetch data. For this example, let’s fetch timezones as shown in the setup section. Ensure you have the apy client from apyhub.ts ready for use.
First, ensure you import your ApyHub client into your function file:
const { apy } = require('./lib/apyhub');Then, modify the handler to fetch timezones:
exports.handler = async (event, context) => {
  try {
    const { data: timezones } = await apy.data.timezones();
    console.log("Fetched timezones: ", timezones);
    return {
      statusCode: 200,
      body: JSON.stringify({ timezones }),
    };
  } catch (error) {
    console.error("Error fetching timezones: ", error);
    return {
      statusCode: 500,
      body: JSON.stringify({ error: "Failed to fetch timezones" }),
    };
  }
};3. Process the Data
For simplicity, this example directly returns the fetched data. However, in a real-world scenario, you might need to process this data before responding. Processing could involve filtering, sorting, or transforming the data based on your application’s needs.
4. Local Testing
Before deploying your serverless function to ApyHub, test it locally to ensure it behaves as expected. You can simulate an invocation of your function with a test event:
// Simulate a function invocation
const { handler } = require('./getTimezoneFunction');

(async () => {
  const response = await handler();
  console.log("Function response: ", response);
})();This local test helps verify the function’s logic and response format.
5. Prepare for Deployment
Ensure your project is properly structured and all dependencies are included in your package.json file. Your serverless function, now ready, will be deployed in the next steps where we’ll cover deploying and managing your function on ApyHub.
Through this process, you’ve developed a serverless function using Node.js that fetches and processes data from ApyHub. This function represents a foundational piece of your web or app development project, showcasing how serverless functions can enhance your applications by offloading compute-intensive tasks to the cloud.
📝 Note: The specific code examples and structure may vary depending on your project requirements and the serverless framework or platform you are using.
Deploying Your Function:
Deploying your serverless function to ApyHub involves a series of steps that ensure your function is ready to execute in response to events or API calls. This section details the deployment process, highlighting key actions and considerations. Remember, while ApyHub facilitates serverless function deployment, the actual deployment may occur on various platforms like AWS Lambda, Azure Functions, or Google Cloud Functions, depending on your preferences and requirements.
1. Select Your Deployment Platform
First, decide on the cloud provider where you will deploy your serverless function. Each platform (AWS Lambda, Azure Functions, Google Cloud Functions) offers unique features and configurations. Your choice may depend on existing cloud infrastructure, specific features, or pricing models. For this guide, we’ll proceed generically, as the deployment steps are broadly similar across platforms.
2. Create a New Serverless Function
Navigate to your chosen platform’s management console or use its CLI tool to create a new serverless function. This step usually involves specifying a function name, selecting a runtime environment (ensure you choose Node.js to match our development), and defining initial configuration settings.
For example, using AWS Lambda:
aws lambda create-function --function-name myApyHubFunction \
--runtime nodejs14.x --role arn:aws:iam::123456789012:role/execution_role \
--handler getTimezoneFunction.handler --zip-file fileb://function.zipThis command creates a new Lambda function named myApyHubFunction using Node.js 14.x runtime.
3. Prepare and Upload Your Code
Package your serverless function code and any dependencies into a deployment package. If you’re using Node.js, this typically means creating a ZIP file containing your project files, including the node_modules directory.
To zip your function and dependencies in the project directory:
zip -r function.zip .Upload this ZIP file to your serverless function on the cloud platform. This can be done through the platform’s web console or CLI. Using AWS Lambda as an example:
aws lambda update-function-code --function-name myApyHubFunction --zip-file fileb://function.zip4. Configure Your Function
After uploading, configure your function’s runtime settings and environment variables. This includes setting the Node.js version and defining any environment variables your function needs to operate, such as API tokens or database connection strings.
For platform-specific consoles, this step involves navigating through the function settings and entering the necessary configurations. Using the CLI, configurations can be updated with commands tailored to the specific platform.
5. Set Up Triggers
Configure how your serverless function will be invoked. This could be in response to HTTP requests, database events, or custom triggers. For HTTP-triggered functions, you might need to set up an API gateway.
Using AWS as an example, you would create an API Gateway trigger and link it to your function, enabling it to be called via a URL:
aws apigateway create-rest-api --name 'MyAPI'
# Follow additional steps to configure endpoints and integrate the Lambda function6. Test Your Function
Once deployed, thoroughly test your serverless function to confirm it behaves as expected. Invoke the function manually from the cloud platform’s console or use tools like Postman or Apidog to test HTTP-triggered functions. Ensure the function executes correctly and handles errors gracefully.
For AWS Lambda, testing can be done via the AWS Console or CLI:
aws lambda invoke --function-name myApyHubFunction --payload '{"key": "value"}' response.jsonThis command sends a sample payload to your function and saves the response to response.json.
By following these steps, you deploy your serverless function to ApyHub and ensure it’s properly configured and ready to handle requests. While this guide provides a generic overview, remember to consult your cloud platform’s documentation for specific instructions and best practices. Deploying your function correctly is crucial for the success of your web or app development project, allowing you to leverage serverless architecture’s scalability and efficiency.
Testing and Debugging:
After deploying your serverless function to ApyHub and the corresponding cloud platform, thorough testing and debugging are essential to ensure it operates correctly under various conditions. This section outlines strategies to test your function effectively and debug any issues that arise.
Testing Your Function
- Manual Testing:
- Start with manual tests by invoking your serverless function directly from the cloud platform’s console or using tools like Postman for HTTP-triggered functions. This allows you to quickly verify the function’s basic behaviour.
- For HTTP-triggered functions, construct requests that cover all the API endpoints your function exposes. Include tests for different HTTP methods (GET, POST, etc.) and various request payloads.
- Use the CLI tools provided by your cloud platform to invoke the function with test payloads. Ensure you test with both valid and invalid input data to see how your function handles errors.
- Automated Testing:
- Implement unit tests for your function’s logic using a testing framework appropriate for Node.js, such as Jest or Mocha. Unit tests help you verify that individual parts of your function perform as expected.
- Consider integration tests that run against the deployed function to ensure it interacts correctly with other services and resources. These tests are crucial for validating the function’s behaviour in its actual runtime environment.
Debugging Your Function
- Logs:
- Leverage logging extensively within your serverless function. Print meaningful messages and error details to the console. Cloud platforms automatically capture these logs, making them accessible for review.
- Explore the logging and monitoring tools provided by your cloud platform. For instance, AWS CloudWatch Logs can be invaluable for tracking the execution of your Lambda functions and identifying issues.
- Local Debugging:
- Where possible, debug your function locally. Use local execution environments that simulate your cloud platform’s runtime. Tools like the Serverless Framework or AWS SAM (Serverless Application Model) can facilitate local debugging.
- Local debugging allows you to step through the code, inspect variables, and understand the function’s flow without deploying it to the cloud.
- Tracing and Monitoring:
- Implement tracing to follow the function’s execution path and measure performance. Distributed tracing systems like AWS X-Ray can help identify bottlenecks and pinpoint failures in your function or its interactions with other services.
- Set up alerts based on metrics and logs to get notified about errors, performance issues, or resource constraints. This proactive monitoring can help you address issues before they affect your users.
- Common Pitfalls:
- Be mindful of common serverless pitfalls, such as timeout errors, cold start delays, and issues related to concurrent executions. Adjust your function’s configuration, such as increasing timeout limits or optimizing your code, to mitigate these issues.
- Validate input data thoroughly to prevent errors during execution. Handle exceptions gracefully to ensure your function responds appropriately under all conditions.
Testing and debugging are iterative processes. By employing both manual and automated testing strategies, along with effective debugging techniques, you can ensure your serverless function performs reliably and efficiently. Always consider the specific features and tools offered by your cloud platform and ApyHub to streamline these processes.
Securing Your Serverless Function
Ensuring the security of your serverless function is crucial, especially when dealing with sensitive data or critical business logic. This section guides best practices to secure your serverless functions deployed with ApyHub, focusing on authentication, authorization, data protection, and vulnerability management.
Authentication and Authorization
- Use API Keys: If your serverless function is accessible over HTTP, secure it with API keys. API keys are a simple yet effective way to control access. Configure your API gateway to require an API key for all requests to your function.
- Implement OAuth or JWT: For more sophisticated scenarios, especially when integrating with user-facing applications, use OAuth tokens or JSON Web Tokens (JWT) for authentication. These tokens provide a secure way to assert the identity of the calling party and can include scopes or claims to implement fine-grained access control.
- Permissions: Assign the least privilege necessary to your serverless function. Carefully review the permissions granted to the function’s execution role. Ensure it has only the permissions needed to perform its tasks and nothing more. This principle limits the potential impact of a compromised function.
Data Protection
- Encrypt Sensitive Data: Encrypt sensitive data in transit and at rest. Use HTTPS to protect data in transit to and from your serverless function. For data at rest, use your cloud provider’s encryption capabilities to secure data stored in databases or object storage.
- Manage Secrets Securely: Use a secrets manager to handle API keys, database credentials, and other sensitive information. Secrets managers encrypt these details and provide them to your function securely at runtime, avoiding the need to hard-code sensitive information in your function’s code or configuration files.
Vulnerability Management
- Dependency Scanning: Regularly scan your function’s dependencies for known vulnerabilities. Use tools like
npm auditfor Node.js projects to identify and update insecure package dependencies. - Static Code Analysis: Employ static code analysis tools to examine your function’s codebase for common security issues, such as injection vulnerabilities or insecure usage of APIs. Integrating these tools into your CI/CD pipeline can help catch issues early.
- Security Headers for HTTP Responses: If your serverless function serves web content or APIs, set HTTP security headers to protect against common web vulnerabilities. Headers like
Content-Security-Policy,X-Content-Type-Options, andStrict-Transport-Securitycan significantly improve security.
Monitoring and Logging
- Audit Logs: Enable audit logs for all actions taken on your serverless function and related cloud services. Audit logs provide a trail of actions that can be invaluable during a security investigation.
- Anomaly Detection: Use monitoring tools to detect anomalous behaviour that could indicate a security issue. Set up alerts for unusual spikes in traffic, error rates, or unauthorized access attempts.
By implementing these security measures, you can significantly enhance the security posture of your serverless functions on ApyHub. Always stay updated with the latest security practices and continuously monitor your functions and their dependencies for new vulnerabilities.
Conclusion
In this guide, we’ve explored the steps necessary to build, deploy, test, debug, and secure a serverless function using ApyHub for web and app development projects with a focus on Node.js. Starting from setting up your ApyHub environment, and developing your function, through deployment, testing, debugging, and securing your application, we’ve covered the essentials to get you up and running with serverless architecture. Serverless computing offers a compelling model for developers, eliminating much of the infrastructure management overhead and allowing you to focus on writing code that delivers value. By leveraging ApyHub and following best practices, you can ensure your serverless functions are efficient, reliable, and secure.
Remember, the journey doesn’t end here. Serverless architecture and ApyHub offer a wide range of features and possibilities to explore. Continuous learning and adaptation are key to mastering serverless computing. Experiment with different ApyHub features, optimize your functions for performance and cost and stay informed about the latest in serverless technologies and security practices. Deploying your first serverless function is just the beginning. As you grow more comfortable with ApyHub and serverless concepts, challenge yourself to integrate more complex functionalities and leverage the full potential of the cloud to build scalable, resilient, and secure applications.
Happy coding!


