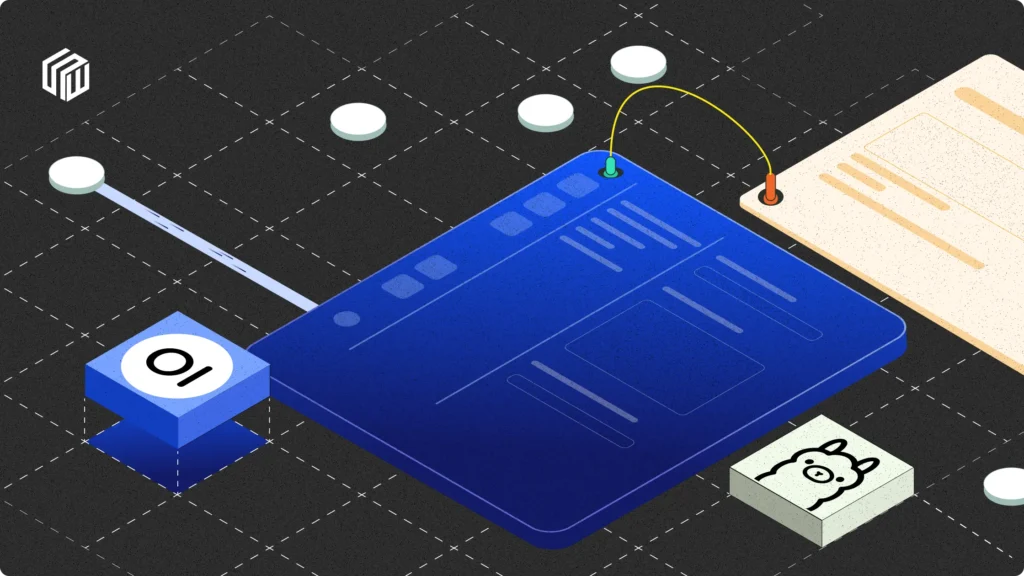
This guide shows you how to run a private AI chat platform on your own Mac. Ollama runs the language models locally, Open WebUI gives you a ChatGPT-style interface in your browser, and your prompts and documents stay on your machine.
With growing privacy concerns, developers increasingly prefer local, self-hosted AI environments. Cloud-based AI platforms frequently involve third-party data handling and recurring costs. Hosting your own AI models locally solves these issues. You retain complete control over data security, customisation, and performance optimisation.
Ollama simplifies local hosting of large language models (LLMs) without extensive configurations. With Open WebUI, a straightforward user interface, it creates a seamless, private AI experience. Open WebUI directly integrates with Ollama, allowing developers to interact easily with AI models through a clean browser-based interface.
Updated September 2026: I’ve refreshed this guide for Ollama 0.34 and Open WebUI 0.11. macOS 14 or newer is now required, Docker Desktop’s Homebrew cask has a new name, Llama 2 is replaced by current models, Open WebUI’s login, model and document steps match today’s interface, and the network section now reflects that Docker publishes ports to your whole network by default.
This how-to guide walks you step-by-step through hosting your local AI platform with Ollama and Open WebUI. By the end, you’ll have a fully functional, private, and efficient AI environment operating entirely within your infrastructure.
Are you ready to build your own local AI platform? Let’s begin.
NOTE: I've done this whole process in MacOS. So, few code snippets can be different for you if you're using Windows or Linux
Prerequisites
Before setting up your local AI platform, confirm your Mac meets the necessary requirements.
Hardware Requirements
- Recommended RAM: 16 GB is a comfortable starting point. 8 GB works with small models (around 3B to 4B parameters), and 32 GB or more gives you room for larger ones.
- Storage space: At least 50 GB free. Individual models range from about 1 GB to 20 GB or more (sizes are in the model table below).
- Processor: Apple Silicon (M-series) is the best fit, because Ollama uses both the CPU and the GPU there. Intel Macs run on the CPU only, which is much slower.
- GPU: No external GPU is needed. The GPU built into Apple Silicon does the work using your Mac’s unified memory.
Software Requirements
macOS Version
Check your macOS version to confirm compatibility:
sw_versOllama requires macOS 14 (Sonoma) or newer. Older guides that list Ventura (13.x) no longer apply.
Homebrew
Homebrew simplifies installing software on macOS. Verify installation with:
brew --versionIf Homebrew isn’t installed, install it using:
/bin/bash -c "$(curl -fsSL https://raw.githubusercontent.com/Homebrew/install/HEAD/install.sh)"Docker Desktop
Docker runs the Open WebUI container. (If you’d rather skip Docker, there’s a pip-based alternative in the Open WebUI section.)
Install Docker Desktop via Homebrew:
brew install --cask docker-desktopOlder tutorials use brew install --cask docker. That cask no longer exists, so the command fails on current Homebrew. The cask is now docker-desktop.
After installation, launch Docker Desktop and confirm the installation by running:
docker --versionFinal Checks
Ensure Docker Desktop is running and that your terminal correctly recognizes Docker:
docker psThis command should run without errors.
You’re now set up with the prerequisites for a local AI platform on your Mac. Ollama itself comes next.
Next, let’s install and configure Ollama.
Installing Ollama
Ollama runs large language models locally with minimal setup. It abstracts away GPU configuration, handles model downloads, and exposes a local API you can call from your own code. On a Mac you can install it either as an app or as a Homebrew package.
Step 1: Install Ollama
Option A: Homebrew (used in this guide). This installs the command-line tool and lets you manage it as a background service:
brew install ollamaOption B: the Mac app. Download Ollama.dmg from ollama.com/download and drag it to Applications, or run brew install --cask ollama-app. Pick one option, not both, because each one starts a server on the same port (11434).
Verify the install:
ollama --versionYou should see the installed version printed in the terminal. If you get a “command not found” error, restart your terminal and try again.
Step 2: Start the Ollama Service
If you installed the Mac app, launch it and the server starts with it. If you installed with Homebrew, start Ollama as a background service:
brew services start ollamaThis starts Ollama now and keeps it running in the background. To stop it at any time:
brew services stop ollamaYou can also run the server in the foreground, which is handy for watching its logs:
ollama serveIt listens on localhost:11434 and you stop it with Ctrl + C. If Ollama is already running as a service or app, ollama serve will complain that the port is in use, so stop the service first.
Step 3: Confirm the Server Is Running
Check that the server responds:
curl http://localhost:11434You should see:
Ollama is runningThat confirms Ollama is up and ready to handle requests.
Step 4: Run Your First Model
To confirm everything works, run a small model. llama3.2 (3B parameters) is a 2.0 GB download and runs comfortably on most Macs:
ollama run llama3.2Ollama downloads the model the first time, then opens a prompt where you can type queries. Type /bye to leave the session.
Which model should you pick?
Model families change every few months, so treat this as a starting point and check the Ollama library for the latest. As a rule of thumb, the model’s download size plus a few GB of headroom should fit in your Mac’s memory.
| Your Mac | Good starting models | Download size |
|---|---|---|
| 8 GB RAM | llama3.2:3b or gemma3:4b | 2.0 GB / 3.3 GB |
| 16 GB RAM | qwen3:8b, gemma3:12b or gpt-oss:20b | 5.2 GB / 8.1 GB / 14 GB |
| 32 GB or more | gemma3:27b or qwen3:30b | 17 GB / 19 GB |
gpt-oss:20b, OpenAI’s open-weight model, lists 16 GB of memory as its minimum. To see the sizes for any model, open its page in the library and look at the tags.
You now have Ollama running locally on macOS. In the next section, we’ll install Open WebUI to add a clean interface on top.
Installing Open WebUI
With Ollama set up, the next step is to add a user interface. Open WebUI is a lightweight frontend that connects directly with Ollama running locally. It provides a clean, browser-based interface to interact with LLMs, manage models, and run queries more efficiently.
Let’s install and configure it using Docker.
Step 1: Verify Docker Installation
Before proceeding, confirm Docker is running:
docker infoIf this throws an error, launch Docker Desktop from Applications and wait until it starts.
Step 2: Pull the Open WebUI Docker Image
Download the Open WebUI container:
docker pull ghcr.io/open-webui/open-webui:mainIf you’re on Apple Silicon, Docker pulls the right architecture automatically. The :main tag is a rolling image that changes with every commit. For anything you depend on, pin a specific release tag such as :vX.Y.Z (the current release at the time of this update is 0.11.4) so an update never surprises you.
Step 3: Run the Open WebUI Container
Use the following command to start Open WebUI and let it reach Ollama on your Mac:
docker run -d \
  -p 3000:8080 \
  --add-host=host.docker.internal:host-gateway \
  -v open-webui:/app/backend/data \
  -e WEBUI_SECRET_KEY=your-secret-key \
  --name open-webui \
  --restart always \
  ghcr.io/open-webui/open-webui:main
What each part does:
-p 3000:8080: maps the container’s port 8080 to port 3000 on your Mac.--add-host=host.docker.internal:host-gateway: lets the container reach services on your Mac, including Ollama on port 11434.-v open-webui:/app/backend/data: stores your chats, users and settings in a persistent volume.-e WEBUI_SECRET_KEY=...: replace the placeholder with your own long random string (for example the output ofopenssl rand -hex 32). Open WebUI uses it to sign login sessions.--restart always: restarts the container automatically after a reboot.
Wait a few seconds for the container to start.
Step 4: Open the Web Interface and Create Your Admin Account
Go to your browser and open:
http://localhost:3000The first screen asks you to create an admin account. The first account you create becomes the administrator, so do this yourself before you share the address with anyone. Open WebUI connects to Ollama on your Mac automatically because the container’s default Ollama address inside Docker is http://host.docker.internal:11434. No API key is required.
Step 5: Confirm Model Connectivity
Open a new chat and click the model selector at the top. You should see the models you’ve downloaded with Ollama, for example llama3.2.
If no models appear:
- Run
ollama listin your terminal and make sure at least one model is downloaded. - Check the connection under Settings → Admin → Connections. The Ollama URL should be
http://host.docker.internal:11434. - Restart the container with
docker restart open-webuiand read the logs withdocker logs open-webui.
Alternative: Install Open WebUI Without Docker
Open WebUI is also available as a Python package. It supports Python 3.11 and 3.12 (3.13 isn’t supported yet):
pip install open-webui
open-webui serve
You now have a working local AI interface powered by Ollama and Open WebUI. Next, let’s decide who else, if anyone, should be able to reach it.
Configuring Network Access
Ollama itself only listens on your Mac (127.0.0.1:11434) by default. Open WebUI is different. By default, -p 3000:8080 publishes the port on all network interfaces, and Docker’s own documentation warns that published ports become reachable from the outside world, not just your machine. So the container you just started may already be visible to other devices on your network. Here’s how to choose who can reach it, on macOS.
1. Keep It Local Only (Best for a Personal Mac)
To make Open WebUI reachable only from your Mac, bind the published port to the loopback address by adding 127.0.0.1: in front of the port mapping. Stop and remove the current container, then start it again:
docker stop open-webui
docker rm open-webui
docker run -d \
-p 127.0.0.1:3000:8080 \
--add-host=host.docker.internal:host-gateway \
-v open-webui:/app/backend/data \
-e WEBUI_SECRET_KEY=your-secret-key \
--name open-webui \
--restart always \
ghcr.io/open-webui/open-webui:mainYour chats and settings live in the open-webui volume, so recreating the container keeps them. Open WebUI is now available only at http://localhost:3000.
2. Share It on Your Local Network
With the original -p 3000:8080 mapping, other devices on the same Wi-Fi or LAN can already open it once they know your Mac’s IP address.
Step 1: Get Your Local IP Address
Run the following:
ipconfig getifaddr en0This returns your Mac’s local IP (e.g.,
192.168.0.101).
Step 2: Open It From Another Device
On your phone, tablet or another computer on the same network, go to:
http://<your-local-ip>:3000Anyone on the network can reach the login page, so keep authentication on, use a strong admin password, and consider closing public sign-ups (covered under User Management below). If the macOS firewall is on, it may ask you to allow incoming connections. Also note that browsers only allow microphone access on HTTPS pages or on localhost, so voice input from another device needs HTTPS (see the reverse proxy section).
3. Optional: Remote Access From the Internet
Don’t forward port 3000 on your router. If you want internet access, use a tunnel or a reverse proxy, and keep authentication on either way.
Method A: Use ngrok
Install Ngrok:
brew install --cask ngrokAuthenticate Ngrok:
ngrok config add-authtoken <your-auth-token>Expose your Open WebUI port:
ngrok http 3000ngrok prints a public HTTPS address. On the free plan that’s a dev domain ending in ngrok-free.dev:
https://your-name.ngrok-free.devThe free plan has monthly request and bandwidth limits (currently about 20,000 requests and 1 GB), so check ngrok’s pricing page if you plan to use it regularly. Remember that anyone who has the URL can reach your login page.
Method B: Use Cloudflare Tunnel
If you already use Cloudflare for your domain, a Cloudflare Tunnel is a more stable option. Install the client with brew install cloudflared and set up a named tunnel in the Cloudflare dashboard. Avoid the one-command “quick tunnel” (cloudflared tunnel --url http://localhost:3000) for real use. It’s fine for a quick test, but Cloudflare notes that quick tunnels don’t support server-sent events, which Open WebUI relies on to stream replies as they’re generated.
4. Advanced: Use a Reverse Proxy With Nginx
A reverse proxy lets you add HTTPS and a custom domain. Open WebUI doesn’t terminate TLS itself, so this is also how you get the HTTPS that mobile voice input needs.
- Install Nginx:
brew install nginx- Edit the Nginx config:
nano /opt/homebrew/etc/nginx/nginx.conf- Add a server block for Open WebUI:
server {
    listen 80;
    server_name your-domain.com;

    location / {
        proxy_pass http://localhost:3000;

        # Open WebUI uses WebSockets
        proxy_http_version 1.1;
        proxy_set_header Upgrade $http_upgrade;
        proxy_set_header Connection "upgrade";

        proxy_set_header Host $host;
        proxy_set_header X-Real-IP $remote_addr;
        proxy_set_header X-Forwarded-For $proxy_add_x_forwarded_for;
        proxy_set_header X-Forwarded-Proto $scheme;

        # Keep streamed replies smooth
        proxy_buffering off;
        proxy_cache off;
    }
}- Restart Nginx:
brew services restart nginxUse Let’s Encrypt or Cloudflare to manage SSL. If WebSocket connections fail behind a proxy, set the CORS_ALLOW_ORIGIN environment variable on the Open WebUI container to your site’s address.
One more rule: don’t expose Ollama’s own port (11434) to the network. It has no login of its own. If you ever change OLLAMA_HOST to make it reachable, restrict access with a firewall or a private VPN.
At this point, your local AI environment is accessible based on your configuration—whether strictly on-device, across a local network, or securely over the internet.
Next, let’s move on to downloading and managing models efficiently.
Downloading and Managing Models
Once Ollama and Open WebUI are running, you need to download models to begin generating responses. You can manage models in two ways: using the terminal (Ollama CLI) or through the browser interface (Open WebUI). Both options connect to the same local backend.
Option 1: Using the Ollama CLI
This method is direct and script-friendly. Use it when you want to install or switch models without relying on a browser.
Step 1: Find a Model
Browse the Ollama library to see what’s available. It covers general chat models (Llama, Gemma, Qwen, gpt-oss), reasoning models (DeepSeek-R1), coding models and embedding models. Each model page lists its tags and download sizes. A model name takes an optional size tag, for example gemma3:12b.
Step 2: Download and Launch a Model
To download and run a specific model, for example qwen3:8b:
ollama run qwen3:8bThis will:
- Automatically download the model if not already present
- Start the model and wait for input
Type /bye to exit the session. To download a model without opening a chat, use ollama pull:
ollama pull qwen3:8bStep 3: See What’s Installed and What’s Loaded
To list the models on disk:
ollama listIt shows each model’s name, size and when it was modified. To see which models are currently loaded in memory, and to unload one:
ollama ps
ollama stop qwen3:8b
Step 4: Remove a Model
If you no longer need a model:
ollama rm qwen3:8bThis frees up disk space.
Option 2: Using Open WebUI
This method offers a visual way to manage models—especially useful for those who prefer not to use the terminal.
Step 1: Open the Connection Settings
- Visit
http://localhost:3000and sign in as the admin. - Open Settings → Admin → Connections.
- Click Manage on the Ollama connection.
Step 2: Download New Models
Type a model name (for example gemma3:12b) into the download field and confirm. You’ll see progress until the model is ready. As the admin you can also type a model name into the model selector of a new chat and confirm the pull from there.
Step 3: Switch Models During Chat
- Open any chat session.
- Click the model selector at the top.
- Choose your preferred model (for example
llama3.2orgemma3).
The selection is instant—no need to restart the app or reload the page.
Where Are These Models Stored?
On macOS, Ollama stores models in:
~/.ollama/modelsThe ~/.ollama folder also holds Ollama’s configuration and logs. Each model can take several GB, so monitor your disk space and remove models you don’t use.
A Note on Cloud Models
Ollama now also offers cloud-hosted models, marked with a -cloud tag (for example gpt-oss:120b-cloud). Those run on Ollama’s servers, not on your Mac, so they don’t fit a strictly private setup. To stay fully local, turn Ollama’s cloud features off by setting OLLAMA_NO_CLOUD=1 or disable_ollama_cloud in ~/.ollama/server.json. You’ll lose cloud models and web search, but everything else keeps working.
With the right models downloaded, you’re ready to create your own. In the next section we’ll build a custom model with modified parameters.
Creating Custom Models
Ollama lets you go beyond the default models by defining custom ones. You can start from an existing base model like llama3.2 or qwen3 and change its parameters and default system message, all locally.
This section shows how to create and register a custom model on macOS with Ollama’s CLI. Note that this changes how a model behaves (its system prompt and sampling settings). It doesn’t retrain the model.
Step 1: Create a Modelfile
Ollama uses a file format similar to a Dockerfile. It starts from a base model and then overrides settings. The conventional file name is simply Modelfile.
Example: Create a file named Modelfile
nano ModelfilePaste the following content, then save (Ctrl + O, Enter) and exit (Ctrl + X):
FROM llama3.2
PARAMETER temperature 0.7
PARAMETER num_ctx 4096
SYSTEM "You are an AI assistant built to help developers with concise, technical answers. Do not provide unnecessary explanations."
Step 2: Build the Custom Model
Build and register the model with:
ollama create dev-helper -f ModelfileThis creates a model named dev-helper. You’ll see confirmation logs as Ollama stores the new configuration.
The
FROMline accepts any model you have or can pull, such asqwen3,gemma3or a coding model.
Step 3: Verify Model Creation
List all available models:
ollama listYou should now see dev-helper in the list.
Step 4: Run the Custom Model
Run it in the terminal:
ollama run dev-helperOr use it in Open WebUI:
- Open
http://localhost:3000 - Go to any chat session
- Use the model selector dropdown
- Choose
dev-helperfrom the list
Step 5: Optional – Tune Behavior With Parameters and System Prompts
To give your model a specialized purpose (data analysis, a security assistant, a coding bot), change the SYSTEM message and chain more parameters. Save this as a separate file, for example Modelfile.coder:
FROM qwen2.5-coder
PARAMETER temperature 0.5
PARAMETER repeat_penalty 1.2
PARAMETER num_predict 256
SYSTEM "You are a coding assistant that prioritizes best practices and writes production-grade code."
Then create the model from that file:
ollama create prod-coder -f Modelfile.coderCustom models help you control how responses are generated. They’re especially useful in multi-user setups or when building task-specific assistants.
In the next section, we’ll look at what you can layer on top: document chat, user accounts, voice and prompt templates.
Advanced Features and Customizations
Once your local AI setup is stable, you can start layering in advanced capabilities. Ollama and Open WebUI aren’t just limited to running static models—they support multiple configurations that make your workflows faster, more efficient, and task-specific.
This section walks through features that elevate your local AI from a basic chat interface to a fully capable decision-support and automation tool.
1. Retrieval-Augmented Generation (RAG)
Retrieval-Augmented Generation (RAG) improves accuracy by injecting your own documents into the prompt. Instead of relying only on what the model learned in training, the model answers using the files you provide. (For the concepts behind this, see How to Use RAG to Ground LLM Answers.)
How to Use RAG in Open WebUI
- Quick question about one file: drag the file into a chat and ask about it. It’s chunked and embedded just for that chat.
- Reusable knowledge base: go to Workspace → Knowledge and create a knowledge base. It can hold PDFs, spreadsheets, code or any text-based document.
- Use it in a chat: type
#in the message box and pick the document or knowledge base to attach. You can also attach a knowledge base to a model under Workspace → Models.
The model now references your content when it answers.
Use Case Examples:
- Query product documentation to generate user support replies
- Search internal policy documents during compliance checks
- Summarize multi-page reports with direct citations
2. User Management
If you’re using your local AI platform across a team or a shared device, Open WebUI’s account system is already built in.
How Accounts Work
- Login is on by default. The first account created becomes the administrator.
- New sign-ups start as “pending.” By default, people who register get the
pendingrole until an admin approves them. - Each user gets their own chat history.
Once you’ve created the accounts you need, you can close registration completely by adding an environment variable when you (re)create the container:
docker run -d \
  -p 3000:8080 \
  --add-host=host.docker.internal:host-gateway \
  -v open-webui:/app/backend/data \
  -e WEBUI_SECRET_KEY=your-secret-key \
  -e ENABLE_SIGNUP=false \
  --name open-webui \
  --restart always \
  ghcr.io/open-webui/open-webui:main
Some older guides mention an OLLAMA_WEBUI_AUTH variable. It isn’t in Open WebUI’s current documentation, and you don’t need it because authentication is already on. If you’re the only user on a fresh install you can turn login off with WEBUI_AUTH=False, but I’d keep it on whenever the app is reachable from other devices.
3. Voice and Audio Integration (Optional)
Open WebUI supports speech-to-text, including local Whisper transcription, so you can talk to your models.
Enable Voice Input
- Connect a microphone to your Mac
- Click on the mic icon in the chat input box
- Speak, and it will transcribe and send the text to your model
You must allow microphone access in your browser. Browsers only allow the microphone on
localhostor HTTPS pages, so from another device you’ll need HTTPS.
Use Case Examples:
- Developers giving verbal instructions to code assistants
- Transcribing meetings and instantly summarizing content
4. Custom Prompt Templates
You can create reusable prompts with variables to speed up specialized queries.
- Go to Workspace → Prompts and click Create.
- Give it a recognizable title and a slash command (for example “Summarize code logic” or “Translate tech doc to Spanish”).
- Add variables such as
{{language}}if you want a form to fill in. - In any chat, type
/followed by the command to use it.
Prompt templates can be used to:
- Enforce tone and formatting
- Act as role-based assistants (e.g., reviewer, translator, analyst)
5. Model-Specific Parameters (On the Fly)
Even without building a custom model, you can change parameters while you chat.
Open Chat Controls in the right-hand sidebar to set the system prompt and advanced parameters for the current chat, such as:
- Temperature (controls randomness)
- Context length
- Number of predicted tokens
Per-chat values override anything set on the model. Admins can also set defaults for a model under Workspace → Models, and those apply to every chat that doesn’t set its own.
These customizations let your local AI work more like a toolset than just a chatbot. In the next section, we’ll cover maintenance and updates.
Maintenance and Updates
Keeping your setup up to date ensures stability, compatibility and access to new features. Both tools have straightforward update workflows on macOS.
1. Update Ollama
Use Homebrew to update Ollama:
brew upgrade ollamaAfter the update, restart the background service:
brew services restart ollamaVerify:
ollama --version(If you installed the Mac app instead, download the latest Ollama.dmg from ollama.com.)
2. Update Open WebUI
Since it runs in Docker, pull the newer image. If you pinned a version tag, change the tag to the release you want:
docker pull ghcr.io/open-webui/open-webui:mainThen recreate the container with your full run command. Include the same flags you used originally (--add-host, --restart always, your secret key and port mapping), or the new container won’t behave like the old one:
docker stop open-webui
docker rm open-webui
docker run -d \
-p 3000:8080 \
--add-host=host.docker.internal:host-gateway \
-v open-webui:/app/backend/data \
-e WEBUI_SECRET_KEY=your-secret-key \
--name open-webui \
--restart always \
ghcr.io/open-webui/open-webui:mainYour settings and chat history are kept because they live in the open-webui volume.
3. Monitor Disk Usage
Check how much space your models use:
du -sh ~/.ollama/modelsRemove unused models if needed:
ollama rm model-name4. Backup Configuration (Optional)
You can back up your Open WebUI data by copying the Docker volume:
docker cp open-webui:/app/backend/data ./webui-backup5. Check the Logs When Something Breaks
- Open WebUI:
docker logs open-webui - Ollama: the logs are in
~/.ollama/logs(server.logfor the server,app.logfor the Mac app).
With these steps, your local AI platform stays performant and reliable with minimal effort.
No GPU at home? You can run the same models on a rented cloud GPU. See Runpod vs Vast.ai and Runpod vs Lambda to compare GPU cloud options.
Conclusion
Running AI models locally gives developers full control over performance, privacy, and customization—without relying on external APIs or cloud billing. With Ollama handling model execution and Open WebUI providing a streamlined interface, you can build a complete local AI platform within minutes.
We walked through everything you need—from installing Ollama and Open WebUI on macOS, configuring local or remote access, downloading and managing models, to creating your own custom models with precise parameters. We also explored how to extend your setup using features like RAG, user isolation, voice input, and prompt templates.
This setup is well suited to personal use, internal tools, prototyping AI assistants and working offline, and small teams can use it too as long as you keep authentication on and think carefully about who can reach it. It gives you the freedom to iterate faster and more privately.
What kind of use case are you planning to build with your self-hosted AI? Let us know in the comments—or try pushing the limits of Ollama with your own prompt-engineering experiments.
Want to put your local model to work? See Deploy Local LLMs with Ollama and n8n for Private Workflows. Or start with custom models, which is where the real flexibility begins.
People Also Ask (FAQ)
1. Can I run Ollama on an M1/M2/M3 Mac without a dedicated GPU?
Yes. On Apple Silicon, Ollama uses both the CPU and the Mac’s built-in GPU, so you don’t need an external one. What matters most is memory: small models like llama3.2:3b or gemma3:4b run smoothly on 8 GB, while larger models such as gemma3:27b or gpt-oss:20b want 16 GB or more and are slower to load. Intel Macs run on the CPU only.
2. Does Ollama run models completely offline?
Yes, for local models. After a model has been downloaded once, inference runs on your Mac without an internet connection, and your prompts don’t leave the machine. Only the initial download needs internet. The exception is Ollama’s optional cloud models (tags ending in -cloud), which run on Ollama’s servers. You can switch cloud features off with OLLAMA_NO_CLOUD=1.
3. How much disk space do the models take up?
It depends on the model and size tag. Some examples of download sizes:
llama3.2:3b: 2.0 GBgemma3:4b: 3.3 GBqwen3:8b: 5.2 GBgemma3:12b: 8.1 GBgpt-oss:20b: 14 GBgemma3:27b: 17 GB
Check what you have installed with:
ollama listTo save space, remove unused models with:
ollama rm model-name4. Can I host multiple models simultaneously?
Yes, memory permitting. Ollama can keep several models loaded at once and serve parallel requests. You control this with the OLLAMA_MAX_LOADED_MODELS and OLLAMA_NUM_PARALLEL environment variables. Use ollama ps to see what’s loaded and ollama stop to unload a model. In Open WebUI you can switch between models from the selector without restarting anything.
5. Can I use Ollama models in my own application?
Yes. Ollama runs a local REST API on localhost:11434, so you can call it with plain HTTP requests from any language.
Example request:
curl http://localhost:11434/api/generate -d '{
  "model": "llama3.2",
  "prompt": "Explain how HTTP/2 works"
}'
Ollama also exposes an OpenAI-compatible API at http://localhost:11434/v1/, so existing OpenAI client libraries work with a changed base URL:
from openai import OpenAI

client = OpenAI(base_url="http://localhost:11434/v1/", api_key="ollama")

response = client.chat.completions.create(
    model="llama3.2",
    messages=[{"role": "user", "content": "Hello"}],
)
print(response.choices[0].message.content)
6. Is there a way to fine-tune models in Ollama?
Not in the sense of training. Ollama runs models, it doesn’t retrain them on new datasets. You can still shape a model’s behavior with:
- Modify system prompts
- Set temperature, context window, and token limits
- Use RAG for dynamic context injection
These options cover most personalization needs without retraining.
7. Does Open WebUI support multiple users?
Yes, and it’s on by default. The first account you create is the admin, new sign-ups get the pending role until you approve them, and each user gets their own chat history. You can close registration with ENABLE_SIGNUP=false.
8. Can I expose Open WebUI over the internet safely?
Yes, but only with caution. Use secure tunneling services like:
- ngrok (HTTPS, with an auth token)
- Cloudflare Tunnel (a named tunnel, ideally with access controls in front)
Never publish port 3000 directly on a public IP without a reverse proxy, SSL and access control in place, and keep Open WebUI’s login on.
9. What’s the difference between Ollama, LM Studio and LMDeploy?
| Ollama | LM Studio | LMDeploy | |
|---|---|---|---|
| Platforms | macOS, Linux, Windows | macOS (Apple Silicon, macOS 14+), Windows, Linux | Python package (check its docs for supported systems and GPUs) |
| What it is | CLI, Mac app and local API server | Desktop app with a built-in local server and an lms CLI | Toolkit for compressing, deploying and serving LLMs |
| API | REST API and OpenAI-compatible endpoints | OpenAI-compatible endpoints | Serving APIs for deployment |
| Maintained by | Ollama | LM Studio | InternLM |
Ollama is API-first and developer-friendly, especially when paired with Open WebUI. LM Studio suits you if you prefer a graphical app for browsing and testing models. LMDeploy is aimed at deploying and serving models rather than casual local use.
10. How often are models and features updated?
Both projects move fast, with regular releases and new models. To stay current:
- Run
brew upgrade ollamaand pull the newer Open WebUI image (see Maintenance and Updates). - Watch the Ollama and Open WebUI release pages on GitHub.
If you get stuck, isolate the issue:
- Run
docker logs open-webuito debug Open WebUI startup. - Read
~/.ollama/logs/server.logfor Ollama server problems. - Check CPU and memory use in Activity Monitor during inference.
11. Is Open WebUI still open source?
It’s source-available, but since version 0.6.6 (April 2025) it’s no longer under an OSI-approved license. Versions up to 0.6.5 were BSD-3-Clause. Newer versions add a branding clause: you can use, modify and self-host it, including for internal use at any scale, but you must keep the “Open WebUI” branding unless you have 50 or fewer users or an enterprise license. For a personal or team setup like the one in this guide, nothing changes in practice.
Need more help? Drop your use case or error on GitHub Discussions or a relevant developer forum. This ecosystem is growing fast, and your feedback might shape what’s next.