In this guide, we’ll explore how to effectively use AWS Batch and Amazon SageMaker to streamline the training and deployment of machine learning models. AWS Batch automates the provisioning of computing resources needed for large-scale processing jobs, making it an ideal choice for handling complex machine-learning workflows. Amazon SageMaker, on the other hand, simplifies the machine learning lifecycle, offering tools for every step, from model building and training to deployment.
Combining AWS Batch with Amazon SageMaker enables developers to efficiently manage machine learning projects, leveraging the strengths of both services. AWS Batch can handle the heavy lifting of processing large datasets, while SageMaker provides a comprehensive, managed environment for model training, evaluation, and deployment. This synergy not only optimizes resource utilization but also accelerates the time-to-market for machine learning solutions.
This blog aims to deliver a clear, step-by-step guide on utilizing AWS Batch and Amazon SageMaker for machine learning projects. We will cover setting up your AWS environment, preparing your data, training your model with SageMaker, using AWS Batch for efficient processing, deploying your model with SageMaker, and monitoring and managing deployed models. Our focus is on providing actionable insights for developers to implement in their machine learning workflows, ensuring the content remains technical, precise, and professional throughout.
Setting Up Your AWS Environment
Before starting with AWS Batch and Amazon SageMaker for machine learning model training and deployment, it’s essential to properly set up your AWS environment. This section provides a detailed walkthrough to prepare your AWS account, ensuring a smooth operation with AWS Batch and Amazon SageMaker.
AWS Account Setup: First, ensure you have an active AWS account. If not, sign up at the AWS website. A basic understanding of AWS services like S3 and IAM will be helpful but is not mandatory.
Creating a SageMaker Domain
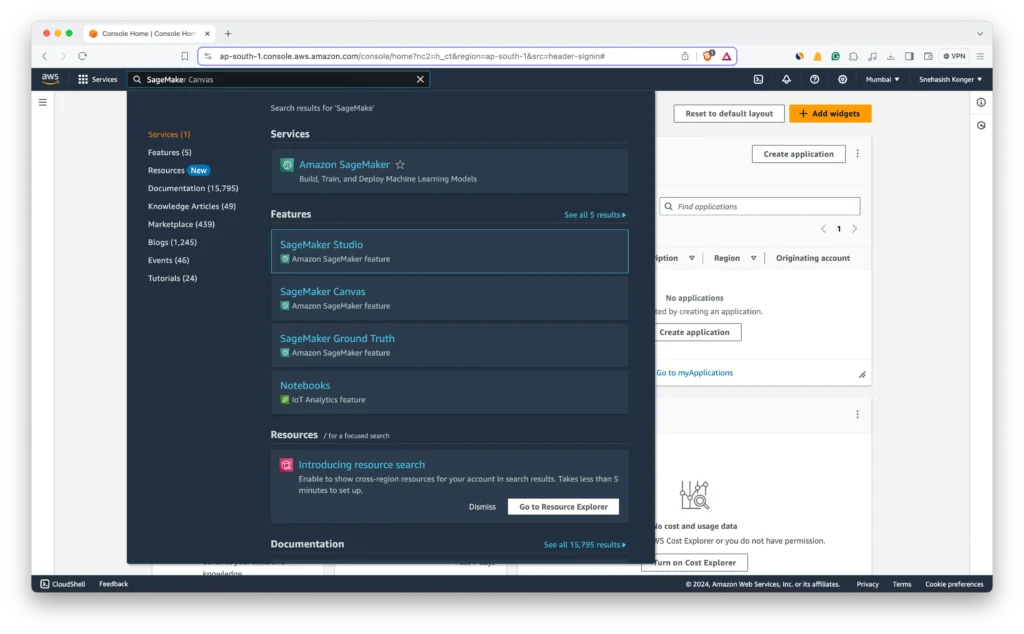
- Navigate to Amazon SageMaker: Log in to your AWS Management Console and open the Amazon SageMaker service.
- Access SageMaker Studio: On the SageMaker dashboard, locate and select “SageMaker Studio” to begin the setup process.
- Launch Studio Setup: Find and click on the “Launch SageMaker Studio” button, which initiates the domain creation process.
- Specify Domain Settings: You’ll be prompted to configure your domain settings. This includes selecting an authentication method (AWS IAM or SSO) and specifying your VPC and subnets if you plan to connect SageMaker Studio to your VPC.
- Create the Domain: Review your settings and click “Submit” to create your SageMaker domain. It might take a few minutes for AWS to provision resources for your domain.
Creating a Studio User
- Open SageMaker Studio: Once your domain is ready, open SageMaker Studio from the SageMaker dashboard.
- User Management: Inside SageMaker Studio, navigate to the “Studio Users” section where you can manage user profiles.
- Add User: Click on the “Add user” button to start creating a new Studio user.
- Configure User Settings: Assign a user name and select the execution role. The execution role grants the user permission to AWS resources. If you haven’t already created a role, you need to create one with appropriate permissions for SageMaker. Usually, the role needs policies that allow access to S3, AWS Batch, and any other services your projects might use.
- Finish User Creation: Finalize the user setup by clicking “Submit”. AWS will then set up the user account within your SageMaker Studio domain.
AWS IAM Roles and Permissions
Security is paramount when working with AWS. Implement the principle of least privilege by granting only necessary permissions to each service.
- Create an IAM Role for SageMaker:
- Go to the IAM service in the AWS Management Console.
- Click “Create Role” and select “Amazon SageMaker” under the AWS service roles.
- Choose a policy template that suits your needs (e.g., “AmazonSageMakerFullAccess” for comprehensive access or a custom policy for more granular permissions).
- Name your role (e.g., “SageMakerTrainingRole”) and create it.
- Create an IAM Role for AWS Batch:
- Repeat the process for AWS Batch by selecting “AWS Batch” for the service.
- Choose an appropriate policy template (e.g., “AWSBatchFullAccess” or a custom policy for tailored permissions).
- Assign a name to your role (e.g., “BatchExecutionRole”) and create it.
- Attach IAM Policies for S3 Access: Both SageMaker and AWS Batch will need access to S3 buckets for storing inputs, outputs, and model artefacts. Edit the roles you’ve created and attach the “AmazonS3FullAccess” policy, or a custom S3 policy if you need to restrict access to specific buckets.
This setup is critical for leveraging AWS Batch and Amazon SageMaker effectively and securely. Properly configured IAM roles and permissions streamline your machine learning workflow, ensuring your projects run without access issues.
Preparing Your Data
After setting up your AWS environment and SageMaker domain, the next critical step in your machine-learning workflow involves preparing your data. Efficient data preparation lays the groundwork for successful model training and deployment. This section outlines the detailed steps for data preparation using AWS services.
Storing Your Data in Amazon S3
- Create an S3 Bucket: Log into the AWS Management Console, navigate to the Amazon S3 service, and create a new bucket. Choose a unique name and select a region that matches your SageMaker instance for optimal performance. Ensure to apply appropriate access permissions to keep your data secure.
- Upload Your Data: Once the bucket is created, upload your datasets into the bucket. Organize your data into clearly named folders, such as
train,test, andvalidation, to simplify access during the model training process. - Set Permissions: Adjust the bucket and object permissions to ensure that SageMaker can access the data. Typically, this involves attaching an IAM policy to the SageMaker execution role, granting it
s3:GetObjectands3:PutObjectpermissions for your bucket.
Data Preparation with AWS Glue
For larger datasets or complex transformations, AWS Glue can automate data preparation tasks through an ETL (Extract, Transform, Load) process.
- Create a Glue Job: Navigate to AWS Glue in the AWS Management Console. In the “Jobs” section, click “Add job” to start configuring your ETL job. Assign a name, select a role with permissions to access your data sources and S3 buckets, and choose a Glue ETL script to perform your data transformations.
- Specify Data Sources: Define the data source for your job. AWS Glue can connect to various data sources, including Amazon S3, Amazon RDS, and Amazon Redshift. Select your source format and provide the necessary connection details.
- Define Transformations: Use the visual editor or script editor in AWS Glue to specify the transformations needed for your data. Common transformations include cleaning, joining, and reshaping data. AWS Glue generates a PySpark or Scala script based on your transformations.
- Configure Output: Choose an S3 bucket as the destination for your transformed data. Define the output format, such as Parquet or CSV, which best suits your model training needs.
- Run the Glue Job: After configuring the job, execute it to transform your data. AWS Glue scales automatically to process your data efficiently, and the job’s progress can be monitored in the Glue console.
- Access Transformed Data in SageMaker: Once the ETL job is completed, the transformed data is stored in your specified S3 bucket, ready for use in SageMaker for model training.
Proper data preparation is crucial for building effective machine-learning models. By leveraging Amazon S3 for data storage and AWS Glue for data transformation, you can ensure that your datasets are ready for the next stages of your machine learning pipeline, including model training and deployment with Amazon SageMaker and AWS Batch.
Training Your Machine Learning Model with Amazon SageMaker
Training your machine learning model with Amazon SageMaker involves several key steps to ensure effective learning and accuracy. This process includes setting up the training environment, preparing your dataset, creating a training script, and finally, running the training job. Let’s dive into each step in detail:
Setting Up the Training Environment
- Choose an Instance Type: First, select an appropriate Amazon SageMaker instance type for your model training. SageMaker offers a variety of machine types designed to handle different sizes and complexities of training jobs.
- Select a Pre-built Algorithm or Framework: Amazon SageMaker provides several built-in algorithms and supports multiple machine learning frameworks like TensorFlow, PyTorch, and MXNet. Depending on your model requirements, you can choose a built-in algorithm or opt for a custom training script using one of the supported frameworks.
- Configure Training Parameters: This includes specifying the S3 path where your training data is stored, setting up the output path for the trained model artefacts, and other training parameters such as the number of epochs, batch size, and learning rate.
Preparing Your Dataset
- Upload Your Dataset to S3: Your training and validation datasets need to be accessible to SageMaker. Upload your datasets to an S3 bucket, and note the paths, as you will need them to configure your training job.
- Data Preprocessing: Depending on the nature of your dataset, you might need to preprocess your data (e.g., normalization, tokenization). SageMaker Processing Jobs can be used for this purpose, allowing you to run preprocessing scripts at scale.
Creating a Training Script
- Write Your Training Script: If you’re using a custom framework, you’ll need to create a training script. Your script should define the model architecture, compile the model, and specify the training process. Make sure your script is compatible with the SageMaker environment by adhering to the framework’s guidelines for SageMaker.
- Use Script Mode: For frameworks like PyTorch, TensorFlow, and MXNet, SageMaker supports Script Mode, which allows you to use training scripts more flexibly. Specify your script file as the entry point for the training job.
Running the Training Job
- Create a SageMaker Estimator: A SageMaker Estimator abstracts the job configuration and execution. It requires specifying the instance type, the number of instances for distributed training, the role ARN with necessary permissions, and the path to your training script.
- Fit the Model: Call the
fitmethod on the Estimator object, passing the S3 paths of your training and validation data. SageMaker will then initialize the training job, pull your data, execute your training script, and save the model artefacts to the specified S3 output path. - Monitor the Training Job: You can monitor the progress of your training job directly from the SageMaker console, where logs and metrics are available in real time. This allows you to adjust hyperparameters or stop and restart the training job if necessary.
After the training job is completed, your model artefacts will be stored in S3, ready for deployment. SageMaker simplifies the model training process by managing the underlying infrastructure, allowing you to focus on tuning and improving your model’s performance.
Remember, the details provided here are based on a general workflow. The specific steps, especially around script writing and data preprocessing, will vary based on the machine learning framework and the complexities of your model.
Always refer to the Amazon SageMaker documentation for the most accurate and framework-specific guidelines.
Using AWS Batch for Efficient Model Training
Integrating AWS Batch with Amazon SageMaker for model training can significantly enhance the efficiency and scalability of your machine-learning workflows. AWS Batch enables you to run batch computing jobs at scale, managing the provisioning of compute resources and optimizing the execution of the batch jobs. This section outlines how to leverage AWS Batch for efficient model training, focusing on setup, job definition, and execution.
Setting Up AWS Batch
- Create a Compute Environment:
- Navigate to the AWS Batch console and select “Compute environments”.
- Click “Create environment”, choosing either a managed or unmanaged type. Managed environments are recommended for their simplicity, as AWS manages the underlying compute resources.
- Configure the environment by specifying instance types, desired vCPUs, and other relevant settings, such as allocation strategies that determine how jobs are distributed across the compute resources.
- Create a Job Queue:
- In the AWS Batch console, go to “Job queues” and click “Create queue”.
- Associate the job queue with the computing environment you created. You can prioritize job queues to control the order in which jobs are processed.
- Define Job Definitions:
- Go to “Job definitions” and click “Create”.
- Specify a name and provide an image for the job; this can be a Docker image in Amazon ECR that contains your training code and dependencies.
- Define the vCPUs and memory requirements for the job. Also, set the command to run your training script, ensuring it aligns with the container image provided.
Preparing Your Model Training Job
- Containerize Your Training Application: Package your model training code and any dependencies into a Docker container. Push this container to Amazon ECR, making it accessible to AWS Batch.
- Upload Your Data to S3: Ensure your training dataset is available in an S3 bucket. Your training application should be able to access S3 to retrieve this data for training.
Submitting Training Jobs to AWS Batch
- Create a Job Submission Script: Write a script or use the AWS CLI to submit your training job to the previously created job queue. Specify the job definition, the job queue, and any job-specific parameters, such as environment variables that include S3 paths to your data.
- Monitor Job Execution: Use the AWS Batch console to monitor the status of your training jobs. AWS Batch provides detailed logs that can help debug issues or optimize your training process.
- Retrieve Output from S3: Upon completion, your training job should save the model artefacts to an S3 bucket. Ensure your job definition includes the necessary commands to perform this action.
Integrating AWS Batch with SageMaker for model training tasks offers a powerful, scalable, and cost-effective solution for handling complex machine learning workflows. This approach is particularly beneficial when dealing with large datasets or computationally intensive training processes.
Deploying the Model with Amazon SageMaker
Deploying your trained machine learning model into production with Amazon SageMaker involves several important steps to ensure your model can serve predictions efficiently and reliably. This section outlines the process of model deployment on SageMaker, from creating a model object to configuring an endpoint for real-time inference or setting up a Batch Transform job for batch inference.
Creating a SageMaker Model Object
- Gather Model Artifacts: After training, SageMaker stores your model artefacts in Amazon S3. You’ll need the S3 path to these artefacts to create a model object.
- Define the Model: Use the SageMaker SDK to define a model by providing the S3 location of your model artefacts and the Docker image of the inference code, which SageMaker uses to perform predictions. If you used a built-in algorithm or a pre-built framework container for training, you could use the same for inference.
- Create the Model Object: With the model definition ready, create the model object in SageMaker by executing the SDK command. This model object is a representation of your model in SageMaker and will be used to configure deployment.
Deploying for Real-time Inference
- Configure an Endpoint: For real-time inference, you need to configure an endpoint. This involves specifying the type and number of instances that will serve your model. The choice depends on your application’s latency and throughput requirements.
- Create the Endpoint: Use the SageMaker SDK to create the endpoint. Behind the scenes, SageMaker provisions the required instances deploys the model, and sets up the endpoint URL for API calls.
- Perform Inference: Once the endpoint is in service, you can start making real-time prediction requests. Use the SageMaker runtime to invoke the endpoint, passing the input data for which you want predictions.
Deploying with Batch Transform
- Configure Batch Transform Job: For scenarios where you need to process large datasets at once, instead of real-time inference, configure a Batch Transform job. This includes specifying the S3 input location of your data, the output location for the predictions, and the compute resources needed.
- Run Batch Transform Job: Execute the Batch Transform job using the SageMaker SDK. SageMaker processes the input data in batches, generates predictions, and stores the output in the specified S3 location.
- Retrieve and Analyze Predictions: Once the Batch Transform job is complete, download the predictions from S3 to analyze or use in your application.
Monitoring and Managing Deployments
- Monitor Endpoint Performance: SageMaker provides metrics for monitoring the performance of your endpoints, such as latency and throughput, which are accessible via Amazon CloudWatch. It’s crucial to monitor these metrics to ensure your deployment meets your application’s performance criteria.
- Update and Scale Endpoints: Based on the performance monitoring and feedback, you may need to update your model or adjust the endpoint configuration. SageMaker allows you to update existing endpoints with new models or change the instance type and quantity for scaling.
Deploying models with Amazon SageMaker streamlines the transition from model training to inference, providing a managed environment that simplifies operations such as monitoring, scaling, and updating your models in production. This ensures your machine learning applications remain performant and cost-effective, even as your usage patterns change over time.
Monitoring and Managing Deployed Models
After deploying your models with Amazon SageMaker, monitoring and managing them effectively is crucial to ensure they perform as expected in production. This involves keeping an eye on model performance, managing resource allocation, and updating models as necessary based on new data or improved algorithms. Here’s how to approach this:
Monitoring Model Performance
- Use Amazon CloudWatch: SageMaker integrates with Amazon CloudWatch to provide detailed metrics on your model’s operational performance, such as invocations, latency, and error rates. Regularly review these metrics to ensure your model is performing as expected.
- Set Alarms: With CloudWatch, you can set alarms for specific metrics that indicate your model’s health. For instance, you might set an alarm for high latency or an increased error rate, which could signal a problem that needs investigation.
- Enable Logging: SageMaker allows you to enable logging for your endpoints to Amazon CloudWatch Logs. These logs can provide valuable insights into the runtime behaviour of your models and help debug issues.
Managing Resource Allocation
- Adjust Endpoint Configurations: Depending on the observed performance and utilization metrics, you may need to adjust your endpoint configurations. This can include scaling the number of instances up or down or changing the instance type to better match your workload requirements.
- Use Endpoint Autoscaling: SageMaker supports automatic scaling for your deployed models. By defining scaling policies based on CloudWatch metrics, you can ensure your endpoints scale in response to changes in demand automatically.
Updating Models
- Model Re-Training: Continuously monitor the performance of your model against new data. If you detect performance degradation or if new data becomes available, it may be time to re-train your model.
- Blue/Green Deployments: When deploying updated models, consider using blue/green deployment strategies to minimize downtime and risk. SageMaker supports blue/green deployments by allowing you to create variant endpoints. You can shift traffic gradually to the new model and monitor its performance before routing all traffic to it.
- Automate Deployments with CI/CD Pipelines: For teams practicing MLOps, automating model deployments through CI/CD pipelines can streamline the process of updating models in production. SageMaker integrates with AWS CodePipeline and other CI/CD tools, enabling automated testing and deployment of model updates.
Handling Model Drift
- Monitor Data and Model Drift: Over time, the data your model receives in production may change, leading to model drift. SageMaker Model Monitor can detect these changes by continuously comparing model predictions against actual outcomes.
- Respond to Drift: When model or data drift is detected, take action by re-training your model with more recent data or adjusting your model to better fit the new data distribution.
By implementing these monitoring and management practices, you can ensure your machine learning models remain effective and efficient over time, providing valuable insights and predictions to your applications and business processes. Regularly reviewing operational metrics, managing resources wisely, and updating models in response to new data or feedback are key to sustaining the performance and reliability of your machine learning deployments on Amazon SageMaker.
Conclusion
In this guide, we’ve navigated through the comprehensive process of using AWS Batch and Amazon SageMaker for training and deploying machine learning models. Starting with setting up your AWS environment, we covered each step in detail, including preparing your data, training your model with Amazon SageMaker, deploying your model for real-time or batch inference, and the crucial practices for monitoring and managing deployed models.
The journey from model conception to deployment is intricate, requiring careful consideration at each step to ensure efficiency, accuracy, and scalability. By leveraging AWS Batch for resource-intensive tasks and Amazon SageMaker for streamlined model development and deployment, developers can focus on optimizing their models rather than managing infrastructure.
As machine learning continues to evolve, tools like AWS Batch and Amazon SageMaker are invaluable for keeping pace with the demands of modern ML workflows. By following the best practices outlined in this guide, you can enhance your ML projects, driving innovation and delivering impactful results.
Remember, the field of machine learning is dynamic, and staying informed about the latest AWS features and services can provide new opportunities to refine and improve your machine learning pipelines.


