Follow Us:
How to Fix LCP with Fetchpriority without a Plugin?
Largest Contentful Paint (LCP) is a critical metric for measuring the loading performance of a webpage. It marks the point when the largest visible element, typically an image or video, is fully rendered. A good LCP score is vital for enhancing user experience and improving search engine rankings.
One common issue affecting LCP is the default lazy loading of above-the-fold images in WordPress. Lazy loading delays the loading of images until the user scrolls down, which can negatively impact the loading time of important visuals at the top of the page. This can result in poor LCP scores and a suboptimal user experience.
Instead of relying on plugins to solve this problem, which can add unnecessary bloat and reduce site performance, we can implement a more efficient solution by directly modifying the theme’s code. In this guide, we’ll walk you through fixing LCP by adjusting the fetchpriority attribute for critical images without using any plugins.
Understanding Your LCP Metric
Largest Contentful Paint (LCP) is one of the most important metrics for measuring the loading performance of a webpage. It reflects how quickly the main content of a page becomes visible to users. Unlike other metrics, LCP focuses specifically on the loading speed of the largest element in the viewport, which is often a significant visual element like an image, video, or large block of text. Understanding and optimizing LCP is crucial for delivering a fast and engaging user experience.
What is the Largest Contentful Paint?
LCP measures the render time of the largest content element visible in the viewport, starting from when the user first requests the URL. This metric is part of Google’s Core Web Vitals, which are essential indicators of web performance. A good LCP score is 2.5 seconds or less, while a score above 4 seconds is considered poor.
LCP directly impacts user satisfaction. A fast LCP means users can quickly see the main content of your page, which reduces bounce rates and increases engagement. Conversely, a slow LCP can frustrate users, causing them to leave your site and potentially never return. Moreover, Google uses LCP as a ranking factor, so improving your LCP can boost your site’s search engine rankings.
How is LCP Measured?
Measuring Largest Contentful Paint (LCP) involves several key phases that the browser goes through to determine how quickly the main content of a page becomes visible. This user-centric metric ensures that web performance is evaluated based on what the user experiences. Here’s a detailed breakdown of the LCP measurement process:
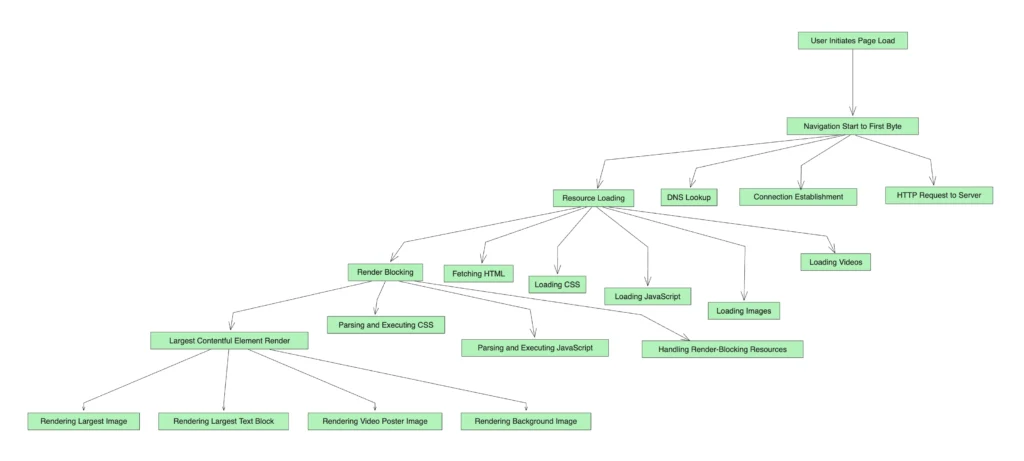
Navigation Start to First Byte (TTFB)
The process begins when the user initiates the page load, either by clicking a link or entering a URL. This phase is crucial as it sets the foundation for the subsequent loading steps. The key components of this phase are:
- DNS Lookup: Resolving the domain name to an IP address.
- Connection Establishment: Establishing a TCP connection with the server.
- HTTP Request to Server: Sending the HTTP request to the server and waiting for the first byte of the response.
A faster TTFB reduces the overall time to start rendering the page, positively impacting LCP.
Resource Loading
Once the initial connection is established, the browser loads the resources required to render the page. These resources include HTML, CSS, JavaScript, images, and videos. The efficiency of this phase directly influences the LCP:
- Fetching HTML: The browser requests and downloads the HTML document.
- Loading CSS: CSS files are fetched and processed, as they are critical for rendering the page correctly.
- Loading JavaScript: JavaScript files are fetched and executed. If these scripts are render-blocking, they can delay the LCP.
- Loading Images: Images, especially large ones, are downloaded. Above-the-fold images are critical for LCP.
- Loading Videos: Video files or their poster images are also fetched.
Efficient resource loading ensures that the largest contentful element appears quickly.
Render Blocking
During this phase, the browser deals with render-blocking resources that must be processed before the main content can be rendered. These include:
- Parsing and Executing CSS: CSS must be parsed and applied before rendering any part of the page.
- Parsing and Executing JavaScript: JavaScript execution can block rendering if it modifies the DOM or CSSOM.
- Handling Render-Blocking Resources: Any resources that delay rendering need to be handled promptly.
Minimizing render-blocking resources is essential for a fast LCP.
Largest Contentful Element Render
Finally, the browser identifies and renders the largest contentful element in the viewport. This element could be an image, a video poster image, a large text block, or a background image. The render time of this element marks the end of the LCP measurement:
- Rendering Largest Image: The largest image in the viewport is rendered.
- Rendering Largest Text Block: Large text blocks, such as headings or paragraphs, are rendered.
- Rendering Video Poster Image: The placeholder image for a video is rendered.
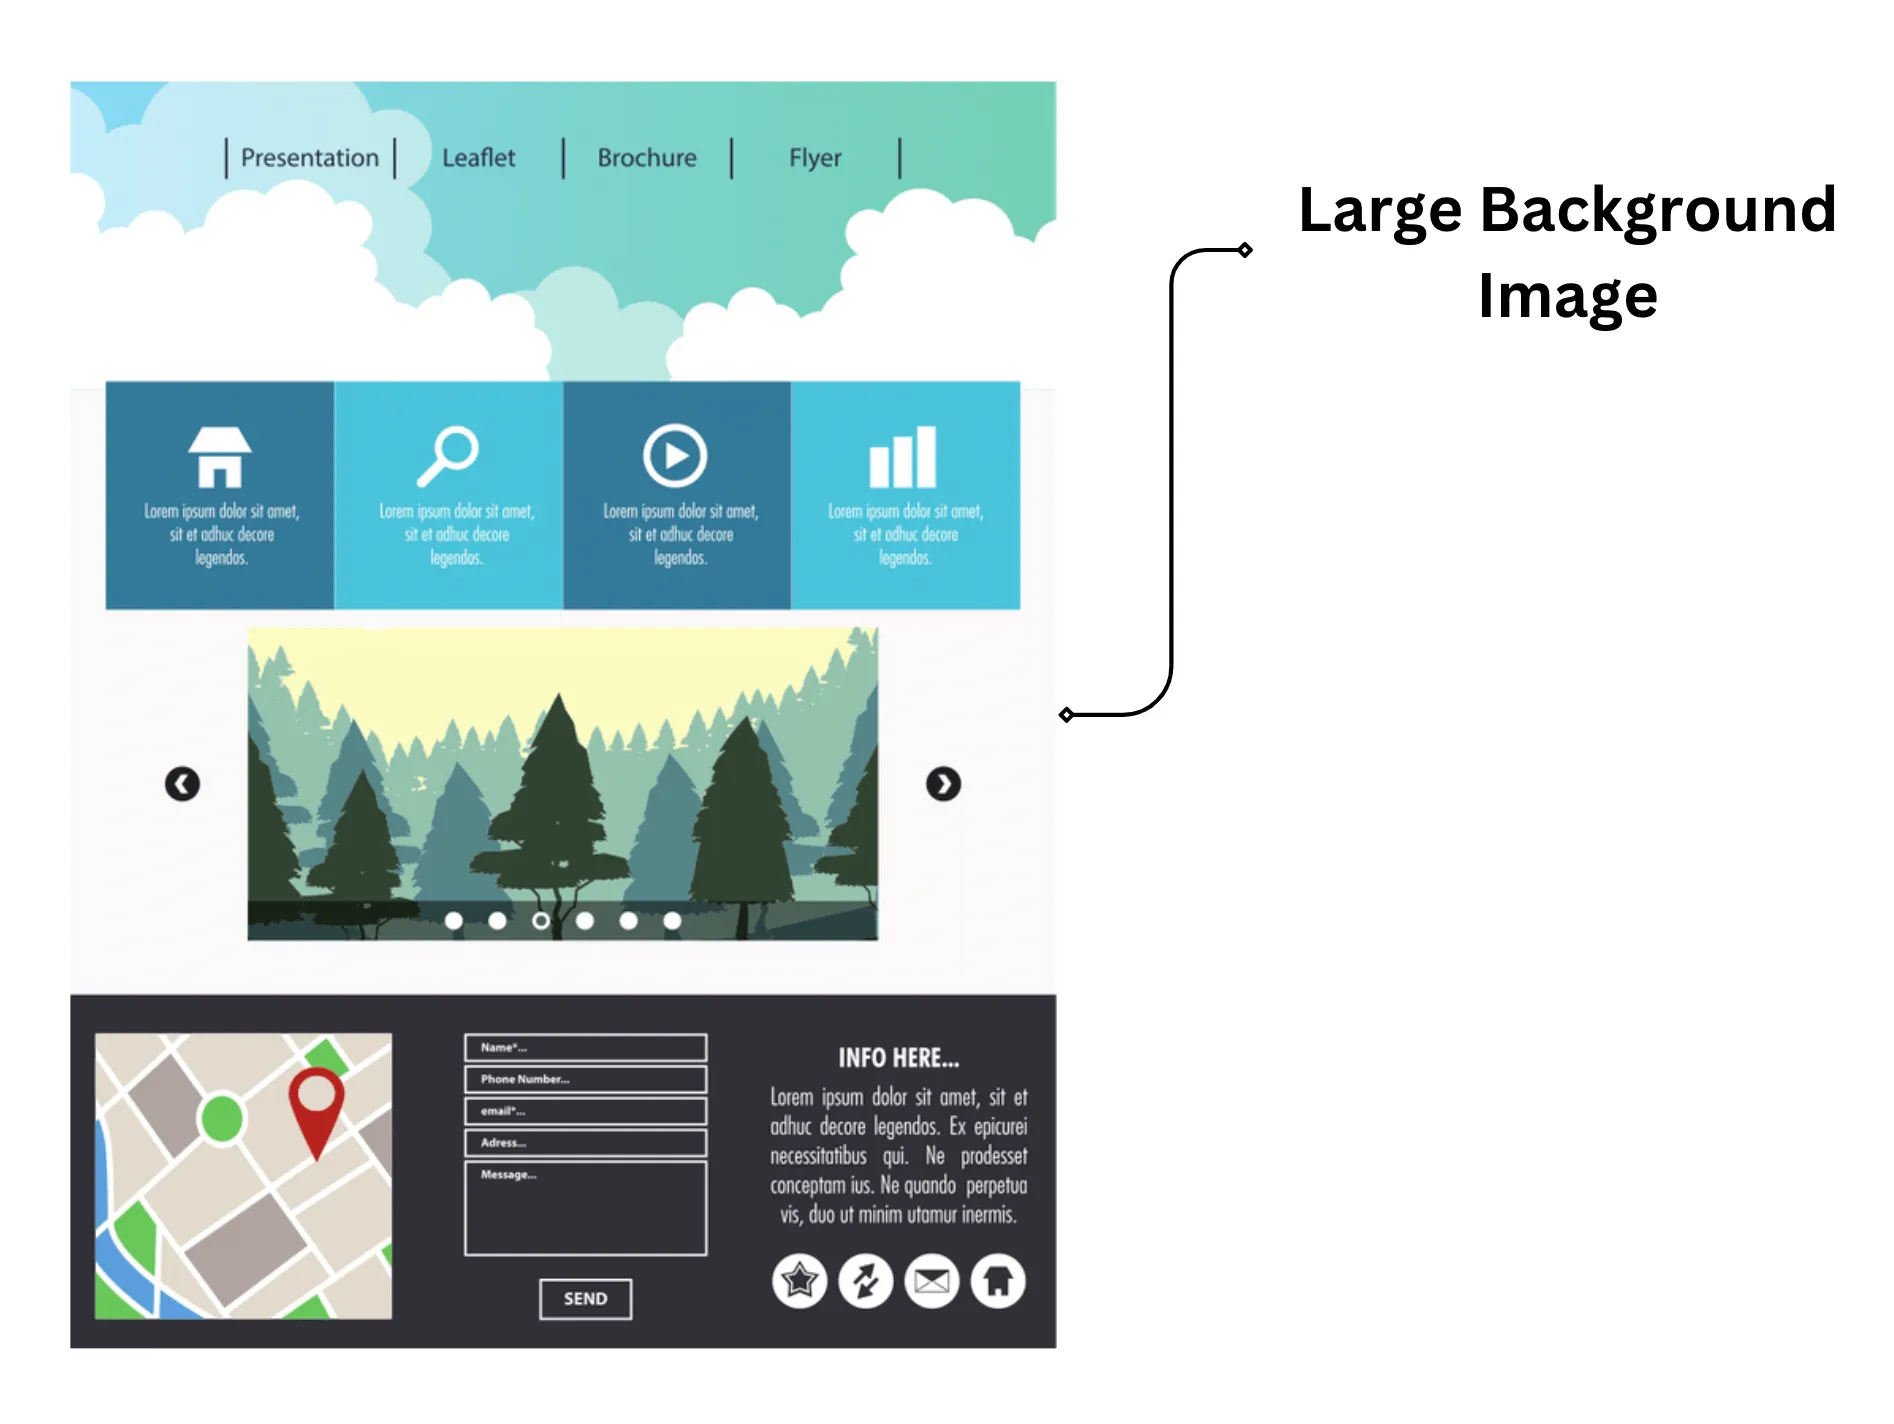
- Rendering Background Image: Large background images within block-level elements are rendered.
The browser continuously monitors the viewport to detect the largest element as it renders. The time it takes for this element to appear fully is recorded as the LCP.
Understanding these phases helps identify and optimize the factors that affect LCP, ultimately leading to a better user experience and improved search engine rankings. By focusing on reducing server response times, optimizing resource loading, and minimizing render-blocking resources, you can significantly enhance your LCP score.
Key Phases in the LCP Measurement
- Navigation Start to First Byte (TTFB): This phase includes DNS lookup, establishing a connection, and sending the HTTP request to the server. TTFB is crucial because a faster server response can significantly reduce the overall LCP.
- Resource Loading: This phase involves fetching and loading resources like HTML, CSS, JavaScript, and media files. The size and number of these resources can impact how quickly the largest contentful element is rendered.
- Render Blocking: Scripts and stylesheets that block rendering can delay LCP. The browser must download, parse, and execute these files before it can render the content.
- Largest Contentful Element Render: The final phase is when the largest contentful element, such as an image or text block, is fully rendered in the viewport. This marks the end of the LCP measurement.
Types of Elements Considered for LCP
- Images: Including
<img>tags, background images loaded via CSS, and elements with theurl()function. - Video Poster Images: The placeholder image is shown before a video starts playing.
- Block-Level Elements: Large block-level elements containing text, such as
<div>,<section>, and<article>. - Text Elements: Large text blocks within headers, paragraphs, or other sizable containers.
Example Scenarios
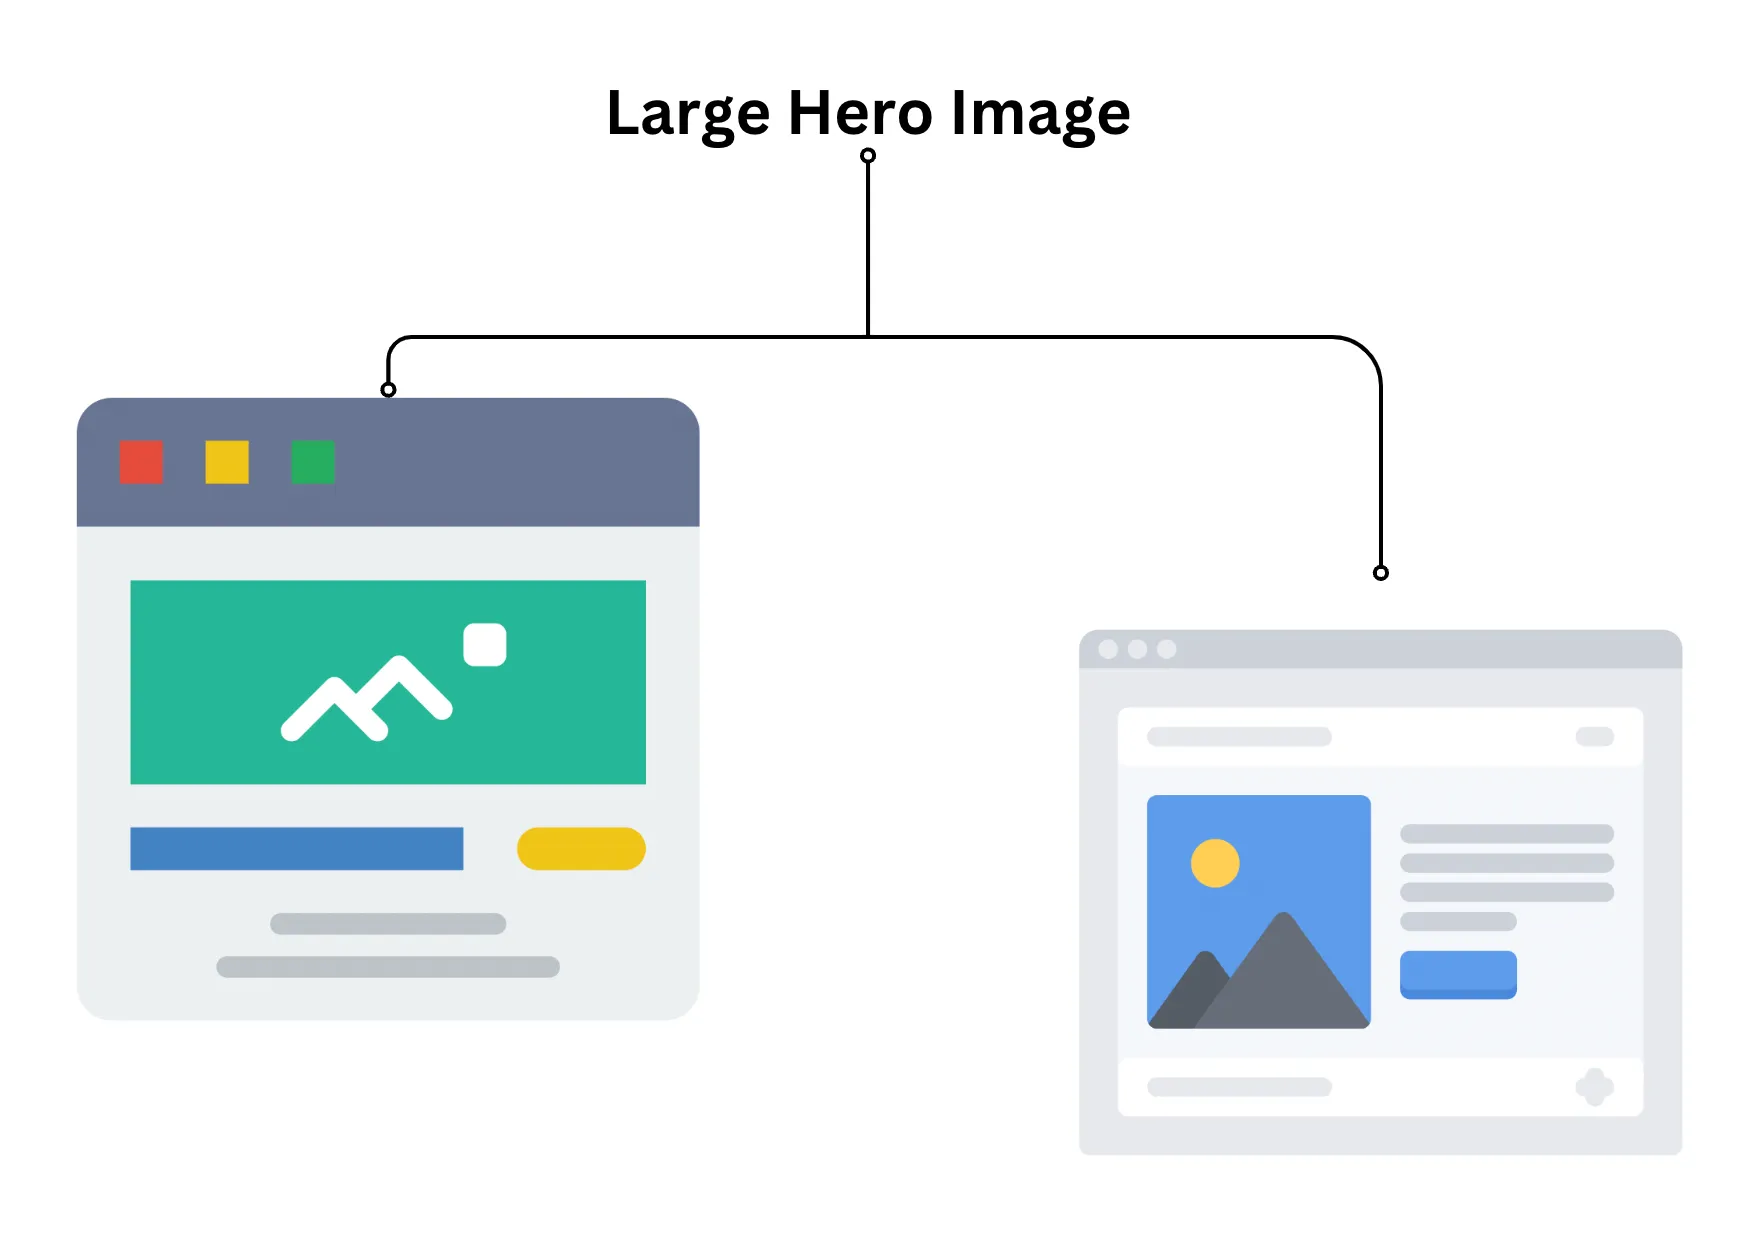
- Image-Heavy Pages: On a webpage where the hero image is the largest element, LCP will be measured from the navigation start until the hero image is fully loaded and visible. If the image is 1200px by 800px and appears prominently in the viewport, the time taken to render this image will be the LCP.
- Text-Heavy Pages: On a blog post, the LCP might be the time it takes to load a large block of text within a
<div>element. If the text block is significant and takes up most of the viewport, the browser will measure the time from the page load start to when the text is fully rendered.
Common Elements Affecting LCP
- Images: High-resolution images or large background images often constitute the largest visible element.
- Video Elements: Video poster images can also be significant contributors to LCP.
- Text Blocks: Large text blocks, especially those within block-level elements like
<div>or<p>, can impact LCP. - Web Fonts: Loading custom web fonts can delay the rendering of large text blocks, affecting LCP.
Problems with Default Lazy Loading in WordPress
WordPress, by default, implements lazy loading for images to improve overall page speed by deferring the loading of images until they are needed. While this approach generally enhances performance, it can be detrimental to LCP, particularly for above-the-fold images.
Lazy loading delays the loading of these crucial images, causing a significant delay in the time it takes for the largest contentful element to appear. This delay negatively impacts the LCP score, as the browser must wait until the user scrolls before loading these images. For above-the-fold content, this delay is unnecessary and counterproductive.
Examples of Poor LCP Scenarios
- Large Hero Image: Consider a webpage with a large hero image at the top. If this image is lazy-loaded, the user will see a blank space or a low-quality placeholder until they scroll, causing a delayed LCP.
- Background Image on a Banner: A banner with a background image that loads lazily will not appear promptly, making the main content appear incomplete and delayed.
Factors Contributing to Poor LCP
- Server Response Time: Slow server response times can delay the rendering of the largest contentful element.
- Render-Blocking JavaScript and CSS: Scripts and styles that block rendering can delay the display of the main content.
- Resource Load Times: Large resources, such as images and videos, take longer to load, affecting LCP.
- Client-Side Rendering: Content that relies heavily on JavaScript to render can delay LCP.
Understanding LCP and its importance is the first step in optimizing your web performance. The largest contentful element, often an image or video, needs to load quickly to improve the user experience and SEO rankings. While WordPress’s default lazy loading helps overall page speed, it can hinder LCP by delaying the loading of critical above-the-fold images. Recognizing and addressing these issues is crucial for optimizing LCP and providing a fast, engaging experience for your users.
Now,

Why you should Avoid Using Plugins?
Using plugins to address web performance issues, such as improving LCP, can seem like an easy solution. However, relying on plugins can introduce several challenges and drawbacks. Here’s why avoiding plugins for LCP optimization might be a better approach:
- Performance Overhead: Plugins, while convenient, often come with additional performance overhead. Each plugin adds extra code, which can slow down your website. This added complexity can counteract the performance gains you aim to achieve.
Like, A plugin designed to optimize images might include features you don’t need, leading to unnecessary processing and increased load times. These redundant operations can slow down your site, negating any LCP improvements. - Increased Complexity: Plugins can introduce increased complexity in your website management. Each plugin requires updates, compatibility checks, and sometimes troubleshooting. This complexity can lead to maintenance headaches and potential conflicts with other plugins or your theme. Installing an image optimization plugin might conflict with your caching plugin, causing unpredictable behaviour and requiring time-consuming troubleshooting.
- Dependency on Third-Party Solutions: Relying on plugins means you depend on third-party developers for updates and support. If a plugin is not regularly maintained, it can become outdated and insecure, posing risks to your website. A plugin that isn’t updated to work with the latest version of WordPress can break your site or leave it vulnerable to security exploits.
- Lack of Control: Using plugins reduces your control over the specific implementation details. Customizing plugin functionality can be limited, and you might not be able to tailor the solution to fit your precise needs. A plugin might offer a general solution for lazy loading images, but it may not provide the fine-tuned control you need for optimizing above-the-fold images specifically.
- Unnecessary Bloat: Many plugins offer a wide range of features, most of which you might not use. This bloat can slow down your site and affect performance. Instead of a lean, focused approach, you end up with additional code that adds no value. A comprehensive SEO plugin may include image optimization as one of its many features, but if you only need image optimization, the rest of the features become unnecessary bloat.
Now, let’s see the benefits of a Code-Based Approach rather than using a plugin:
- Performance Efficiency: Directly modifying your theme’s code allows you to implement precisely what you need without unnecessary overhead.
- Simplicity: A code-based solution is straightforward and avoids the complexity of plugin management.
- Full Control: You have complete control over the implementation, allowing for fine-tuned optimization.
- Reduced Bloat: By adding only the necessary code, you avoid the additional bloat that comes with plugins.
While plugins can offer convenient solutions, they often come with drawbacks that can impact your site’s performance and maintainability. A direct, code-based approach to improving LCP gives you greater control, efficiency, and simplicity. By focusing on precisely what your website needs, you can achieve better performance without the added overhead and complexity of plugins.
Implementing Fetchpriority without a Plugin
Now, let’s see how we can use a code-based approach to fix the LCP issue of our website. To fix the issue without using a plugin, we can directly modify our WordPress theme’s functions.php file to add the necessary code. This approach allows us to have full control over the implementation and ensures that the fetchpriority attribute is applied to the relevant images on our website. Here’s the step-by-step guide:
- Locate your WordPress theme’s
functions.phpfile: This file is typically located in the root directory of your theme, usually found in the/wp-content/themes/your-theme-name/folder. I’d recommend you not use the WordPress dashboard for this, and use the server files instead. Because if you want to personalize your code, it would be easier for you to do that on your server.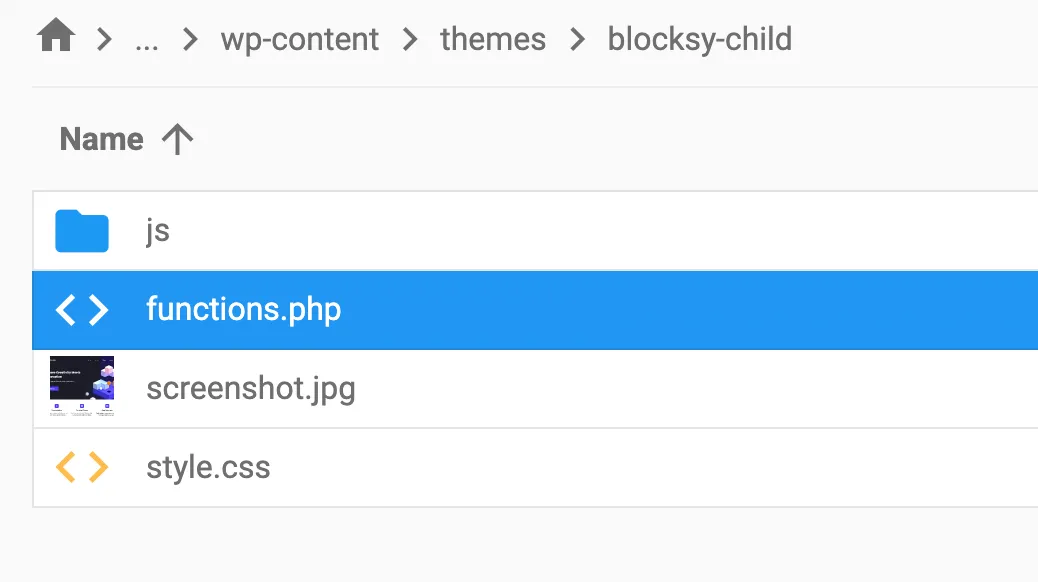
- Open the
functions.phpfile: You can use a text editor or an integrated development environment (IDE) to edit the file. - Add the following code to the
functions.phpfile:
function add_fetchpriority_to_images($content) {
    // Modify image tags to add fetch priority attribute
    $content = preg_replace('/<img(.*?)class="(.*?)attachment-large(.*?)"(.*?)>/i', '<img$1class="$2attachment-large$3"$4 fetchpriority="high">', $content);
    $content = preg_replace('/<img(.*?)class="(.*?)ct-media-container-static(.*?)"(.*?)>/i', '<img$1class="$2ct-media-container-static$3"$4 fetchpriority="high">', $content);
    $content = str_replace('loading="lazy"', '', $content);
    $content = str_replace('decoding="async"', '', $content);
    return $content;
}
add_filter('the_content', 'add_fetchpriority_to_images');
add_filter('post_thumbnail_html', 'add_fetchpriority_to_images');The code provided uses regular expressions to identify image tags in your content and adds the fetchpriority="high" attribute to them. Additionally, it removes the loading=lazy and decoding= async attributes. This might seem counterintuitive, as lazy loading and async decoding are commonly used to improve performance. However, there are specific reasons for removing these attributes when using fetchpriority. Which we’ll be talking about after finishing the steps. Moving forward,
- Save the
functions.phpfile: After adding the code, save the file. - Clear your website’s cache: If you’re using a caching plugin or service, make sure to clear the cache so that the changes take effect immediately.
By implementing this code in your functions.php file, you’re directly modifying the HTML output of your WordPress website to include the fetchpriority attribute on the relevant images. This approach ensures that the browser prioritizes the fetching of these critical images, leading to an improved LCP and overall website performance. Remember, the code provided targets specific image classes (attachment-large and ct-media-container-static). If your website uses different image classes, you may need to adjust the regular expressions accordingly to ensure the fetch priority attribute is applied to the correct images.
Now, let’s discuss,
Why did we remove Decoding Async along with Lazy Loading?
The removal of decoding=async along with loading =lazy is necessary for several reasons:
- Performance: When using
fetchpriority="high", the browser will prioritize the loading of images. Addingdecoding=asyncwould allow the browser to decode the images asynchronously, which could potentially slow down the loading process. By removingdecoding=async, the browser will decode the images synchronously, ensuring that they are loaded and displayed promptly. - Consistency: Using
fetchpriority="high"implies that the images are critical to the page’s content and should be loaded quickly. Addingdecoding=asyncwould introduce an asynchronous decoding process, which could lead to inconsistent behaviour. By removingdecoding=async, the browser will follow a consistent loading and decoding process for all images. - Browser Support: Some older browsers may not support
decoding=asyncor may not handle it correctly. By removing this attribute, the code ensures that the images will be displayed correctly across different browsers. - Code Simplification: Removing
decoding=asyncsimplifies the code and reduces the complexity of the image-loading process. This makes the code more maintainable and easier to understand.
In summary, removing decoding = async along with loading = lazy ensures that the images are loaded and displayed consistently, efficiently, and correctly across different browsers, making the code more robust and maintainable.
Additional Tips for a Smoother Implementation
Okay, so now that we’ve implemented fetchpriority in our above-the-fold images, let’s go through some troubleshooting points that you can follow through, in case you face anything wrong while implementing the code.
Troubleshooting Guide
To ensure a smooth implementation of the fetch priority attribute, it’s essential to troubleshoot any potential issues that may arise. Here are some common pitfalls to watch out for:
- Verify the Code: Double-check that the code is correctly added to your
functions.phpfile and that there are no syntax errors. - Clear Cache: Clear your website’s cache to ensure that the changes take effect immediately.
- Check Image Classes: Verify that the image classes targeted by the code match the classes used in your website’s HTML.
- Test in Different Browsers: Test the implementation in different browsers to ensure compatibility.
- Monitor Performance Metrics: Keep an eye on your website’s performance metrics, such as LCP, to ensure the implementation is having the desired effect.
Additional Tips for Optimization
To further optimize the implementation and ensure maximum performance, consider the following additional tips:
- Use a Child Theme: Using a child theme allows for more customization and flexibility when modifying your WordPress theme’s code.
- Use More Robust Code: Consider using more robust code that handles edge cases and potential errors, ensuring a more reliable implementation.
- Optimize Image Sizes: Optimize your image sizes to reduce the overall file size and improve page load times.
- Use a Content Delivery Network (CDN): Utilize a CDN to distribute your website’s content across different geographic locations, reducing latency and improving performance.
- Monitor and Analyze Performance: Continuously monitor and analyze your website’s performance using tools like Google PageSpeed Insights or WebPageTest to identify areas for improvement and optimize accordingly.
By following these additional tips and troubleshooting guides, you can ensure a smoother implementation of the fetch priority attribute and maximize its performance benefits for your WordPress website.
Conclusion
Optimizing the Largest Contentful Paint (LCP) is critical for delivering a fast and user-friendly website experience. By understanding the measurement process and challenges associated with LCP, you can take targeted actions to improve this vital performance metric.
In this guide, we’ve explored a practical solution to address the Largest Contentful Paint (LCP) issue in WordPress without relying on a plugin. By directly modifying your theme’s functions.php file, you can add the fetchpriority attribute to your critical images, ensuring that the browser prioritizes their fetching and improves your website’s overall performance.
Avoiding plugins for this task reduces complexity and overhead, giving you more control over your website’s performance. By integrating these code modifications into your theme’s functions.php file, you enhance your site’s efficiency, boost SEO rankings, and deliver a better user experience. Regularly testing and verifying these changes ensures that your optimizations are effective and sustained.
Using direct code solutions over plugins not only optimizes LCP but also aligns with best practices for maintaining a clean, efficient, and fast-loading website. Prioritizing critical resources and minimizing unnecessary dependencies are key strategies for achieving superior web performance.
Take control of your website’s performance today by implementing these code-based optimizations. Your users and search engines will thank you.