
Firebase Authentication is a powerful tool that allows developers to add user authentication to their applications with ease. It offers a secure and reliable way to handle user authentication, without the need for server-side code. If you’re building a React application, integrating Firebase Authentication can be a great way to quickly add user authentication functionality to your app.
In this how-to guide, we will walk you through the steps needed to integrate Firebase Authentication with your React app. We’ll cover everything from setting up a Firebase project to implementing sign-in and sign-out functionality, as well as additional features like password reset and email verification. By the end of this guide, you’ll have a solid understanding of how to use Firebase Authentication with React and be able to implement it in your own projects. So, let’s get started!
Before jumping to the main topic, just a quick overview about Firestore.
Firestore is a NoSQL document-oriented database offered by Google Cloud Platform. It is designed to store and sync data for web, mobile, and IoT applications at a global scale, with real-time updates and offline support. Firestore is fully-managed and serverless, which means that developers do not need to worry about infrastructure or maintenance. It supports flexible data modeling, hierarchical data structures, and complex querying. It is a popular choice among developers because it provides real-time data synchronization, offline data persistence, and easy scalability. It is a powerful and flexible database solution that can help developers build scalable and reliable applications.
Prerequisites
Before you can integrate Firebase Authentication with your React application, there are a few prerequisites you need to have in place. Here’s what you’ll need:
- A Firebase project with Authentication enabled
- If you don’t have a Firebase project yet, you can create one by following these steps:
- Go to the Firebase console (https://console.firebase.google.com/)
- Click “Add project” or select an existing project if you already have one
- Follow the prompts to create your project
- Once your project is created, make sure to enable Firebase Authentication. You can do this by navigating to the “Authentication” section of the Firebase console and following the setup instructions.
- If you don’t have a Firebase project yet, you can create one by following these steps:
- A React application
- If you don’t have a React application yet, you can create one using the create-react-app command-line tool:
npx create-react-app my-app
cd my-app
npm start
- If you don’t have a React application yet, you can create one using the create-react-app command-line tool:
- The npm package manager
- npm comes bundled with Node.js, so make sure you have Node.js installed on your system. You can download Node.js from the official website: https://nodejs.org/
- Basic knowledge of JavaScript, React, and Firebase
- While we’ll cover everything you need to know to integrate Firebase Authentication with your React app, it’s helpful to have a basic understanding of these technologies before you get started.
With these prerequisites in place, you’re ready to start integrating Firebase Authentication with your React application. The next step is to set up your Firebase project.
Setting up a Firebase Project
To integrate Firebase Authentication with your React application, you need to set up a Firebase project and enable Authentication. Here’s how:
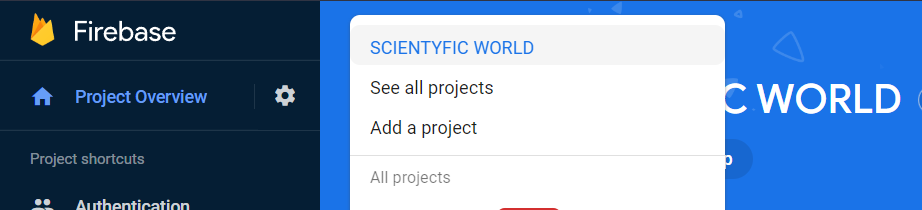
- Go to the Firebase console (https://console.firebase.google.com/)
- Click “Add project” or select an existing project if you already have one
- Follow the prompts to create your project. Make sure to choose a name for your project and select your preferred country/region for data storage.
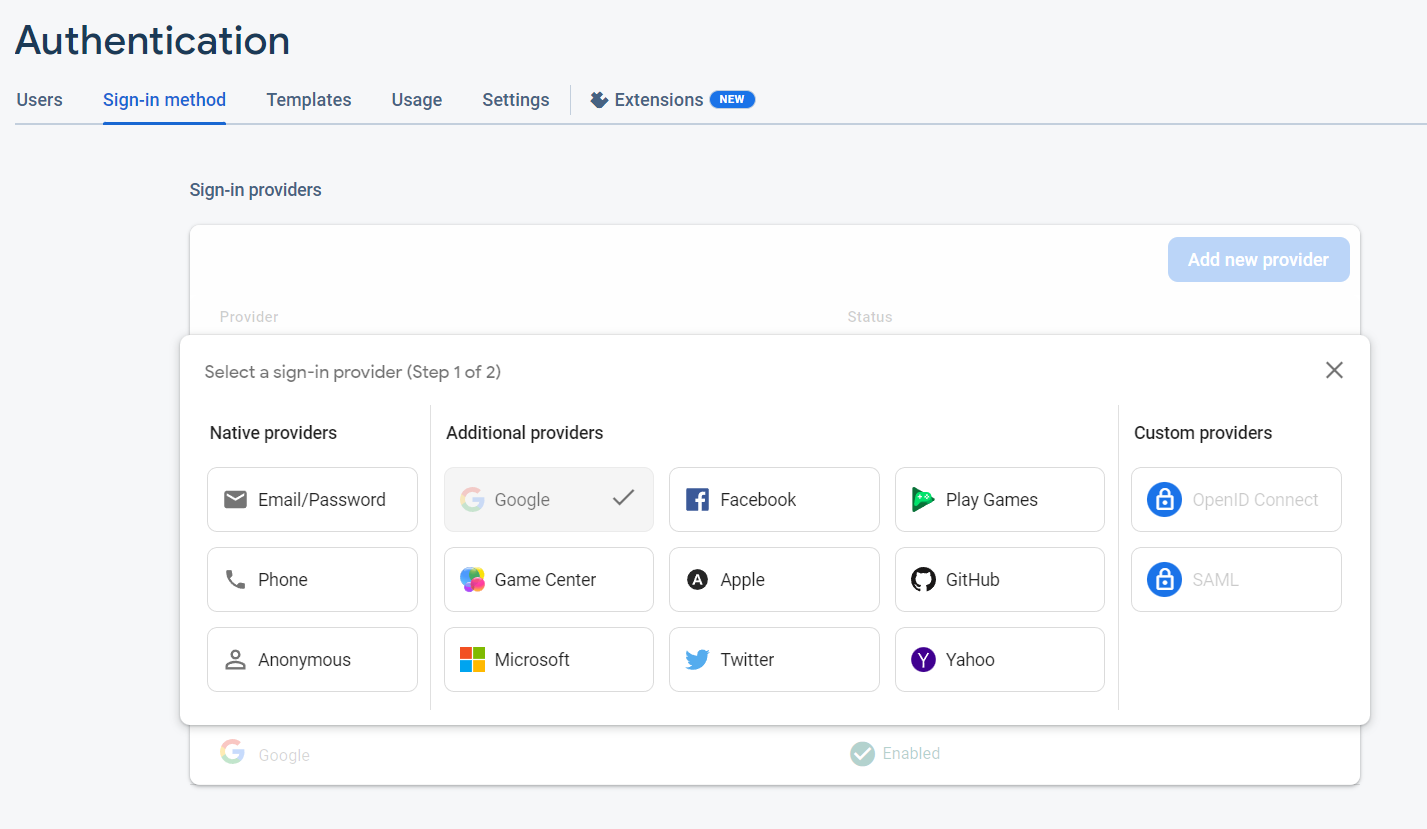
- Once your project is created, click on the “Authentication” tab in the left-hand menu.
- From here, you can enable the sign-in methods you want to support in your application. At a minimum, we recommend enabling “Email/Password” sign-in.
- Once you’ve enabled the sign-in methods you want to use, you’re ready to start integrating Firebase Authentication with your React application.
With your Firebase project set up and Authentication enabled, we’re now ready to move on to the next step: installing the Firebase and firebase packages using npm.
But before that, just a quick view of our react project, at what level this project is being working or at what level we’re building it.
Project settings:
So the project is very basic, and is designed such as we’ll implement further Firebase methods in this same project. For now as we’re just implementing the firebase login authentication functionality, so our project will contain three main pages.
- Landing page [ It will be our profile page too where the logged-in user can see their profile data]
- Login Page
- Signup Page
We’ll be using two authentication methods.
- By Email and Password
- By Google Login
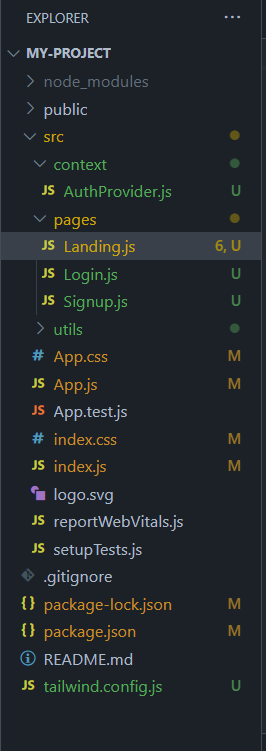
Now here is the file structure of our project:
Let me explain a bit how this going to be work.
- Landing Page: It is our home and main page of this project. All the changes will be shown in this page.
- Login Page: Login page is for simply login our signed up user.
- Signup Page: It is simply the signup page.
From this you can understand that we’re using multiple pages, so to make these pages work together, we’ll be using react router.
To install react router, we need to install react-router-dom using npm like this:
npm i react-router-domAfter this we can simply write this in the App.js:
import { BrowserRouter as Router, Routes, Route } from "react-router-dom";
//Importing the BrowserRouter, Routes and Route components
//history is a function called createBrowserHistory that stores the location in regular URLs.
<Router history={history}>
        <Routes>
          <Route path="/" element={<Landing />} />
          <Route path="/login" element={<Login />} />
          <Route path="/signup" element={<SignUp />} />
        </Routes>
</Router>
Also we’re using tailwind css to design this simple react project. To install tailwind, you can follow these steps:
npm install -D tailwindcss
npx tailwindcss init
Okay, now we’re completely good to go with the installation of Firebase to our project.
Installing Firebase into our React Project
To use Firebase Authentication in our React application, we need to install the Firebase packages. Here’s how:
- Open a terminal window in the root directory of your React application.
- Run the following command to install the Firebase package:
npm install firebase - Once the packages are installed, we can now import Firebase into our React components as needed.
Implementing Firebase Authentication in the App
Now that we’ve set up our Firebase project and installed the necessary packages, let’s move on to implementing Firebase Authentication in our React application.
- First, we’ll create a new file called
AuthProvider.jsin oursrc/contextdirectory. This file will contain the logic for handling user authentication using Firebase. We’ll start by importing the necessary Firebase modules:
import { initializeApp } from "firebase/app";
import { getAuth, createUserWithEmailAndPassword, signInWithEmailAndPassword, signOut } from "firebase/auth";- Next, we’ll initialize our Firebase app by creating a new Firebase configuration object and passing it to the
initializeApp()function:
const firebaseConfig = {
  apiKey: "YOUR_FIREBASE_API_KEY",
  authDomain: "YOUR_AUTH_DOMAIN",
  projectId: "YOUR_PROJECT_ID",
  storageBucket: "YOUR_STORAGE_BUCKET",
  messagingSenderId: "YOUR_MESSAGINGSENDER_ID",
  appId: "YOUR_APP_ID",
  measurementId: "YOUR_MEASUREMENT_ID"
};
const app = initializeApp(firebaseConfig);
const auth = getAuth(app);
Make sure to replace the placeholders in the configuration object with your own Firebase project information.
- Now that we have initialized Firebase and set up authentication, we can create functions to handle login and signup. In the
AuthProvider.jsfile, add the following code:
import { useState, useEffect } from 'react';
import { getAuth, createUserWithEmailAndPassword, signInWithEmailAndPassword, signOut } from "firebase/auth";

const firebaseConfig = {
  apiKey: "YOUR_FIREBASE_API_KEY",
  authDomain: "YOUR_AUTH_DOMAIN",
  projectId: "YOUR_PROJECT_ID",
  storageBucket: "YOUR_STORAGE_BUCKET",
  messagingSenderId: "YOUR_MESSAGINGSENDER_ID",
  appId: "YOUR_APP_ID",
  measurementId: "YOUR_MEASUREMENT_ID"
};

// Initialize Firebase
const app = initializeApp(firebaseConfig);
const auth = getAuth(app);

import { getAuth, createUserWithEmailAndPassword, signInWithEmailAndPassword, signOut } from "firebase/auth";

export const auth = getAuth();

export const signup = async (email, password) => {
  try {
    const userCredential = await createUserWithEmailAndPassword(auth, email, password);
    const user = userCredential.user;
    console.log(user);
  } catch (error) {
    console.log(error);
  }
};

export const login = async (email, password) => {
  try {
    const userCredential = await signInWithEmailAndPassword(auth, email, password);
    const user = userCredential.user;
    console.log(user);
  } catch (error) {
    console.log(error);
  }
};

export const logout = async () => {
  try {
    await signOut(auth);
  } catch (error) {
    console.log(error);
  }
};

const AuthProvider = ({ children }) => {
  const auth = useAuth();

  return (
    <FirebaseAuthProvider firebase={firebase} {...auth}>
      {children}
    </FirebaseAuthProvider>
  );
};

export default AuthProvider;
Here, we are importing the getAuth() function from the Firebase authentication library to initialize the auth variable. We are then defining three functions: signup(), login(), and logout().
The signup() function takes an email and password as arguments and uses the createUserWithEmailAndPassword() function to create a new user in Firebase Authentication. The function then logs the user object to the console.
The login() function takes an email and password as arguments and uses the signInWithEmailAndPassword() function to authenticate the user with Firebase. The function then logs the user object to the console.
The logout() function uses the signOut() function to log the user out of Firebase.
- Using the AuthProvider in our React app
Now that we have set up Firebase and implemented the authentication methods, we can use the AuthProvider component to provide the authentication context to our app.
In the App.js file, import the AuthProvider component and wrap it around the Router component:
import AuthProvider from "./context/AuthProvider";
import { BrowserRouter as Router, Routes, Route } from "react-router-dom";
import Landing from "./pages/Landing";
import Login from "./pages/Login";
import SignUp from "./pages/Signup";
function App() {
  return (
    <Router>
      <Routes>
        <AuthProvider>
          <Route path="/" element={<Landing />} />
          <Route path="/login" element={<Login />} />
          <Route path="/signup" element={<SignUp />} />
        </AuthProvider>
      </Routes>
    </Router>
  );
}

export default App;
Now, any component within the Router will have access to the authentication context.
To use the authentication methods, we can import the useContext hook from the AuthProvider file and call the signup(), login(), and logout() functions:
import { useContext } from "react";
import { Navigate } from "react-router-dom";
import { AuthContext } from '../context/AuthProvider';

export default function SignUp() {
const { signUp, loggedIn } = useContext(AuthContext);
  const handleSubmit = (e) => {
    e.preventDefault();
    const data = {
      email: e.target[0].value,
      password: e.target[1].value,
    };
    signUp(data);
  };
  if (loggedIn) {
    return <Navigate to="/" replace={true} />;
  }
  return(
  //Rest of the code
  );
  }
This is a sample Signup.js file. This way we’ve to write all the Authenticating page like Login.js and Signup.js.
Now, let’s see some additional features that you can add to your project.
Additional Feature:
Once you’ve implemented Firebase Authentication in your React app, you can also take advantage of additional authentication features that Firebase provides.
Password Reset
One useful feature is the ability for users to reset their password if they’ve forgotten it. Firebase provides an easy way to implement this functionality with the sendPasswordResetEmail function. Here’s an example of how you can add a “forgot password” functionality to your app:
- Create a new component called
ForgotPassword.jsx. - In this component, add a form that asks the user to enter their email address.
- When the user submits the form, call the
sendPasswordResetEmailfunction with the entered email address:
import { useState } from "react";
import { auth } from "./AuthProvider";

const ForgotPassword = () => {
  const [email, setEmail] = useState("");
  const [message, setMessage] = useState("");

  const handleForgotPassword = (e) => {
    e.preventDefault();

    auth.sendPasswordResetEmail(email)
      .then(() => setMessage("Password reset email sent."))
      .catch((error) => setMessage(error.message));
  };

  return (
    <div>
      <h2>Forgot Password</h2>
      <form onSubmit={handleForgotPassword}>
        <label>Email:</label>
        <input type="email" value={email} onChange={(e) => setEmail(e.target.value)} required />
        <button type="submit">Reset Password</button>
      </form>
      {message && <p>{message}</p>}
    </div>
  );
};

export default ForgotPassword;
Email Verification
Firebase also provides the ability to verify a user’s email address. When a user signs up, Firebase sends a verification email to the provided email address. The user can then click on the link in the email to verify their email address.
You can check if a user’s email address has been verified by accessing the emailVerified property on the user object. Here’s an example of how you can display a message to the user if their email address hasn’t been verified:
import { useEffect, useState } from "react";
import { auth } from "./AuthProvider";

const Profile = () => {
  const [user, setUser] = useState(null);
  const [isEmailVerified, setIsEmailVerified] = useState(false);

  useEffect(() => {
    const unsubscribe = auth.onAuthStateChanged((authUser) => {
      setUser(authUser);

      if (authUser) {
        setIsEmailVerified(authUser.emailVerified);
      }
    });

    return unsubscribe;
  }, []);

  return (
    <div>
      <h2>Profile</h2>
      {user && (
        <>
          <p>Email: {user.email}</p>
          {isEmailVerified ? (
            <p>Email verified</p>
          ) : (
            <p>Email not verified. Check your email for a verification link.</p>
          )}
        </>
      )}
    </div>
  );
};

export default Profile;
In the above code, we’re using the onAuthStateChanged listener to check if the user’s authentication status changes. If the user is authenticated, we’re checking if their email address has been verified and displaying a message accordingly.
Conclusion
In this tutorial, we learned how to integrate Firebase Authentication with a React application. We went through the prerequisites and the steps involved in setting up a Firebase project and installing Firebase into our React project. We also learned how to implement Firebase Authentication in a React app and add additional authentication features like social media login, email verification, password reset, and sign out.
Firebase Authentication is a powerful tool that makes it easy to add user authentication to your application. With Firebase Authentication, you don’t have to worry about the backend infrastructure for user authentication and can focus on building your frontend.
If you want to apply login authentication without using backend, then follow our blog on “How to Implement Login Authentication without a backend?“.


