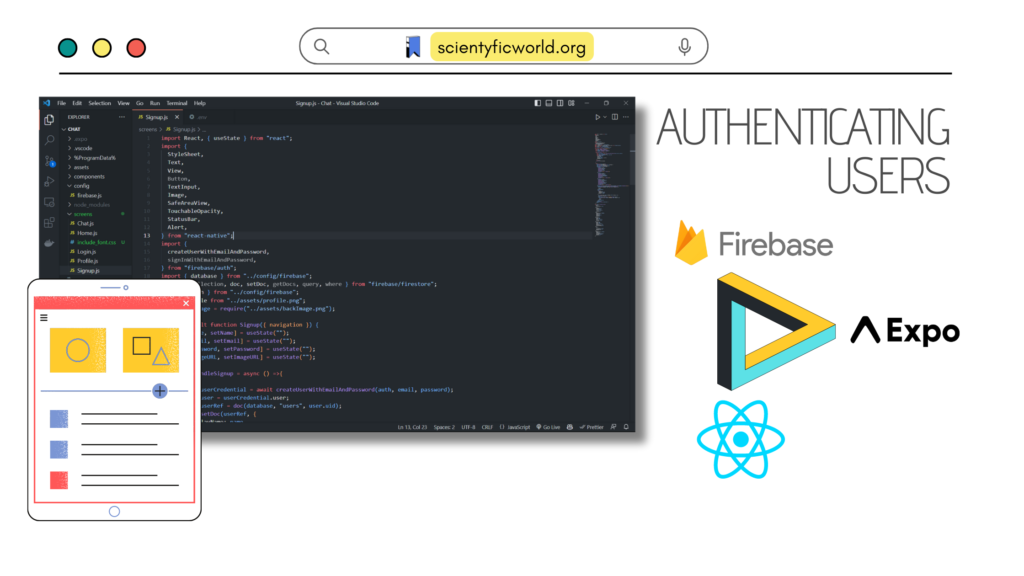
Firebase Authentication is a fundamental aspect of modern mobile app development, enabling developers to implement secure user authentication and authorization processes with ease. In this comprehensive guide, we will walk you through the process of integrating Firebase Authentication with an Expo (React Native) app. Whether you are a seasoned developer or an aspiring one, this tutorial will equip you with the knowledge and steps to seamlessly implement user authentication in your Expo app using Firebase.
Firebase, developed by Google, is a powerful and flexible backend-as-a-service (BaaS) platform that offers various cloud-based services to support app development. Firebase Authentication is one such service that provides a secure and reliable way to manage user identities in your app. It allows users to sign up and log in using various methods like email and password, Google, Facebook, etc., while handling all the authentication complexities behind the scenes.
In this guide, we will start by setting up a Firebase project and an Expo app, and then proceed to configure Firebase in the Expo app using the Firebase SDKs. We will demonstrate how to build both the “Signup” and “Login” screens, implementing Firebase Authentication for each. Additionally, we’ll cover essential topics like error handling, user validation, and navigating between screens.
Let’s get started!
Setting Up Firebase Project and Expo App:
Before integrating Firebase Authentication into your Expo app, you need to set up a Firebase project and create an Expo app or use an existing one. Here’s a step-by-step guide to help you with the setup process:
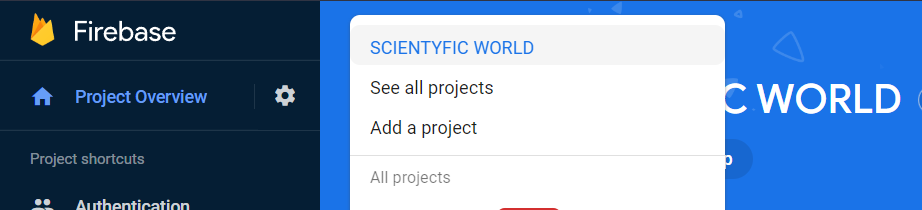
1. Create a Firebase Project:
- Go to the Firebase Console (https://console.firebase.google.com/) and sign in with your Google account.
- Click on “Add project” to create a new project.
- Enter a project name and choose your preferred region.
- Click “Create Project” to initialize your Firebase project.
2. Enable Firebase Authentication:
- Inside your Firebase project dashboard, navigate to “Authentication” from the left-hand menu.
- Click on the “Get Started” button to set up Firebase Authentication.
- In the “Sign-in method” tab, enable the sign-in providers you want to support (e.g., Email/Password, Google, Facebook).
- For Email/Password authentication, make sure to enable it and click “Save.”
3. Set Up Expo App:
- Install the Expo CLI globally on your machine by running the following command in your terminal:
npm install -g expo-cli - Create a new Expo project by running:
expo init YourProjectName - Choose a project template (e.g., “blank” or “tabs”) and wait for the project to be created.
- Navigate to your project directory:
cd YourProjectName
4. Install Firebase Dependencies:
- To interact with Firebase services in your Expo app, you need to install the necessary Firebase packages. Run the following commands in your project directory:
expo install firebase @react-native-firebase/app @react-native-firebase/auth @react-native-firebase/firestore
5. Obtain Firebase Configuration:
- Inside your Firebase project dashboard, click on the gear icon and select “Project settings.”
- Scroll down to the “Your apps” section and click on the “Web” icon ().
- Register your app by providing an app nickname (e.g., “ExpoApp”) and click “Register app.”
- Firebase will generate a configuration object (apiKey, authDomain, projectId, etc.). Copy this configuration.
6. Configure Firebase in Expo App:
To integrate Firebase into your Expo app and maintain a secure and organized structure, follow these steps:
a. Create a Firebase Configuration File:
- In your project’s root directory, create a new folder named “config.”
- Inside the “config” folder, create a file named “firebase.js.”
b. Define API Keys in .env File:
- In the project’s root directory, create a file named “.env” (if it doesn’t exist already).
- In the “.env” file, define your Firebase API keys in the following format:
API_KEY=your_api_key
AUTH_DOMAIN=your_auth_domain
PROJECT_ID=your_project_id
STORAGE_BUCKET=your_storage_bucket
MESSAGING_SENDER_ID=your_messaging_sender_id
APP_ID=your_app_id
c. Use API Keys in app.config.js:
- Open the “app.config.js” file in the root directory of your Expo app.
- Import ‘dotenv/config’ at the top of the file to read the environment variables from the “.env” file.
- Modify the “expo” object to use the API keys defined in the “.env” file. Your “app.config.js” should look like this:
import 'dotenv/config';

export default {
  "expo": {
    extra: {
      apiKey: process.env.API_KEY,
      authDomain: process.env.AUTH_DOMAIN,
      projectId: process.env.PROJECT_ID,
      storageBucket: process.env.STORAGE_BUCKET,
      messagingSenderId: process.env.MESSAGING_SENDER_ID,
      appId: process.env.APP_ID,
    }
  }
}
d. Use API Keys in firebase.js:
- Now, update the “firebase.js” file (located in “config” folder) to access the API keys from the Expo configuration.
- Instead of directly using
Constants.manifest.extra, you’ll useprocess.envto fetch the API keys from the environment variables:
// Import the functions you need from the SDKs you need
import { initializeApp } from "firebase/app";
import { getAuth } from "firebase/auth";
import { getFirestore } from "firebase/firestore";
import Constants from "expo-constants";
import 'dotenv/config';

const firebaseConfig = {
  apiKey: process.env.API_KEY,
  authDomain: process.env.AUTH_DOMAIN,
  projectId: process.env.PROJECT_ID,
  storageBucket: process.env.STORAGE_BUCKET,
  messagingSenderId: process.env.MESSAGING_SENDER_ID,
  appId: process.env.APP_ID,
};

initializeApp(firebaseConfig);
export const auth = getAuth();
export const database = getFirestore();
7. Test Your Setup:
- Start your Expo app using the following command:
expo start - Open your app on an Android or iOS simulator or a physical device using the Expo Go app.
- Verify that your app runs without errors and that Firebase is correctly configured.
Congratulations! You have now set up your Firebase project and Expo app, and Firebase Authentication is ready to be integrated into your Expo app. Proceed to the next sections to implement the “Signup” and “Login” screens with Firebase Authentication functionalities.
Building the Signup Screen:
The “Signup” screen in our Expo app allows users to create new accounts using Firebase Authentication. Let’s break down the code and understand the key components and functionalities:
1. Import Necessary Components and Functions:
import React, { useState } from "react";
import { StyleSheet, Text, View, TextInput, TouchableOpacity, Alert } from "react-native";
import { createUserWithEmailAndPassword } from "firebase/auth";
import { auth, database } from "../config/firebase";
import profile from "../assets/profile.png";
2. Create the Functional Component:
export default function Signup({ navigation }) {
  const [name, setName] = useState("");
  const [email, setEmail] = useState("");
  const [password, setPassword] = useState("");
  const [imageURL, setImageURL] = useState("");
3. Handle Signup Function:
const onHandleSignup = async () => {
  try {
    const userCredential = await createUserWithEmailAndPassword(auth, email, password);
    const user = userCredential.user;
    const userRef = doc(database, "users", user.uid);
    await setDoc(userRef, {
      displayName: name,
      email: email,
      uid: user.uid,
      photoURL: imageURL || profile,
      phoneNumber: "",
    });
  } catch (error) {
    Alert.alert(error.message);
  }
};
4. Define the UI and Input Fields:
return (
  <View style={styles.container}>
    {/* Background Image */}
    <Image source={backImage} style={styles.backImage} />

    {/* White Overlay */}
    <View style={styles.whiteSheet} />

    {/* Title */}
    <Text style={styles.title}>Sign Up</Text>

    <SafeAreaView style={styles.form}>
      {/* Input Fields */}
      <TextInput
        style={styles.input}
        placeholder="Enter name"
        autoCapitalize="none"
        autoCorrect={false}
        textContentType="name"
        value={name}
        onChangeText={(text) => setName(text)}
      />
      <TextInput
        style={styles.input}
        placeholder="Enter email"
        autoCapitalize="none"
        keyboardType="email-address"
        textContentType="emailAddress"
        autoFocus={true}
        value={email}
        onChangeText={(text) => setEmail(text)}
      />
      <TextInput
        style={styles.input}
        placeholder="Enter password"
        autoCapitalize="none"
        autoCorrect={false}
        showSoftInputOnFocus={false}
        secureTextEntry={true}
        textContentType="password"
        value={password}
        onChangeText={(text) => setPassword(text)}
      />
      <TextInput
        style={styles.input}
        placeholder="Enter image URL"
        value={imageURL}
        onChangeText={(text) => setImageURL(text)}
      />

      {/* Signup Button */}
      <TouchableOpacity style={styles.button} onPress={onHandleSignup}>
        <Text style={{ fontWeight: "bold", color: "#fff", fontSize: 18 }}>Sign Up</Text>
      </TouchableOpacity>

      {/* Navigation to Login Screen */}
      <View
        style={{
          marginTop: 20,
          flexDirection: "row",
          alignItems: "center",
          alignSelf: "center",
        }}
      >
        <Text style={{ color: "gray", fontWeight: "600", fontSize: 14 }}>
          Don't have an account?{" "}
        </Text>
        <TouchableOpacity onPress={() => navigation.navigate("Login")}>
          <Text style={{ color: "#f57c00", fontWeight: "600", fontSize: 14 }}>Log In</Text>
        </TouchableOpacity>
      </View>
    </SafeAreaView>
    {/* StatusBar */}
    <StatusBar barStyle="light-content" />
  </View>
);
In the “Signup” screen, users can input their name, email, password, and an optional profile picture URL. When the “Sign Up” button is pressed, the onHandleSignup function is triggered. This function uses Firebase Authentication’s createUserWithEmailAndPassword method to create a new user account using the provided email and password. Upon successful signup, the user’s information, including their name, email, and profile picture URL (or a default profile image if not provided), is stored in the Firestore database under a “users” collection. Any errors during the signup process will be displayed as an alert.
Users can navigate to the “Login” screen by clicking the “Log In” link, allowing them to log in with their new credentials after signup.
By following this simple yet robust implementation, your Expo app will have a fully functional “Signup” screen, enabling users to create accounts with Firebase Authentication seamlessly.
Next, we will proceed with building the “Login” screen, where users can log in using their credentials.
Building the Login Screen:
The “Login” screen is an essential component of your Expo app, enabling users to log in with their existing credentials. Let’s dive into the code and explore the functionalities:
1. Import Necessary Components and Functions:
import React, { useState } from "react";
import { StyleSheet, Text, View, TextInput, TouchableOpacity, Alert, Image } from "react-native";
import { signInWithEmailAndPassword } from "firebase/auth";
import { auth } from "../config/firebase";
const backImage = require("../assets/backImage.png");
2. Create the Functional Component:
export default function Login({ navigation }) {
  const [email, setEmail] = useState("");
  const [password, setPassword] = useState("");
3. Handle Login Function:
const onHandleLogin = () => {
  if (email !== "" && password !== "") {
    signInWithEmailAndPassword(auth, email, password)
      .then(() => console.log("Login success"))
      .catch((err) => Alert.alert("Login error", err.message));
  }
};
4. Define the UI and Input Fields:
return (
  <View style={styles.container}>
    {/* Background Image */}
    <Image source={backImage} style={styles.backImage} />

    {/* White Overlay */}
    <View style={styles.whiteSheet} />

    {/* Title */}
    <Text style={styles.title}>Log In</Text>

    <SafeAreaView style={styles.form}>
      {/* Input Fields */}
      <TextInput
        style={styles.input}
        placeholder="Enter email"
        autoCapitalize="none"
        keyboardType="email-address"
        textContentType="emailAddress"
        autoFocus={true}
        value={email}
        onChangeText={(text) => setEmail(text)}
      />
      <TextInput
        style={styles.input}
        placeholder="Enter password"
        autoCapitalize="none"
        autoCorrect={false}
        secureTextEntry={true}
        textContentType="password"
        value={password}
        onChangeText={(text) => setPassword(text)}
      />

      {/* Login Button */}
      <TouchableOpacity style={styles.button} onPress={onHandleLogin}>
        <Text style={{ fontWeight: "bold", color: "#fff", fontSize: 18 }}>Log In</Text>
      </TouchableOpacity>

      {/* Navigation to Signup Screen */}
      <View
        style={{
          marginTop: 20,
          flexDirection: "row",
          alignItems: "center",
          alignSelf: "center",
        }}
      >
        <Text style={{ color: "gray", fontWeight: "600", fontSize: 14 }}>
          Don't have an account?{" "}
        </Text>
        <TouchableOpacity onPress={() => navigation.navigate("Signup")}>
          <Text style={{ color: "#f57c00", fontWeight: "600", fontSize: 14 }}>Sign Up</Text>
        </TouchableOpacity>
      </View>
    </SafeAreaView>
    {/* StatusBar */}
    <StatusBar barStyle="light-content" />
  </View>
);
In the “Login” screen, users can input their email and password to log in to your app. When the “Log In” button is pressed, the onHandleLogin function is triggered. This function uses Firebase Authentication’s signInWithEmailAndPassword method to verify the provided email and password and grant access to the user if the credentials match an existing account. Upon successful login, the “Login success” message will be logged to the console. Any login errors, such as incorrect credentials or authentication issues, will be displayed as an alert to the user.
By following this straightforward yet powerful implementation, your Expo app now includes a fully functional “Login” screen, enabling users to securely access their accounts using Firebase Authentication.
State Management:
In this section, we’ll explore how state management is achieved in an Expo app using Firebase Authentication. In the previous sections, we built the signup and login screens, but now it’s time to integrate them and manage the user’s authentication state across the entire app. For this purpose, we will create and utilize the App.js file.
To implement state management in an Expo app with Firebase Authentication, follow these steps:
- Create the AuthenticatedUserContext: Define the
AuthenticatedUserContextusingcreateContextand provide an initial value for the user state (e.g.,nullfor no user). - Wrap the App with AuthenticatedUserProvider: Surround the
RootNavigatorwith theAuthenticatedUserProvidercomponent. This will enable components inside theAuthenticatedUserProviderto access the authentication state.
// App.js

import React, { useState, createContext, useContext, useEffect } from "react";
import { NavigationContainer } from "@react-navigation/native";
// ... Other imports ...

// Create the AuthenticatedUserContext
const AuthenticatedUserContext = createContext({});

const AuthenticatedUserProvider = ({ children }) => {
  const [user, setUser] = useState(null);
  return (
    <AuthenticatedUserContext.Provider value={{ user, setUser }}>
      {children}
    </AuthenticatedUserContext.Provider>
  );
};

export default function App() {
  return (
    // Wrap the App with AuthenticatedUserProvider
    <AuthenticatedUserProvider>
      <RootNavigator />
    </AuthenticatedUserProvider>
  );
}- Handle Authentication State Changes: In the
RootNavigatorcomponent, use theuseContexthook to access theAuthenticatedUserContext. Inside theuseEffecthook, set up the listener usingonAuthStateChangedto detect changes in the user’s login status. Update the user state accordingly.
// App.js

// ... Other imports ...

export default function App() {
  // Use the AuthenticatedUserContext
  const { user, setUser } = useContext(AuthenticatedUserContext);
  const [isLoading, setIsLoading] = useState(true);

  useEffect(() => {
    const unsubscribeAuth = onAuthStateChanged(
      auth,
      async (authenticatedUser) => {
        authenticatedUser ? setUser(authenticatedUser) : setUser(null);
        setIsLoading(false);
      }
    );
    return unsubscribeAuth; // Unsubscribe auth listener on unmount
  }, [user]);

  // Conditional rendering based on authentication state
  if (isLoading) {
    return (
      <SafeAreaView
        style={{ flex: 1, justifyContent: "center", alignItems: "center" }}
      >
        <ActivityIndicator size="large" />
      </SafeAreaView>
    );
  }

  return (
    <NavigationContainer>
      {user ? <AppStack /> : <AuthStack />}
    </NavigationContainer>
  );
}
With this implementation, the AuthenticatedUserContext will provide the authentication state to components within the AuthenticatedUserProvider, enabling you to efficiently manage the user’s login status throughout your Expo app with Firebase Authentication.
Error Handling and Validation:
Error handling and validation are critical aspects of any authentication system to ensure smooth user experiences and maintain security. Let’s explore how error handling and validation are implemented in the “Signup” and “Login” screens of your Expo app.
- Signup Screen Error Handling and Validation:
When a user attempts to sign up using the “Signup” screen, we need to ensure that all required fields are filled correctly and handle any potential errors that may arise during the signup process. Here’s how it’s done:- Empty Fields Validation:
- Before initiating the signup process, the “Signup” screen checks whether the “name,” “email,” and “password” fields are not empty.
- If any of these fields are left empty, an error message will be displayed, guiding the user to fill in all required information.
- Firebase Authentication Errors:
- When creating a new user account using
createUserWithEmailAndPassword, Firebase Authentication may encounter errors, such as invalid email formats, weak passwords, or email addresses already associated with existing accounts. - In such cases, the errors returned by Firebase will be caught and displayed as an alert, informing the user about the specific issue with their signup attempt.
- When creating a new user account using
- Empty Fields Validation:
- Login Screen Error Handling and Validation:
Similarly, when a user attempts to log in using the “Login” screen, we need to validate the input fields and handle potential errors during the login process. Here’s how it’s done:- Empty Fields Validation:
- Before initiating the login process, the “Login” screen checks whether both the “email” and “password” fields are not empty.
- If any of these fields are left empty, an error message will be displayed, prompting the user to provide both their email and password.
- Empty Fields Validation:
- Firebase Authentication Errors:
- During the login process, Firebase Authentication may encounter errors if the provided email and password do not match any existing user account or if there are other authentication-related issues.
- Any login errors returned by Firebase will be caught and displayed as an alert, informing the user about the specific issue with their login attempt.
- Overall User Experience:
Proper error handling and validation contribute to a positive user experience by guiding users through the signup and login processes and providing clear instructions in case of errors. By displaying relevant error messages, users can easily understand what went wrong and take appropriate actions to resolve the issues.
Additionally, implementing error handling also enhances the security of your app by preventing unauthorized access and discouraging malicious login attempts.
Best Practices for Error Handling and Validation in Firebase Authentication in Expo App
Firebase Authentication is a powerful tool for authenticating users in your Expo App. However, it is important to handle errors gracefully in order to provide a good user experience.
Here are some best practices for error handling and validation in Firebase Authentication in Expo App:
- Use the
FirebaseAuthExceptionclass to catch errors. This class exposes a number of properties that you can use to identify the error that occurred, such as the error code, message, and stack trace. - Log errors to the console. This will help you to track down the source of the error and troubleshoot it.
- Show a user-friendly error message to the user. This will help the user to understand why they were not able to authenticate successfully.
- Validate user input before submitting it to Firebase. This will help to prevent errors from occurring in the first place.
- Use a try/catch block to handle errors that occur during authentication. This will prevent your app from crashing if an error occurs.
Here is an example of how to handle errors in Firebase Authentication in Expo App:
import FirebaseAuth from "firebase/auth";

const handleAuthError = (error) => {
  // Check the error code to determine the type of error that occurred.
  const errorCode = error.code;

  // Show a user-friendly error message to the user.
  switch (errorCode) {
    case "auth/invalid-email":
      alert("The email address you entered is invalid.");
      break;
    case "auth/wrong-password":
      alert("The password you entered is incorrect.");
      break;
    default:
      alert("An unexpected error occurred.");
      break;
  }
};

// Sign in the user with their email address and password.
FirebaseAuth.signInWithEmailAndPassword("[email protected]", "password").catch(handleAuthError);
By following these best practices, you can ensure that your Expo App handles errors in Firebase Authentication gracefully and provides a good user experience.
Additional Considerations
In addition to the above, here are some other things to keep in mind when handling errors in Firebase Authentication:
- Use the
FirebaseAuth.currentUserproperty to check if the user is already authenticated. If the user is already authenticated, you can avoid making unnecessary calls to Firebase Authentication. - Use the
FirebaseAuth.onAuthStateChangedlistener to listen for changes in the user’s authentication state. This listener will be called when the user signs in, signs out, or their authentication state changes for any other reason. - Use the
FirebaseAuth.resetPasswordmethod to reset the user’s password. This method will send an email to the user with a link that they can use to reset their password.
By adhering to these best practices and effectively handling errors and validation, your Expo app will deliver a seamless and secure authentication experience for users, increasing trust and engagement with your application.
Sure, here is the section on testing the integration of Firebase Authentication in Expo App:
Testing the Integration:
Once you have integrated Firebase Authentication into your Expo App, you need to test the integration to make sure that it is working properly.
To test the integration, you can follow these steps:
- Run the Expo App on your device or in a simulator.
- Try to sign in to the app using your email address and password.
- If the integration is working properly, you should be able to sign in to the app successfully.
- Try to sign out of the app.
- If the integration is working properly, you should be able to sign out of the app successfully.
If you are unable to sign in or sign out of the app, then the integration is not working properly. You will need to troubleshoot the integration to fix the problem.
Here are some things to check if the integration is not working properly:
- Make sure that you have installed the Firebase SDK correctly.
- Make sure that you have configured the Firebase SDK correctly.
- Make sure that you have entered the correct email address and password.
- Make sure that the user is not already authenticated.
If you have checked all of these things and the integration is still not working properly, then you can contact Firebase support for help.
Conclusion:
Firebase Authentication is a powerful tool that can be used to authenticate users in your Expo App. It is easy to use, secure, and scalable. However, it is important to be aware of the limitations of the service.
If you are looking for a simple and secure way to authenticate users in your Expo App, then Firebase Authentication is a good option. However, if you need to use all of the features of Firebase Authentication or if you need to support all platforms, then you may need to look for a different solution.
FAQs:
What is the difference between Firebase Authentication and Expo Auth?
Firebase Authentication is a service that provides a variety of authentication methods, including email/password, Google, Facebook, Twitter, and many more. Expo Auth is a wrapper around Firebase Authentication that provides some additional features, such as the ability to sign in users with social media accounts that are not supported by Firebase Authentication.
What is the best way to handle errors in Firebase Authentication with Expo App?
The best way to handle errors in Firebase Authentication with Expo App is to use the FirebaseAuthException class. This class exposes a number of properties that you can use to identify the error that occurred, such as the error code, message, and stack trace. You can then use this information to troubleshoot the error and display a user-friendly error message to the user.
How can I test the integration of Firebase Authentication with Expo App?
Once you have integrated Firebase Authentication into your Expo App, you need to test the integration to make sure that it is working properly. You can do this by running the Expo App on your device or in a simulator and trying to sign in to the app using your email address and password. If the integration is working properly, you should be able to sign in to the app successfully.
Can I integrate Firebase Authentication with my own backend server for additional authentication checks?
Yes, Firebase Authentication supports custom authentication tokens, enabling you to integrate it with your own backend server for additional authentication checks or to access protected resources.
Is Firebase Authentication compliant with industry standards and regulations (e.g., GDPR, HIPAA)?
Firebase Authentication is designed to be secure and compliant with various industry standards and regulations. However, it’s essential to review Firebase’s terms and compliance documentation to ensure it aligns with your app’s specific regulatory requirements.
How can I implement social media login buttons (e.g., Google, Facebook) in my Expo app’s authentication flow?
Integrating social media login buttons is straightforward with Firebase Authentication. You can use FirebaseUI libraries to easily add buttons for Google, Facebook, Twitter, and other providers. Alternatively, Firebase provides documentation on customizing OAuth authentication flows.
I hope this article has been informative. If you have any questions, please feel free to leave a comment below.
Thank you for reading! (^///^)


